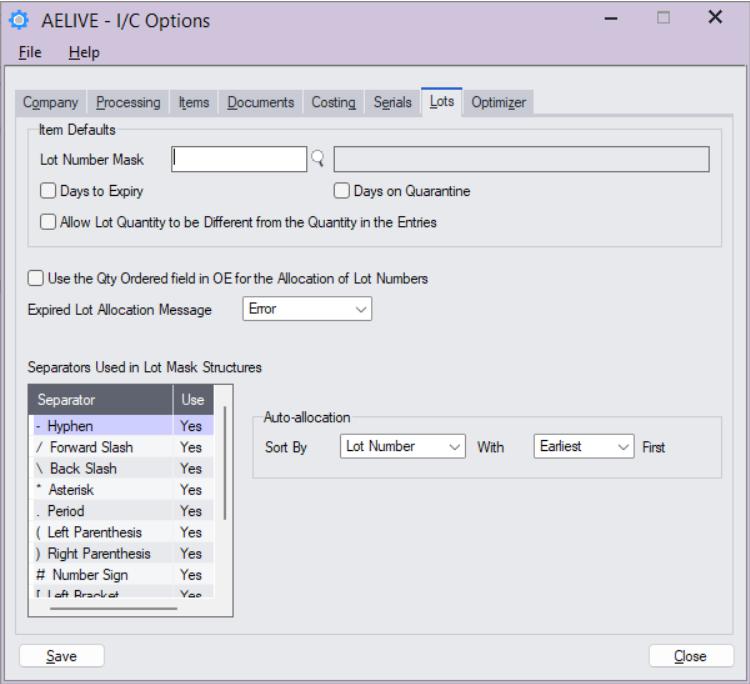
Sage 300 has provided a useful feature to control the Lot number allocation on the Order entry and Purchase order entry modules. You can locate the feature in the Inventory Control –> IC Option –> Lots tab.
Below is the image for your reference :
Now, we will create one purchase order and create a LOT numbers for the product.
First, we will go to the PO module-> PO Transaction -> Purchase order entry and will pass one Purchase order cycle transaction with a new LOT number.
Below is the image for your reference :
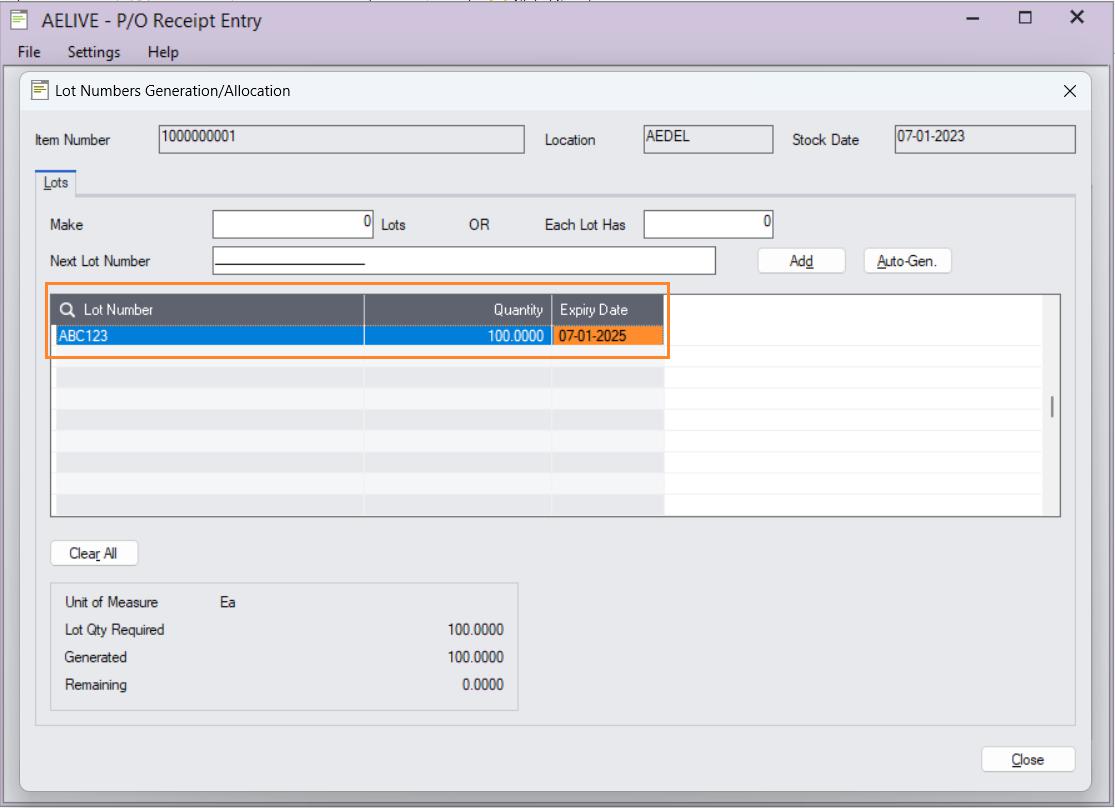
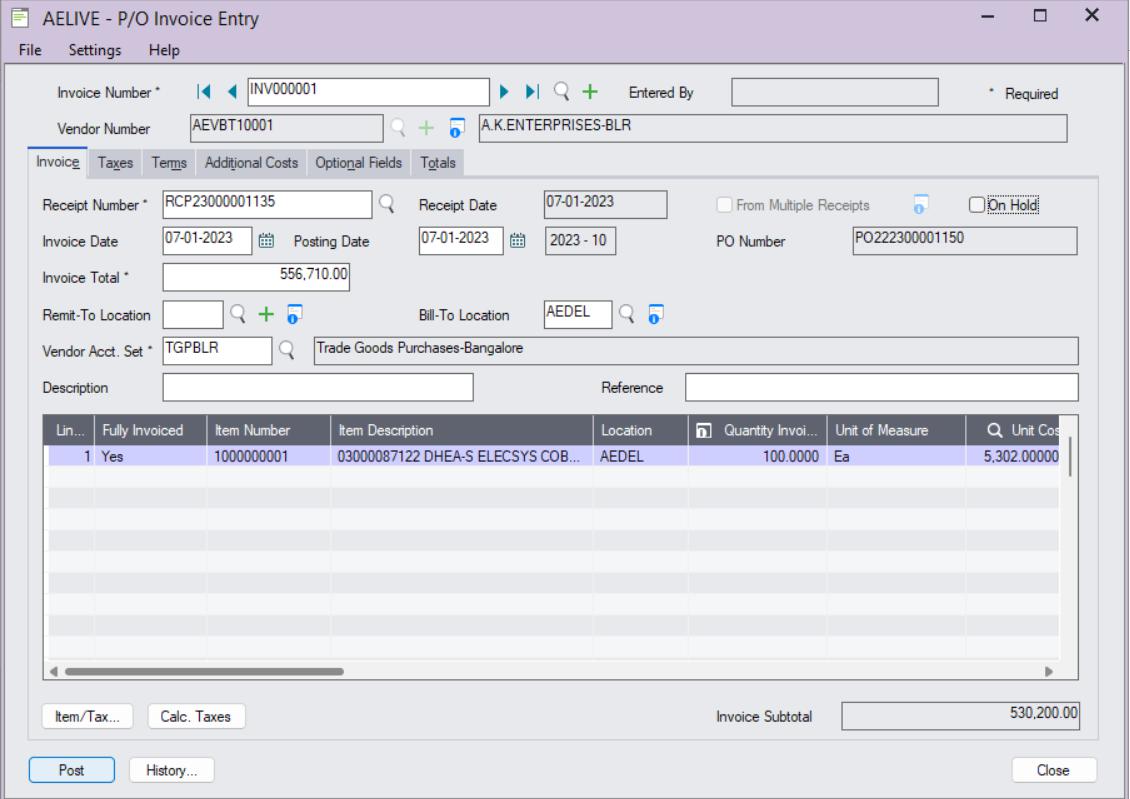
So, in the above image, we have given the new LOT number, Quantity, and Expiry Date to the item on Lot Numbers Generation/Allocation screen under the PO Receipt screen and posted the entry and will pass the PO invoice for the same.
Below is the image for your reference :
Once the Purchase Order entry cycle is complete now we will pass the Order entry cycle.
Go to Order entry module-> O/E transactions -> Order entry and will pass one Order Entry cycle transaction to assign the LOT number to that item which we created in the Purchase order.
Below is the OE shipment screen with LOT number allocation.
Note: First you have to enter the Qty shippable quantity on the OE shipment ‘Qty shipped’ column then click on the tab button to enter the lot number manually or auto-allocate.
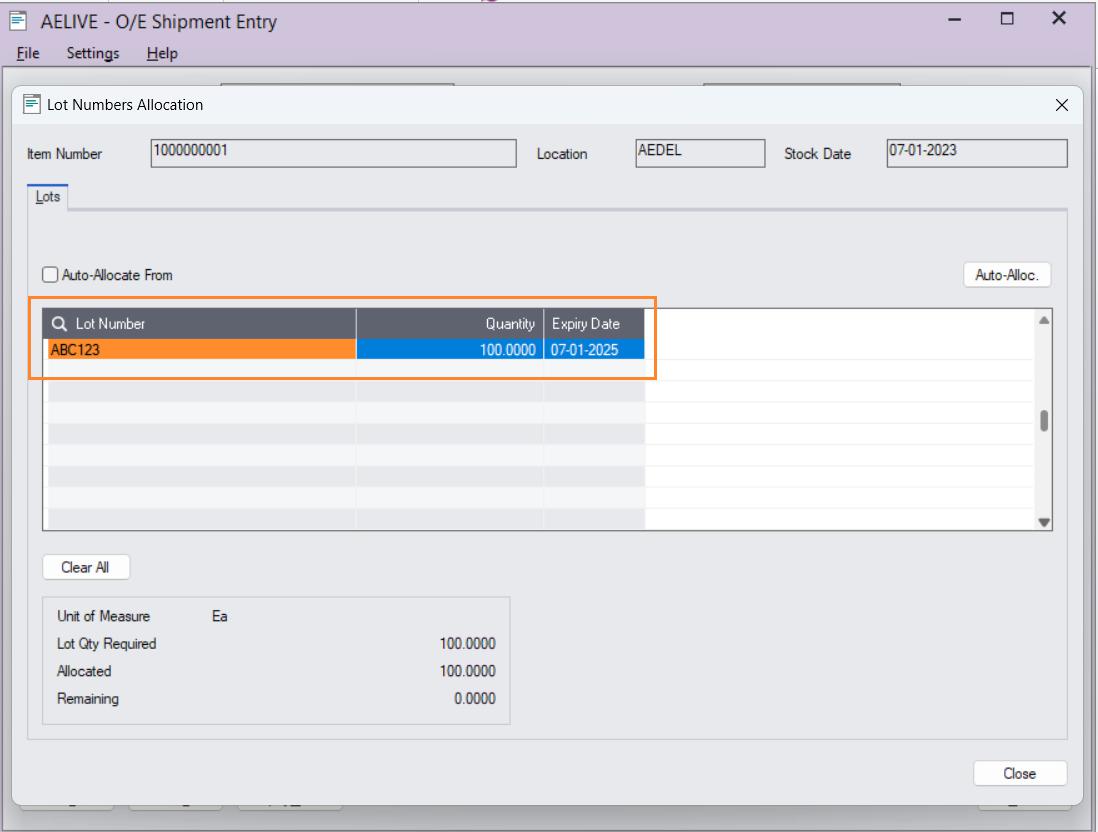
So, in the above image we have allocated the LOT number to the item also you can click on the Auto-allocate button or else you can give it manually by clicking on the detail line and then clicking on the finder button to check all the LOT numbers against the product and then you and pass the OE invoice for the same.
Sage Software Solution keeps you ahead of the race by keeping you updated.