The accounting process in India has evolved from manual entries to automation. Modern-day ERP software offers better internal control and deep financial insights to reduce your operational complexities, improve accuracy, and enhance transparency.
Vendor creation is one of the critical processes that enable accurate invoice processing, payments, reporting, and compliance. Proper setup ensures smooth AP operations and avoids transaction-level issues. This document provides a step-by-step guide for creating Accounts Payable (AP) Vendors in Sage Intacct. This process applies to the finance and accounts payable teams, which are responsible for creating and maintaining vendor masters in your ERP.
Essential Requirements
Below are the prerequisites required while creating a vendor in Sage Intacct:
- Master Access: User must have appropriate AP/Vendor master access in Sage Intacct
- Vendor Master Data: Vendor master data, such as legal name, address, tax details, and bank information, must be available
- Multi-currency: Multi-currency must be enabled if the vendor operates in a foreign currency.
Step-by-step Process for AP Vendor Creation in Sage Intacct
Use the AP Automation module in Sage Intacct for efficient vendor creation and effective management.
1.Log in to Sage Intacct using valid user credentials.
2. Navigate to Accounts Payable → Vendors.
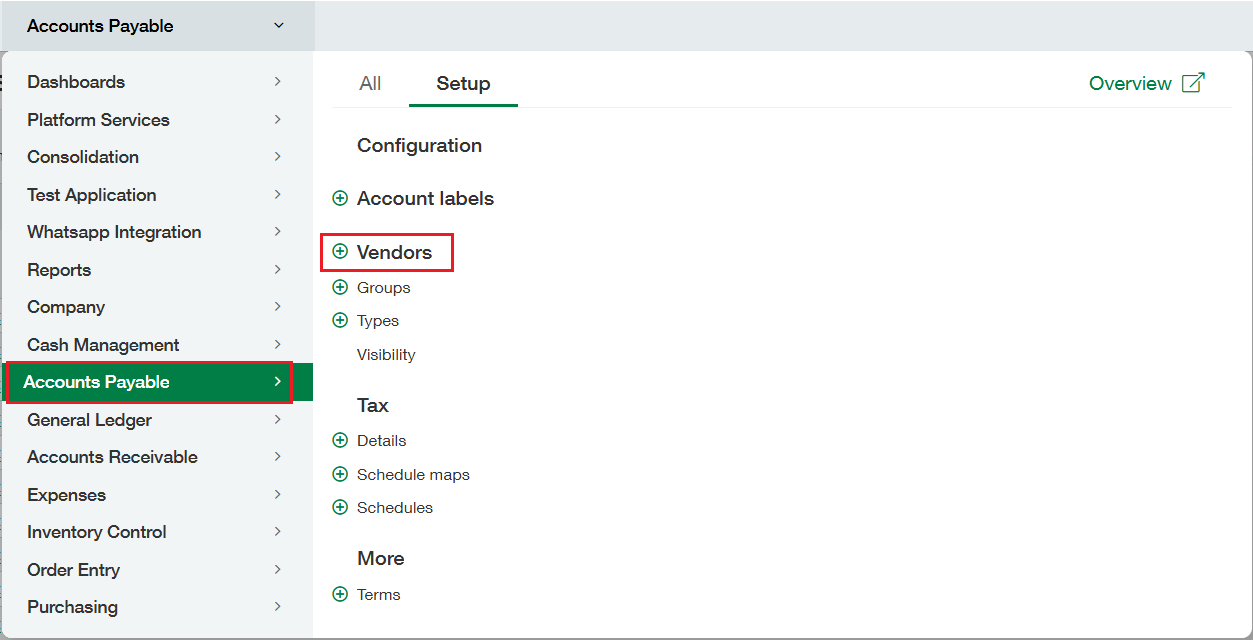
3. The Vendors List screen opens. Click Add to open the Vendor Information screen.
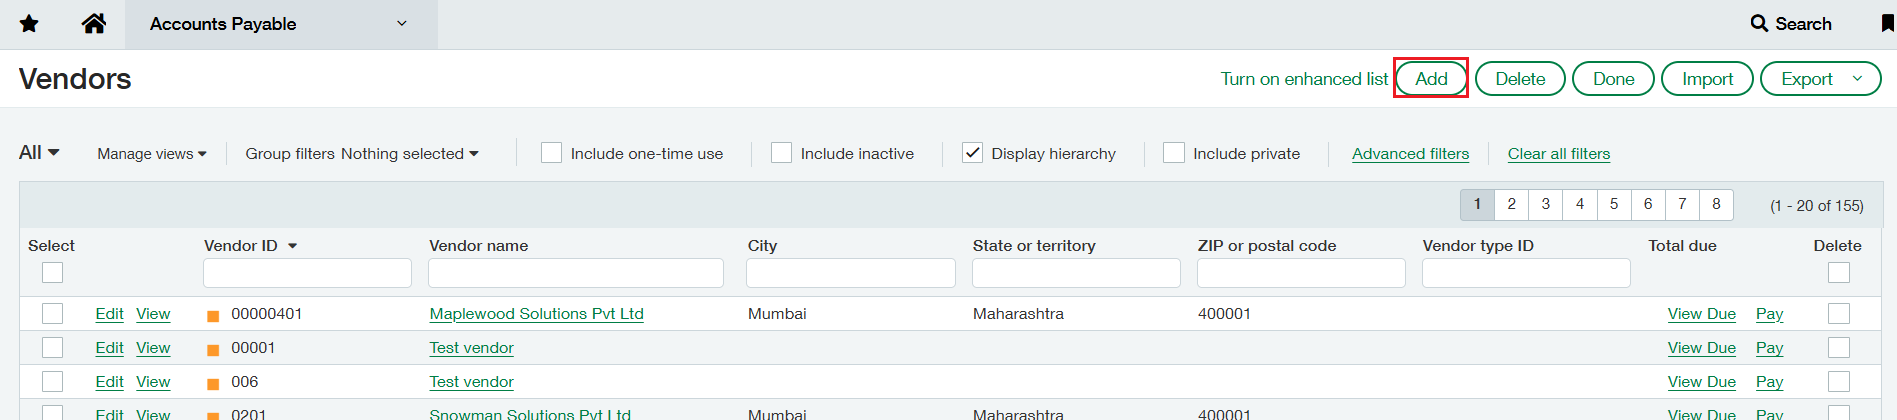
4. The Vendor Information screen contains multiple tabs to capture required and optional vendor details such as tax information, contact information, bank details, and payment terms.
Example: As per the Micro, Small, and Medium Enterprises Development Act, companies are required to pay within 45 days of the acceptance of the goods/ service rendered to micro and small vendors.

5. On the Vendor tab:
- Enter a unique Vendor ID.
- Enter the Vendor Name.
- Set the Vendor Status to Active.
- Enter complete Contact Information, including address, email ID, and phone number.
- Enter the vendor’s Bank Details, such as:
-
- Bank name
- Account number
- IFSC code
- Country
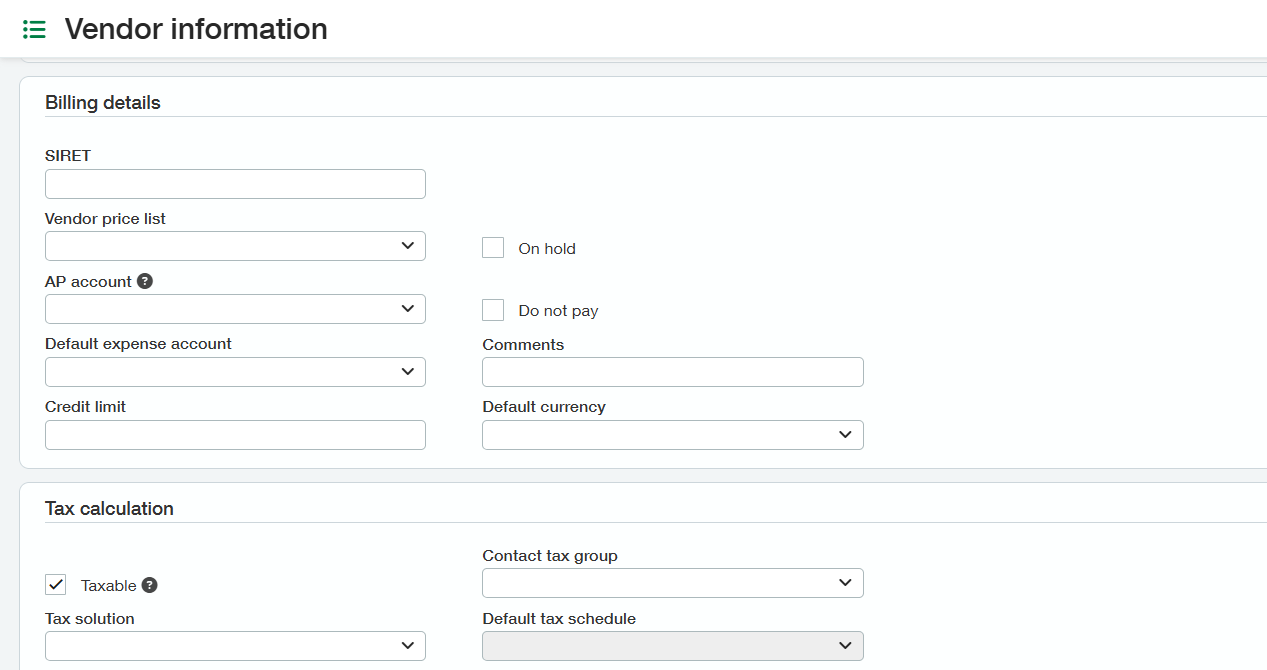
6. On the Additional Information tab, enter vendor billing details, including:
- Default vendor currency
- Credit limit
- Default expense account
- Enable tax calculation for the vendor and assign the applicable default tax schedule.
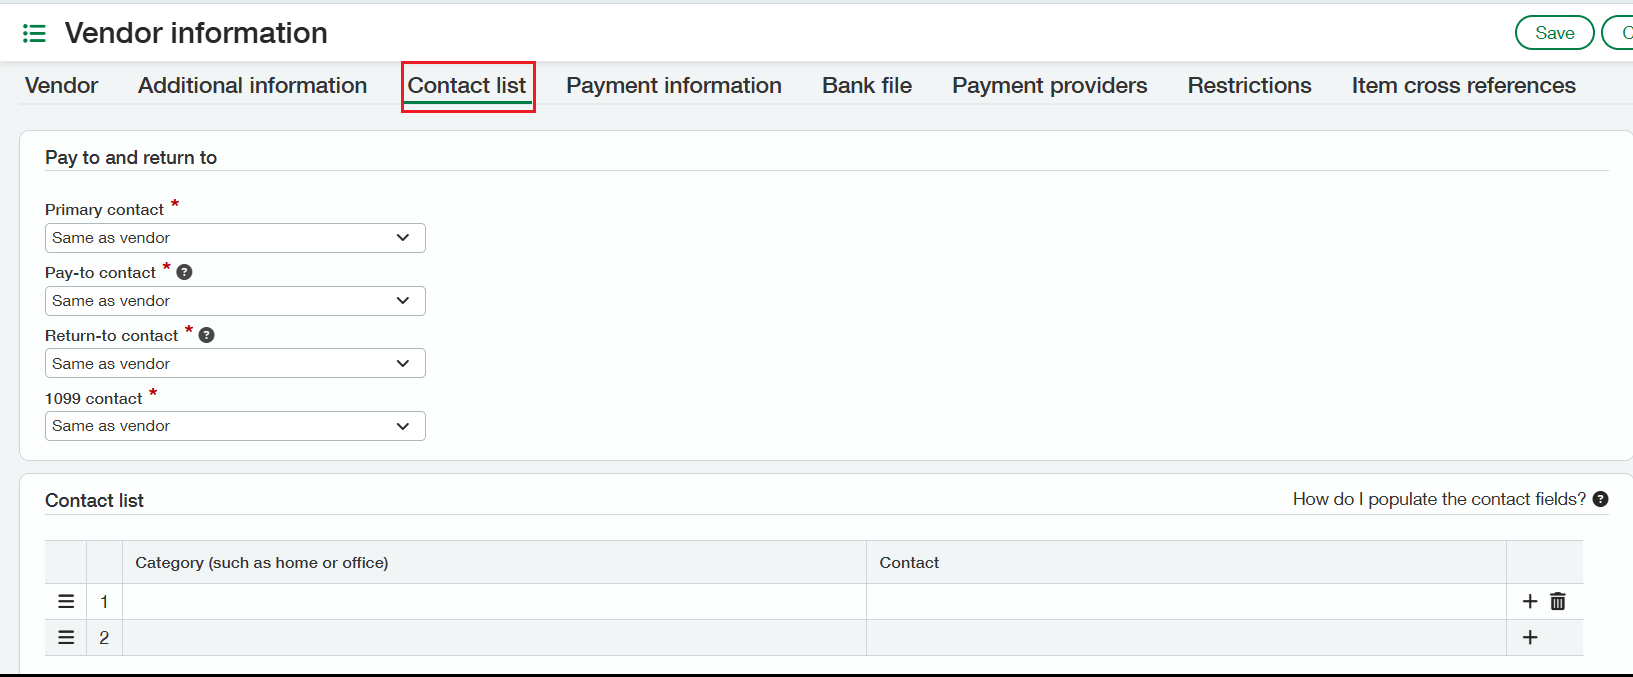
7. On the Contact List tab, set up additional vendor contacts with different contact details from the default vendor information. A Pay-to contact can also be defined for printing on payment documents.
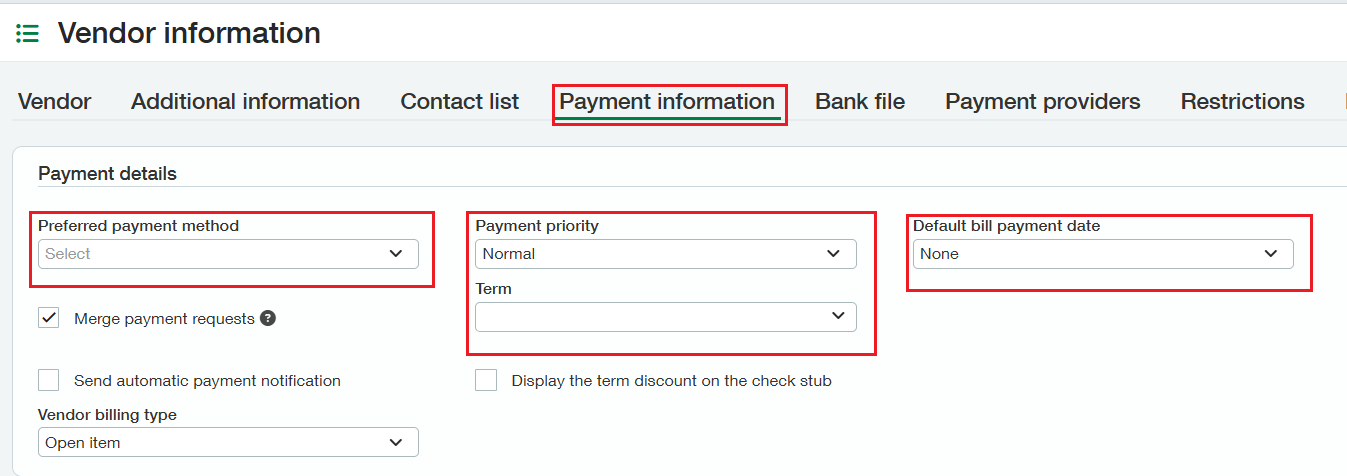
8. On the Payment Information tab, define optional default payment settings to reduce data entry, such as:
- Preferred payment method
- Payment priority
- Payment terms
- Default bill payment date
9. Review all entered details for completeness and accuracy.
10. Click Save to complete the vendor creation process.
Conclusion
By following the steps defined in this document, users can ensure that vendors are accurately configured in Sage Intacct. Proper vendor master setup supports smooth invoice processing, timely payments, and reliable financial data management across the organization.