Many Indian businesses use Sage Intacct to streamline accounts payable and maintain a healthy cash flow. This highly flexible and customizable ERP software enables you to make timely payments to your suppliers, avoid monetary penalties, and foster stronger relationships with external stakeholders.
While using the accounts payable automation module in Sage Intacct, you may want to enforce internal controls for different purposes, such as early fraud detection, minimizing unauthorized spending, and ensuring stricter regulatory compliance. The software provides a user-friendly interface to improve process clarity, transparency, and simplify unnecessary complexities. In this blog, we will discuss how the AP transaction approvals work and how you can fine-tune the workflow to meet your business requirements.
Step-by-Step Guide to Setting the Approval Process for AP Bill
Following the Government of India’s Digital India initiative, many CFOs are now prioritizing automation of their internal AP processes with cloud-based enterprise-level tools like Sage Intacct.
Let’s deep dive into the process:
1. To Activate the Approve Payment Transactions
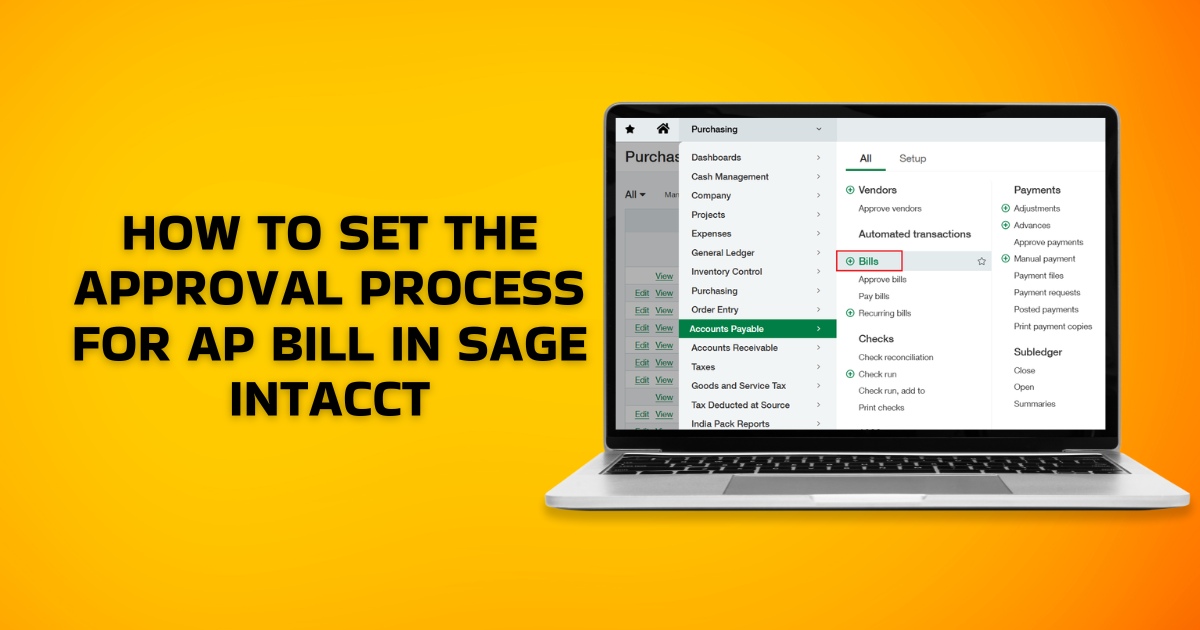
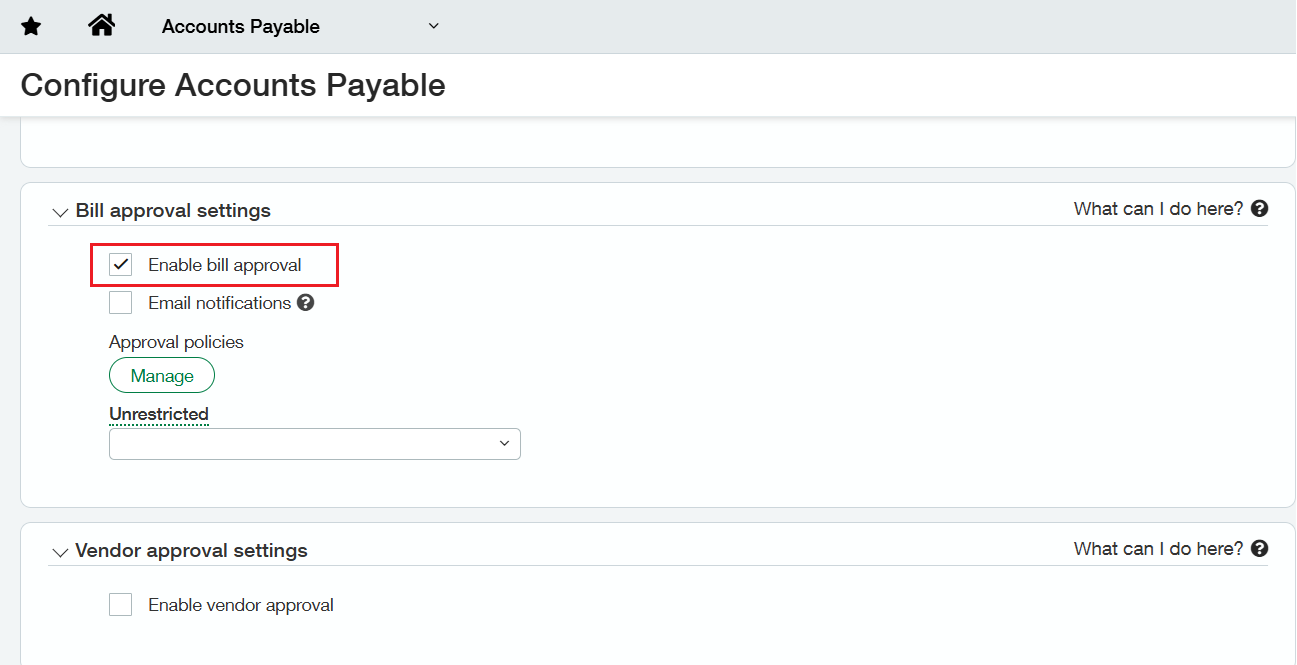
- From the top-level, navigate to the Accounts Payable Module. Then select ‘Setup’ to access configuration options, and click on ‘Configuration.’
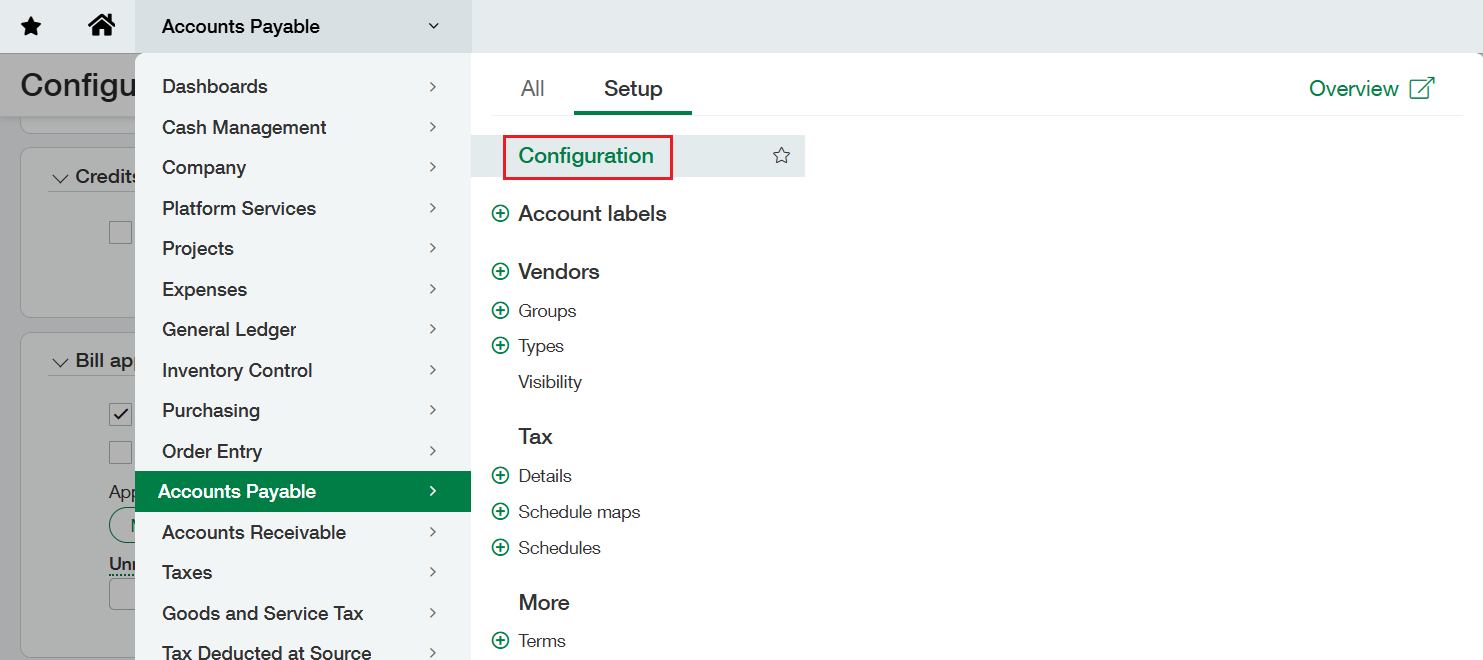
- In the Configuration, locate the Approvals section where you can enable or disable the approval workflow for transactions. Check the checkbox labeled “Enable Bill Approval” to activate the functionality.

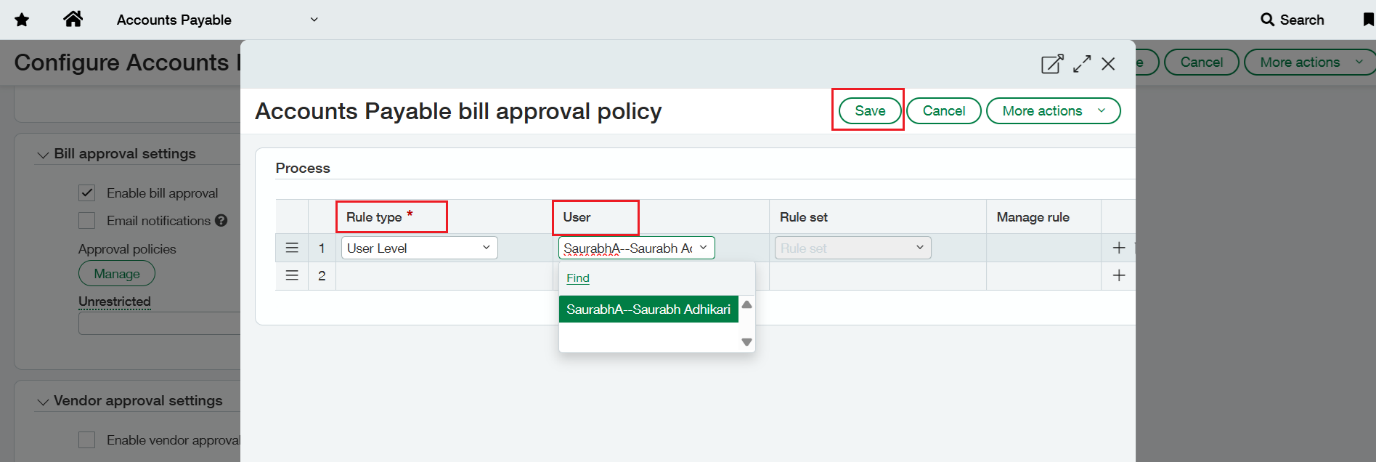
- Once enabled, a section titled Approval Policies appears. Click on the “Manage” button next to the Approval Policies section to define custom approval rules. This will open a new interface where you can assign a Rule type and assign the user who will be responsible for approving transactions.
- Under the Rule type from drop down option select ‘User Level’ and in the ‘User’ field select the user who will be approving the transactions. Once this is done, click on ‘Save’.
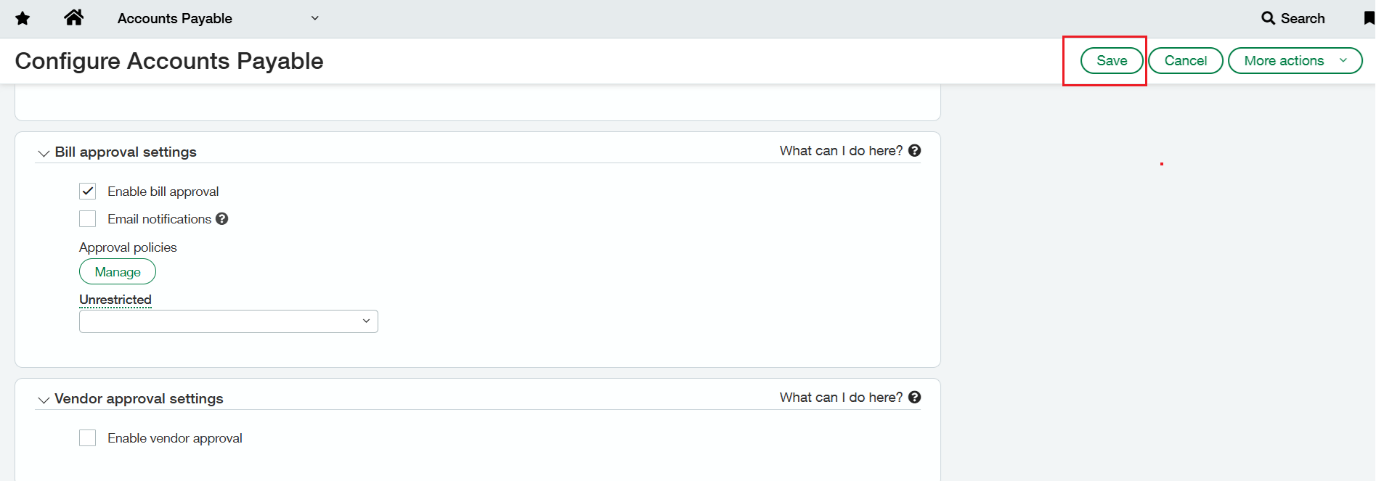
- Once the required configuration is done. Click on ‘Save’
2. Transaction flow
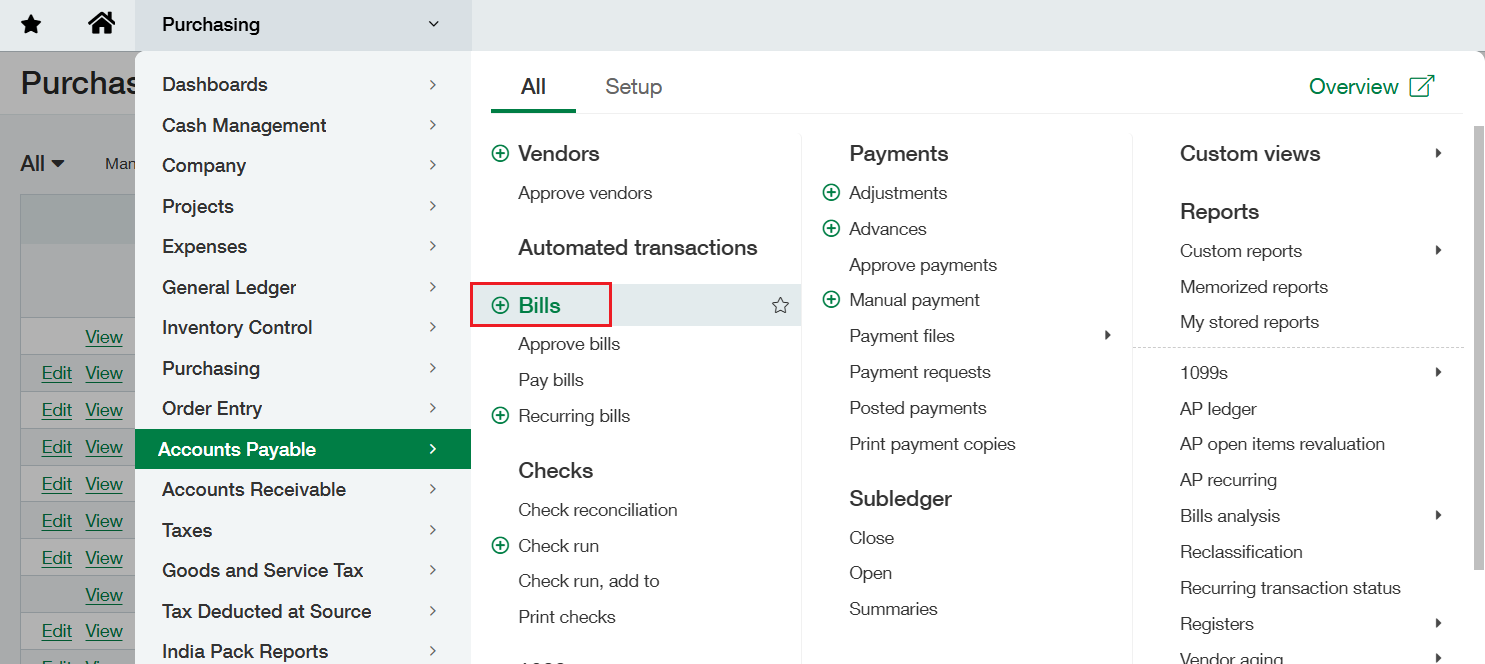
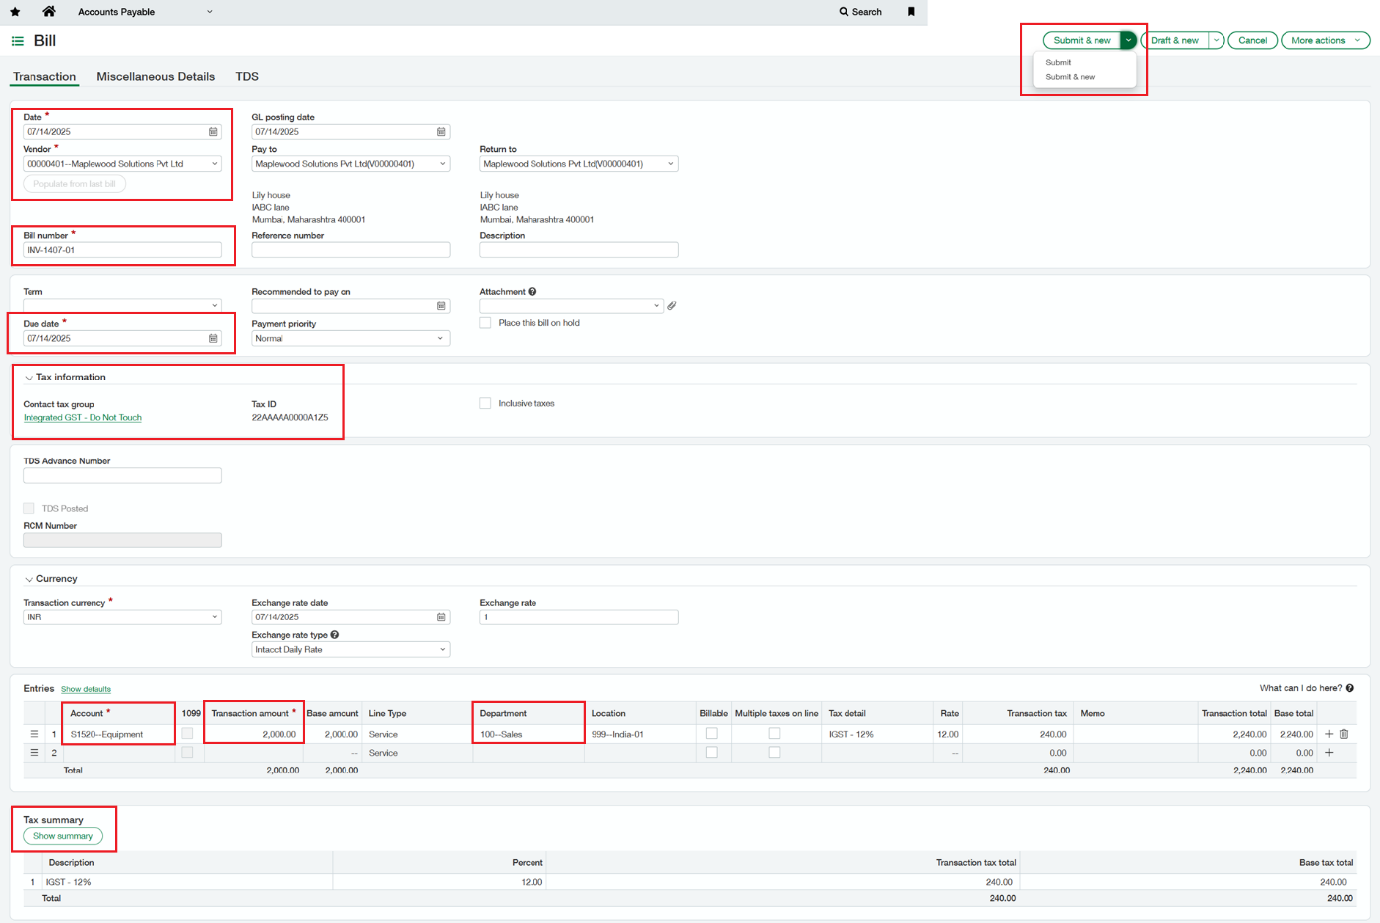
Go to the Accounts Payable module >> All >> Bills. Click on the ‘+’ sign to open a new AP bill.
- In the AP bills, fill in the required details such as – Date, Vendor, Date due, Bill number, Tax Information, Account, Transaction amount, Department, Tax summary.
- Once all the required fields are filled in, submit the bill. As we have enabled the Bill Approval, we will get an option to either submit the invoice or keep it in Draft state.
3. Approval Process
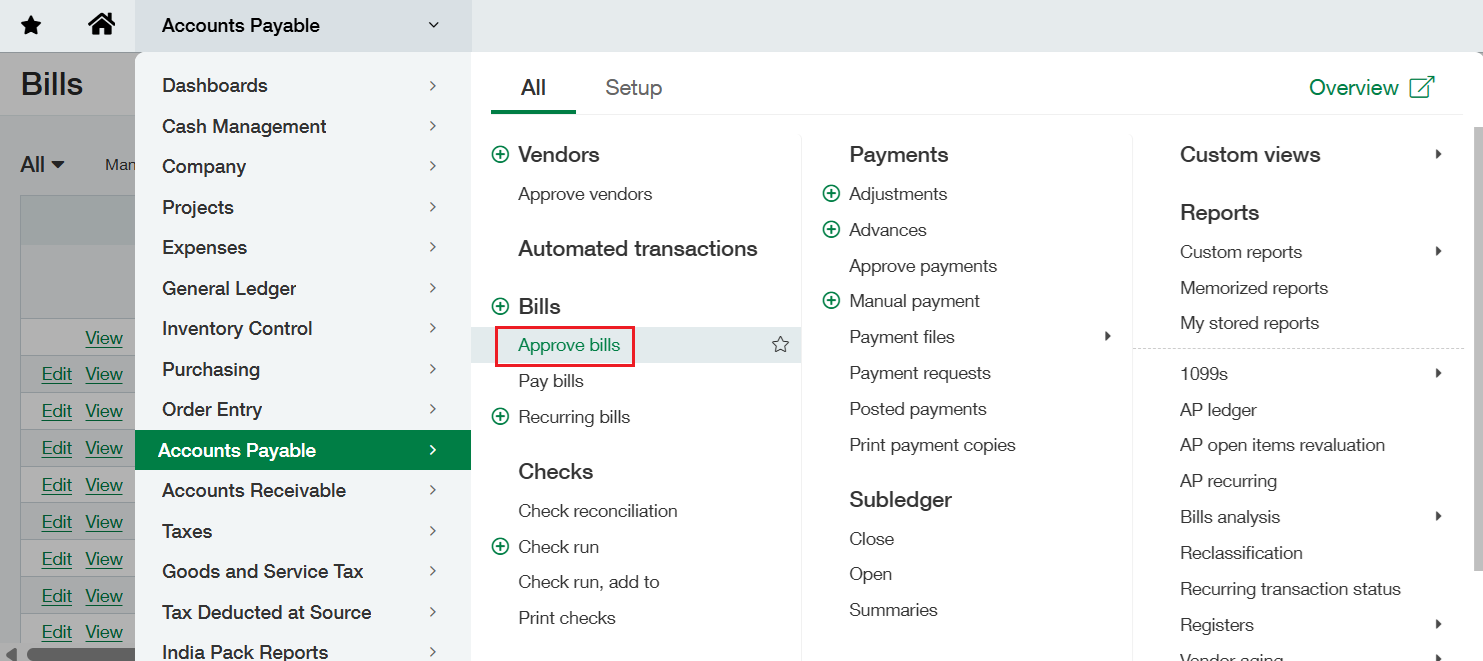
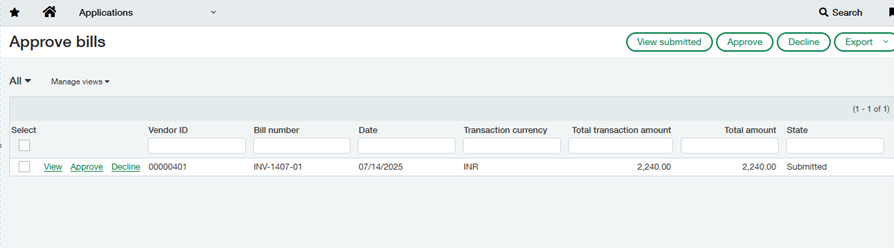
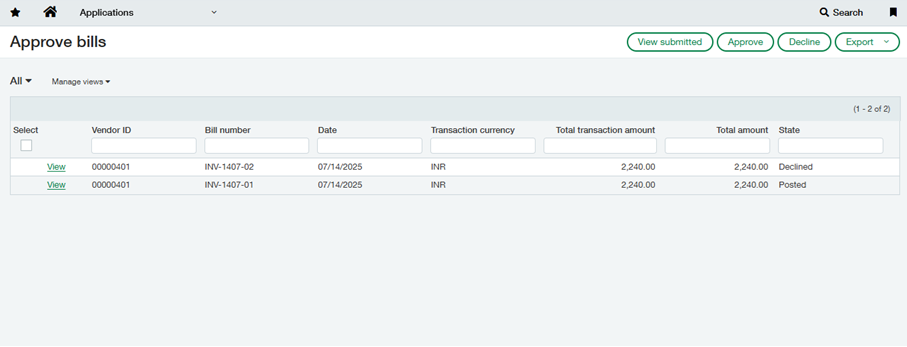
- As the Bill is submitted, it will be reflected under Accounts Payable module >> All >> Bills >> Approve Bills, for the user whom we had assigned the user under the Bill Approval policy.
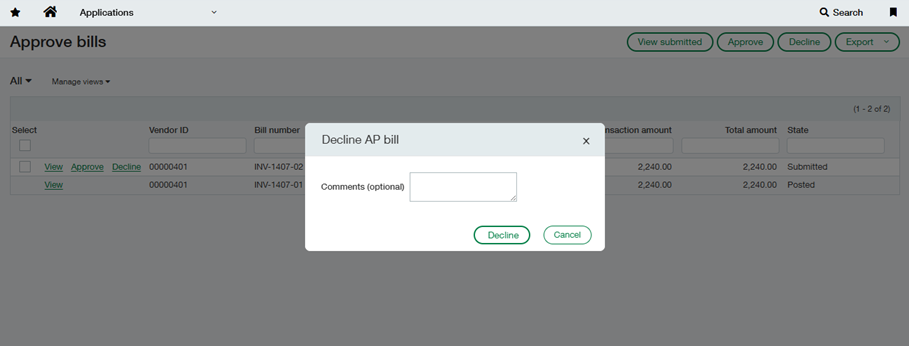
- In the Approve bills list, we can see the list of transactions that you can Approve or Decline.
- As the approver clicks on ‘Approve’ to approve the invoice, a new window will pop up where one can give any comments if required.
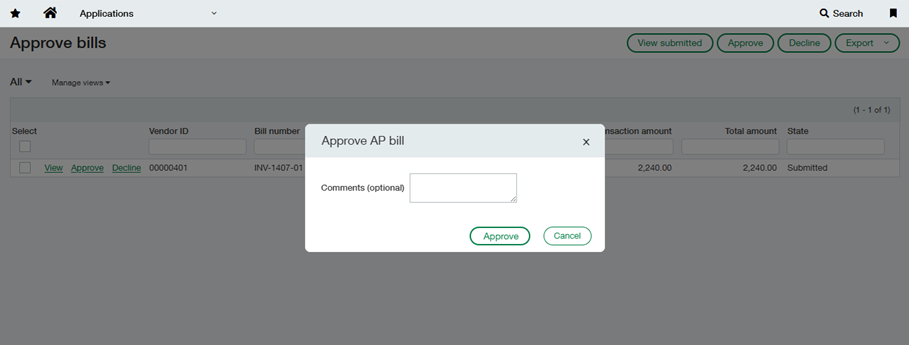
- The approver can decline the transactions by clicking on the ‘Decline’. Here, if there are any comments that are required to be added, it can be done through the comments box as shown below.
- Once an AP bill is approved, its status is updated to ‘Posted’. If the approver rejects the bill, the status changes to ‘Declined.’
Wrap Up
Sage Intacct’s Accounts Payable approval workflow helps teams process vendor bills efficiently by ensuring proper review, clear responsibility, and timely payments with better control. Much like accounts payable, the software provides a single unified interface for accounts receivable automation. It streamlines many labor-intensive processes, allowing your staff to focus on high-value activities and boost productivity.