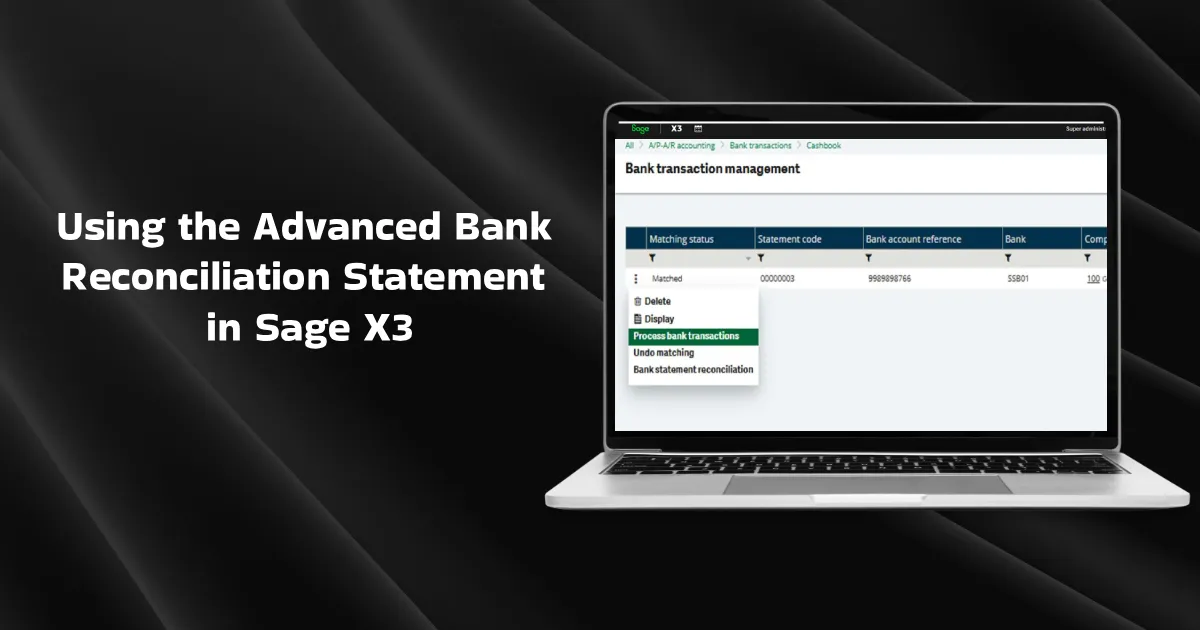
Advanced Bank Reconciliation Statement
The Advanced Bank Reconciliation Statement plays an important role in identifying accounting errors and building reconciliation journal entries. It automates the process of matching your internal accounting records with the corresponding external bank statements for both incoming and outgoing payments. Your ERP software examines the difference between the figures to identify, report, and rectify discrepancies. By automating and accelerating the bank reconciliation process, your organization can save time, effort, and potential human errors.
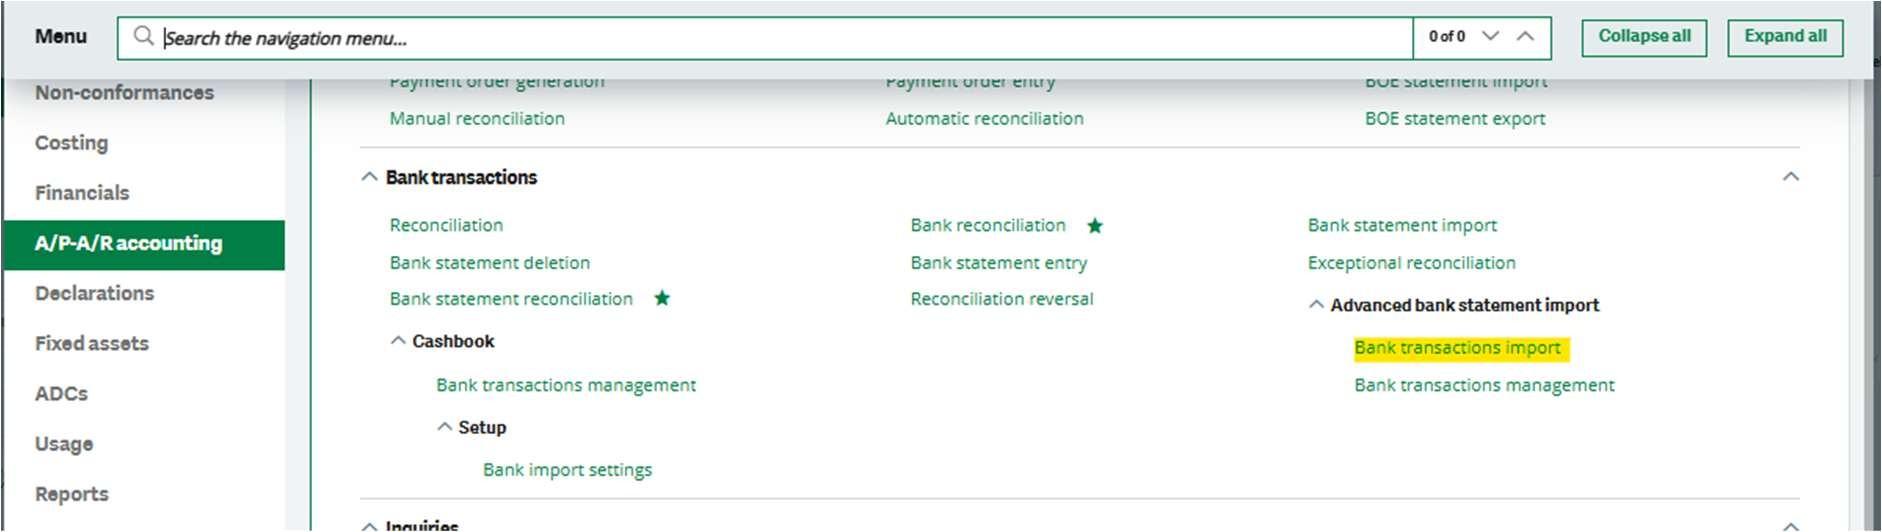
Bank Statement Import
Bank Statement Import is a robust, out-of-the-box bank reconciliation function that lets you upload electronic bank statements from your bank into Sage X3, instead of typing bank transactions manually.
Once imported, Sage X3 can automatically try to match those bank lines with:
- customer receipts
- supplier payments
- bank charges
- transfers
- other cash transactions
Using the Advanced Bank Reconciliation Statement
To perform an automatic bank statement, there are a few prerequisites that need to have/configure.
- Set up Bank import settings
- Bank statement to be downloaded in MT940 format.
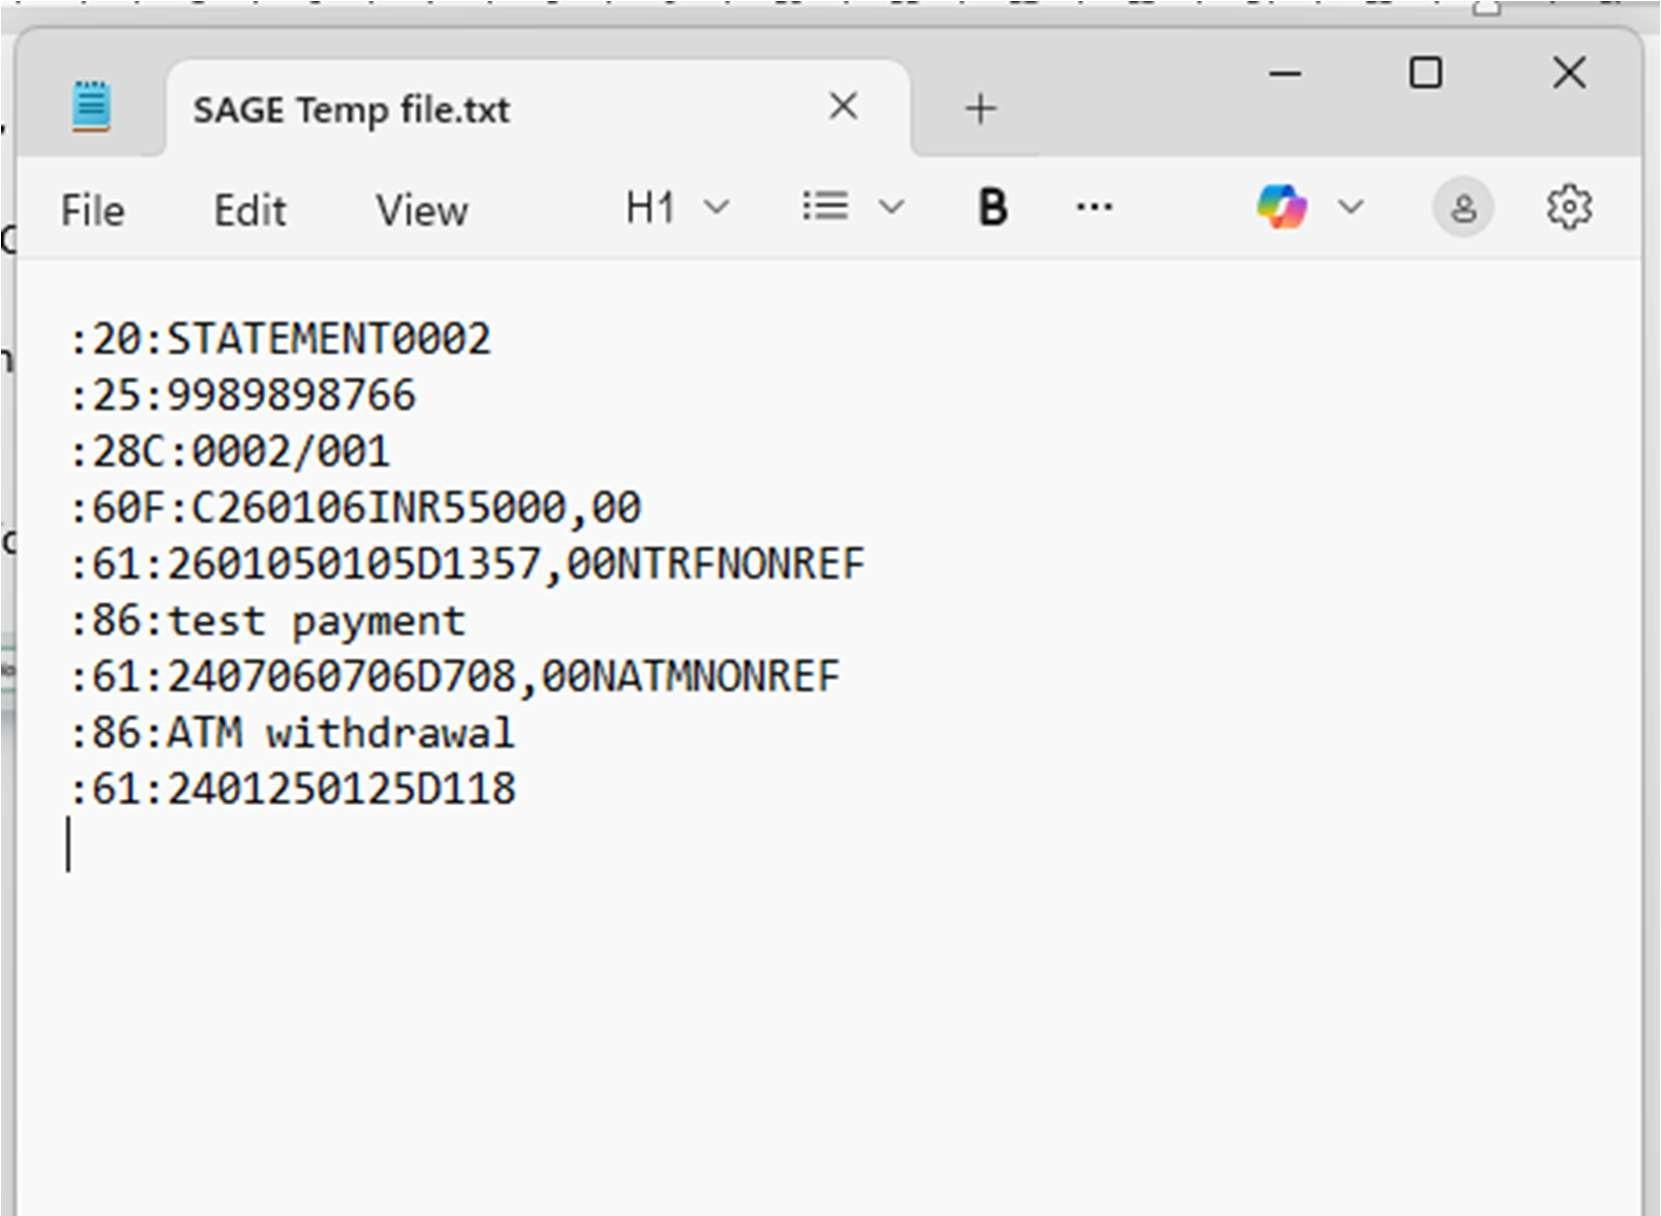
Sample MT940 file format:
:20:STATEMENT12345
:25:123456789/123456789
:28C:00001/001
:60F:C240101EUR1000,00
:61:2401020102C100,00NTRFNONREF//123456789
:86:/TRCD/TRANSFER/REMI/Payment from Client A
:61:2401030103D50,00NTRFNONREF//987654321
:86:/TRCD/TRANSFER/REMI/Payment to Supplier B
:62F:C240103EUR1050,00
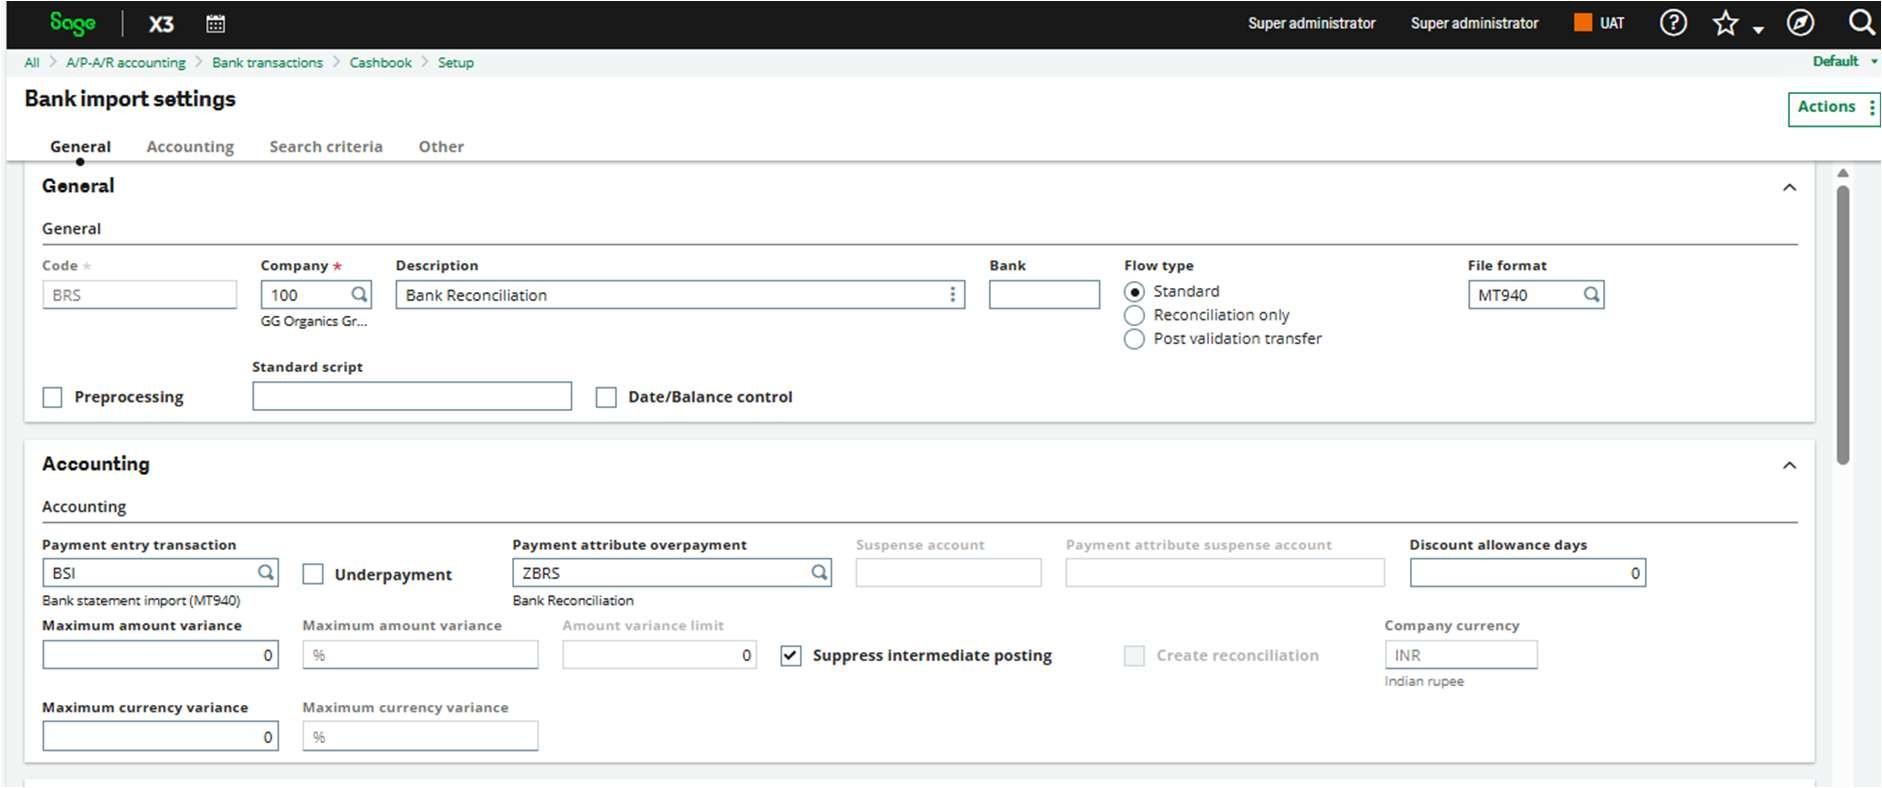
1. Bank Import Setting:
This function defines settings used for bank transaction imports and automatic matching.
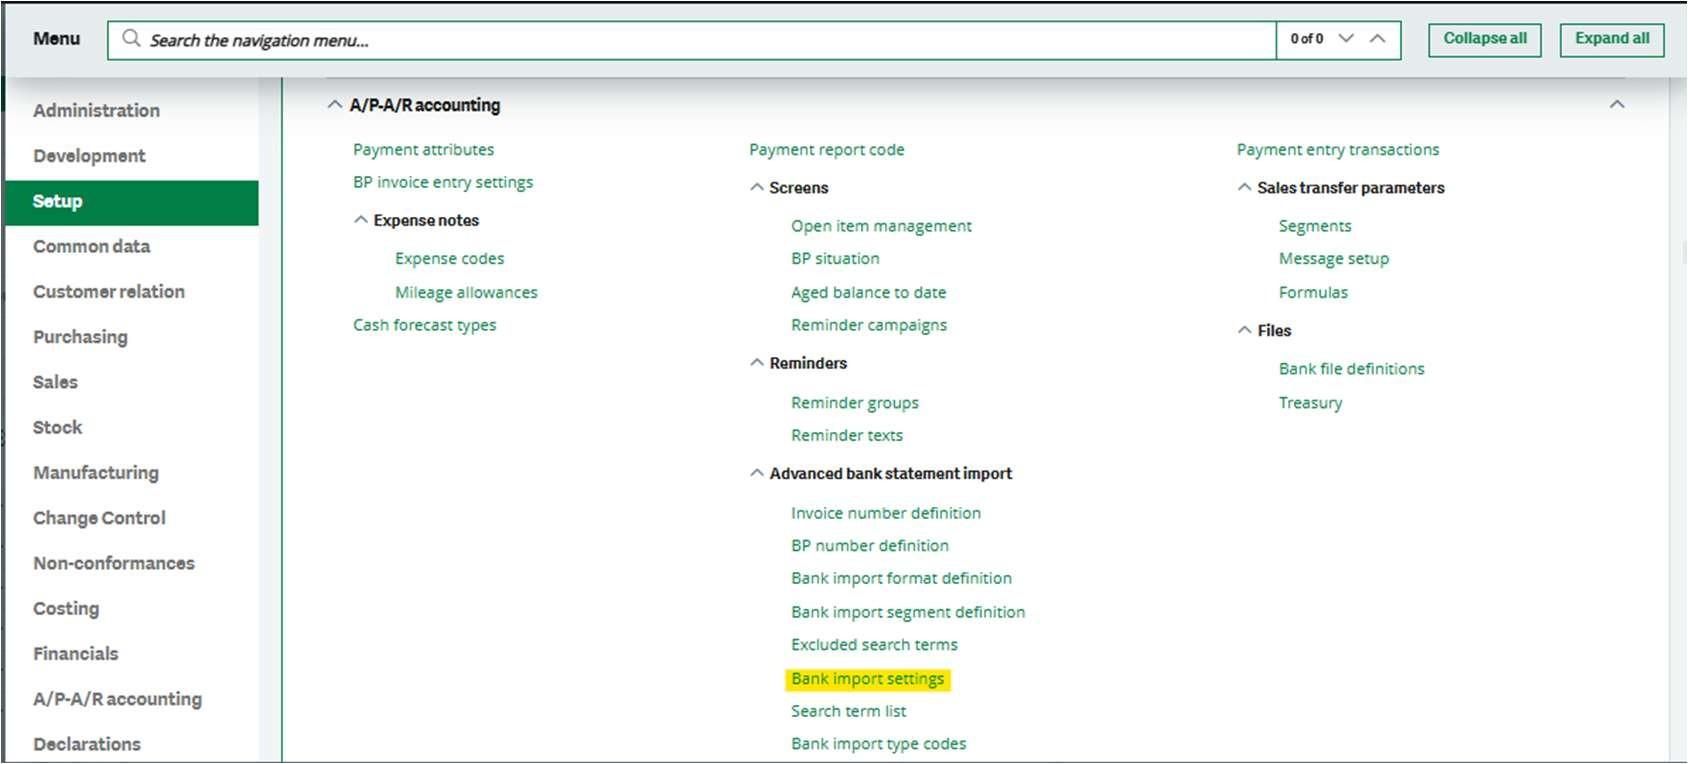
Bank Import Setting in Sage X3 is used to configure how electronic bank statements are imported and interpreted in the system. It allows you to define the bank file format, map the statement fields to Sage X3 fields, and set rules to automatically identify and match transactions. This helps automate bank reconciliation, reduce manual entry, and ensure accurate posting of receipts, payments, and bank charges.
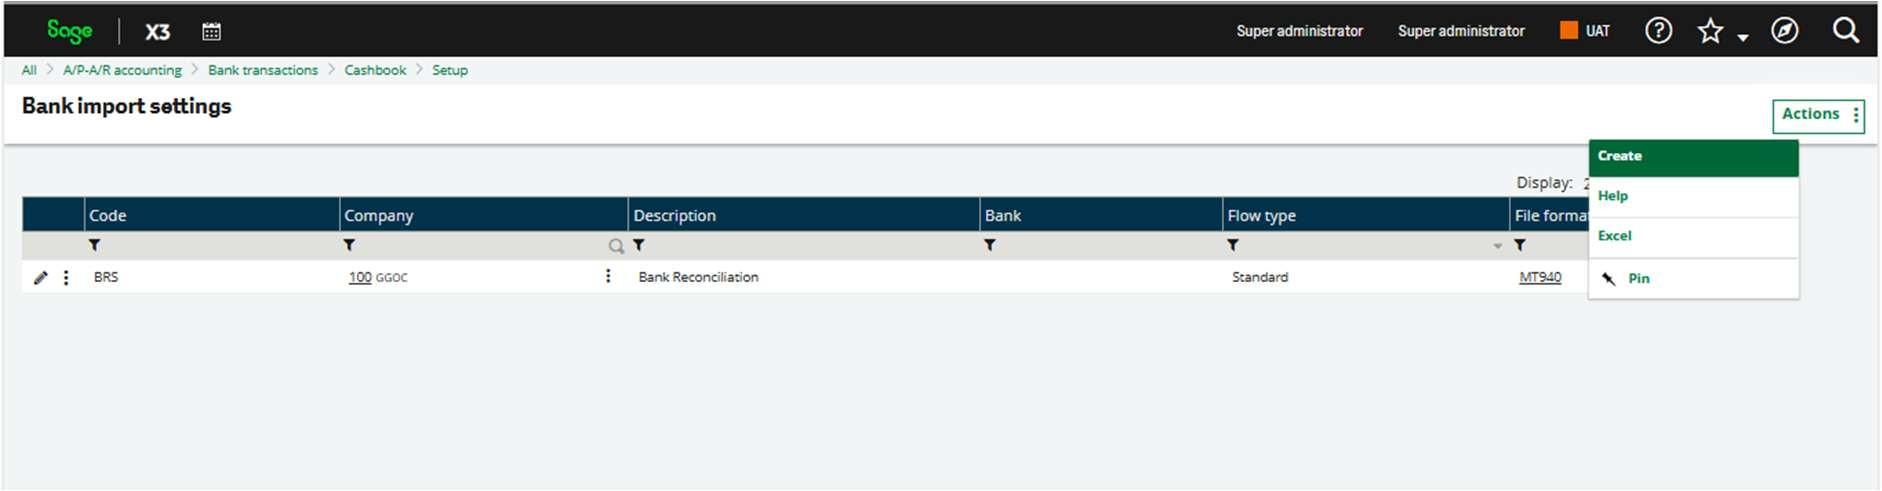
You can create a new bank import setting by clicking on the ‘Create’ button from the Action button.
Code: BRS
A unique code to identify this bank import setup. Here it’s named “BRS” (usually short for Bank Reconciliation Statement).
Company: 100
This configuration applies specifically to company 100 (GG Organics Group).
Description: Bank Reconciliation
A label to describe what this setup is used for.
Bank: (blank)
No specific bank is selected — so this setup can be used for any bank linked later in the process.
File format: MT940
The system expects the bank statement file in SWIFT MT940 format — a common electronic bank statement format.
Payment entry transaction: BSI
Defines the entry type Sage X3 will use when creating accounting/payment entries from imported statements.
Here, we created a transaction called BSI – Bank Statement Import.
Payment attribute overpayment: ZBRS
If an overpayment is detected during reconciliation, Sage uses the attribute/rule set defined in ZBRS.
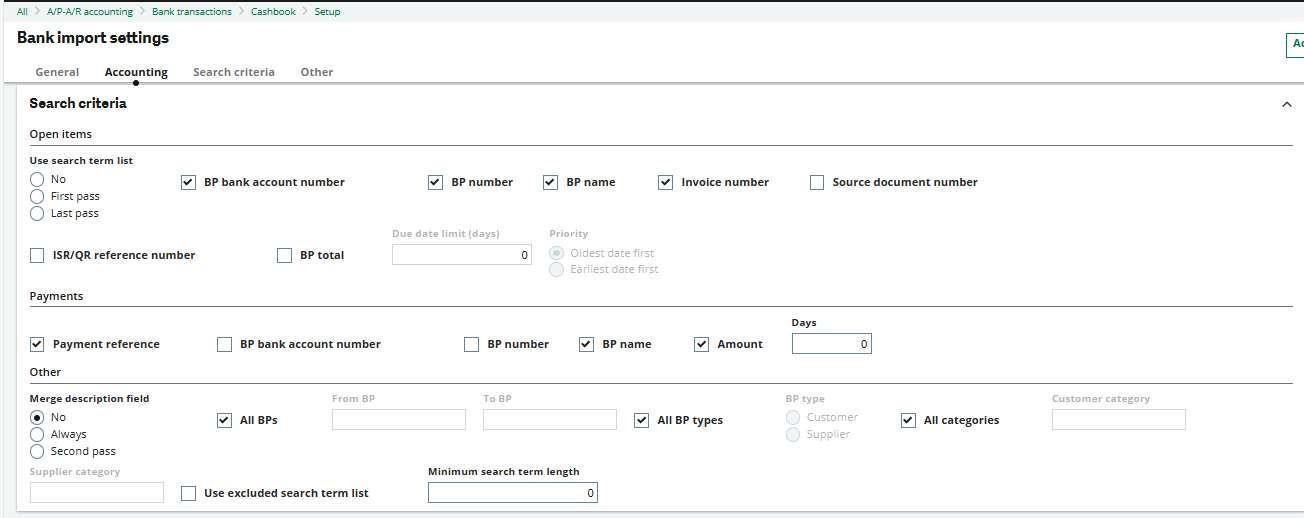
SEARCH CRITERIA — OPEN ITEMS
This section controls how Sage X3 tries to find open invoices / open items to match with the bank statement lines.
You have selected:
- BP bank account number
- BP number
- BP name
- Invoice number
This means:
When a bank transaction is imported, Sage X3 will scan the description/reference text in the bank statement and try to identify:
PAYMENTS SECTION
This part controls how Sage X3 identifies payment transactions. The following are checked:
- Payment reference
- BP number
- BP name
- Amount
This means Sage tries to match payments using:
| Field | Purpose |
| Payment reference | Bank UTR/reference |
| Text BP number | Identify Business Partner |
| BP name | Name-based matching |
| Amount | Ensures the transaction amount matches |
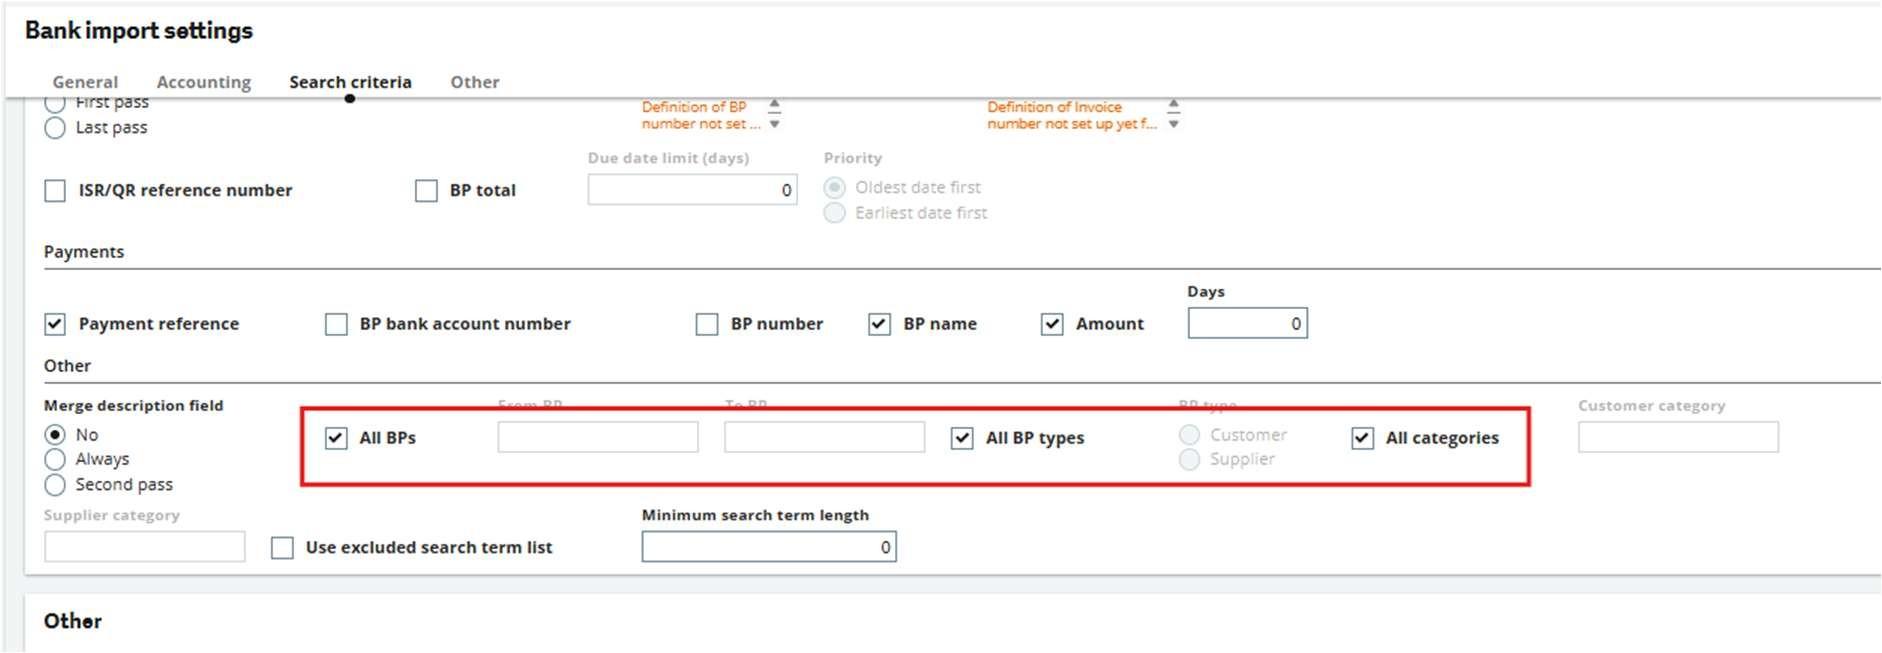
All BPs — CHECKED
Matching is allowed across all customers and suppliers, not restricted to a range.
All BP types — CHECKED
Both: Customers, Suppliers are included.
All categories — CHECKED
All business partner categories are included — no filtering.
Now we can perform the Bank statement Import to do the automatic bank reconciliation.
This is what the MT940 bank statement will look like
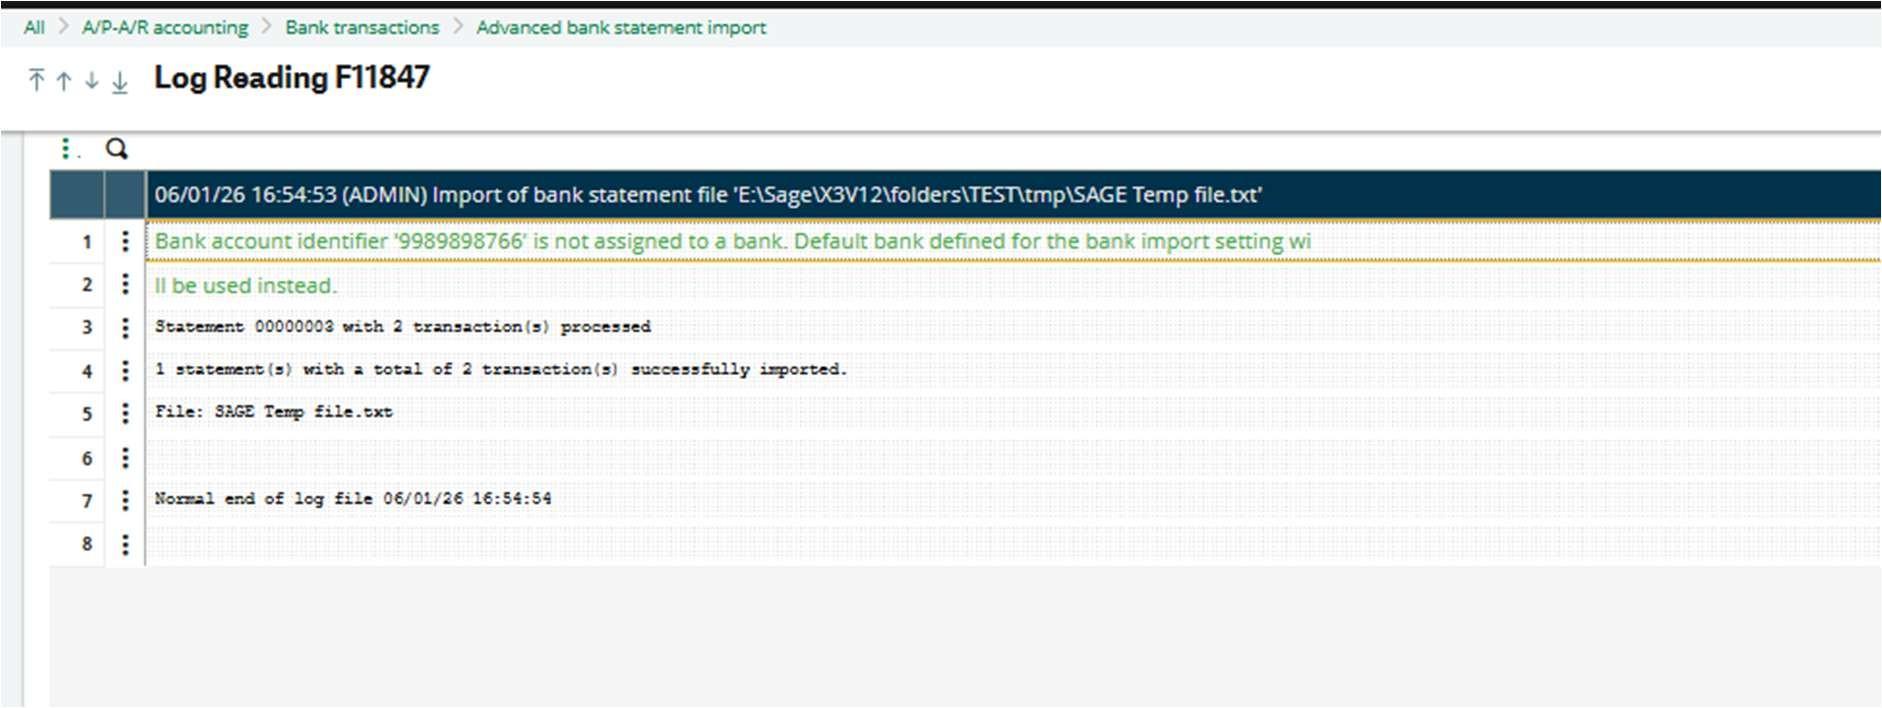
Go to the bank transaction import and select Bank import setting code, Bank, and click on OK. Then the system will ask to import the statement file. Select the file and click “Open”.
![]()
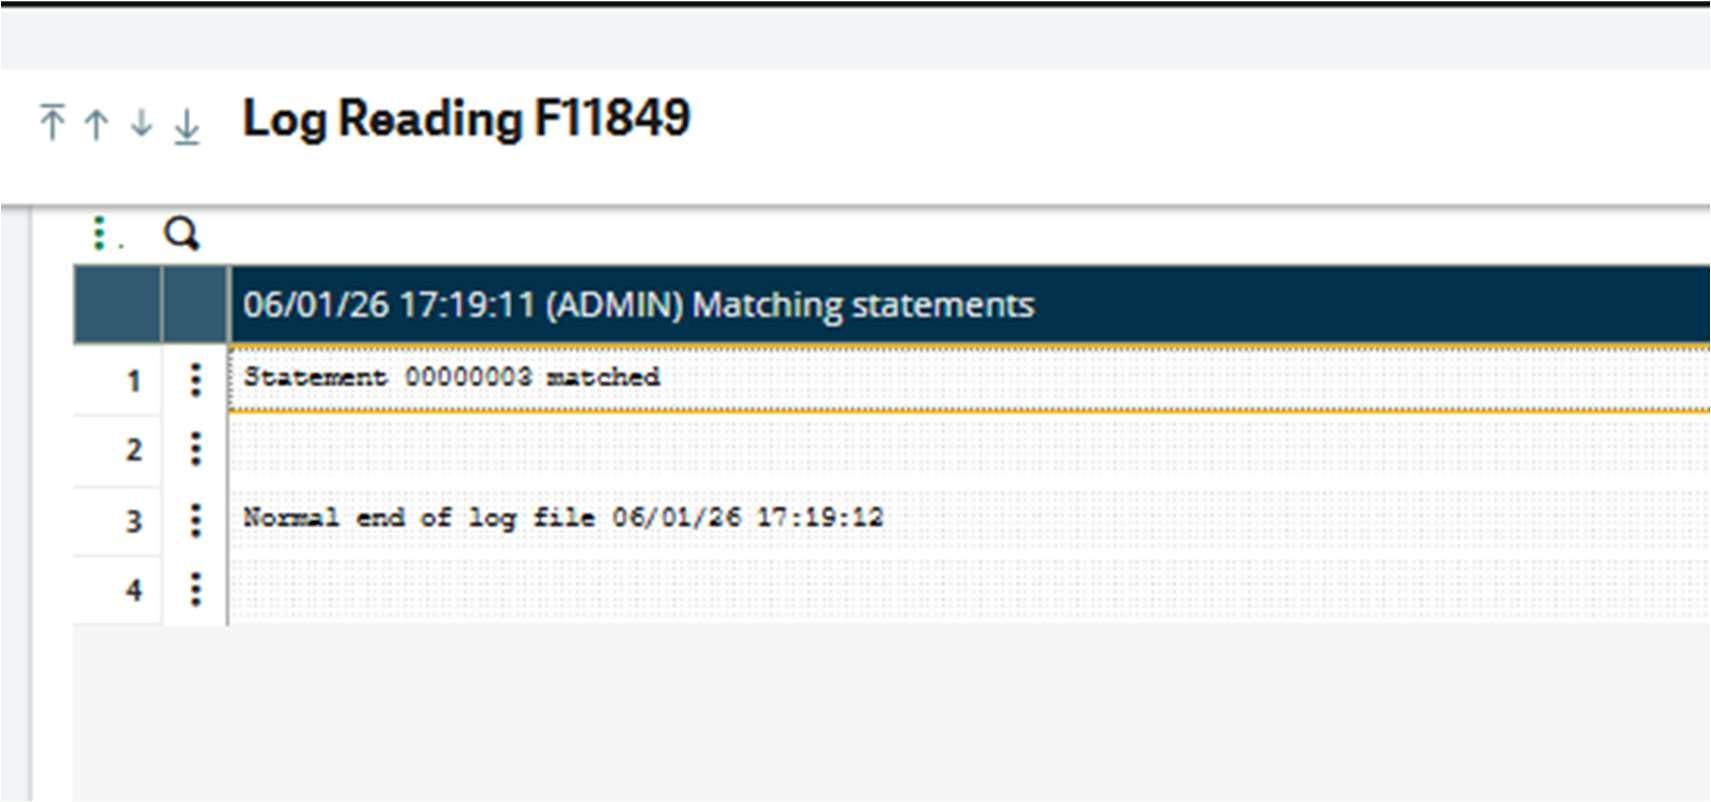
After importing, a log file will be generated.
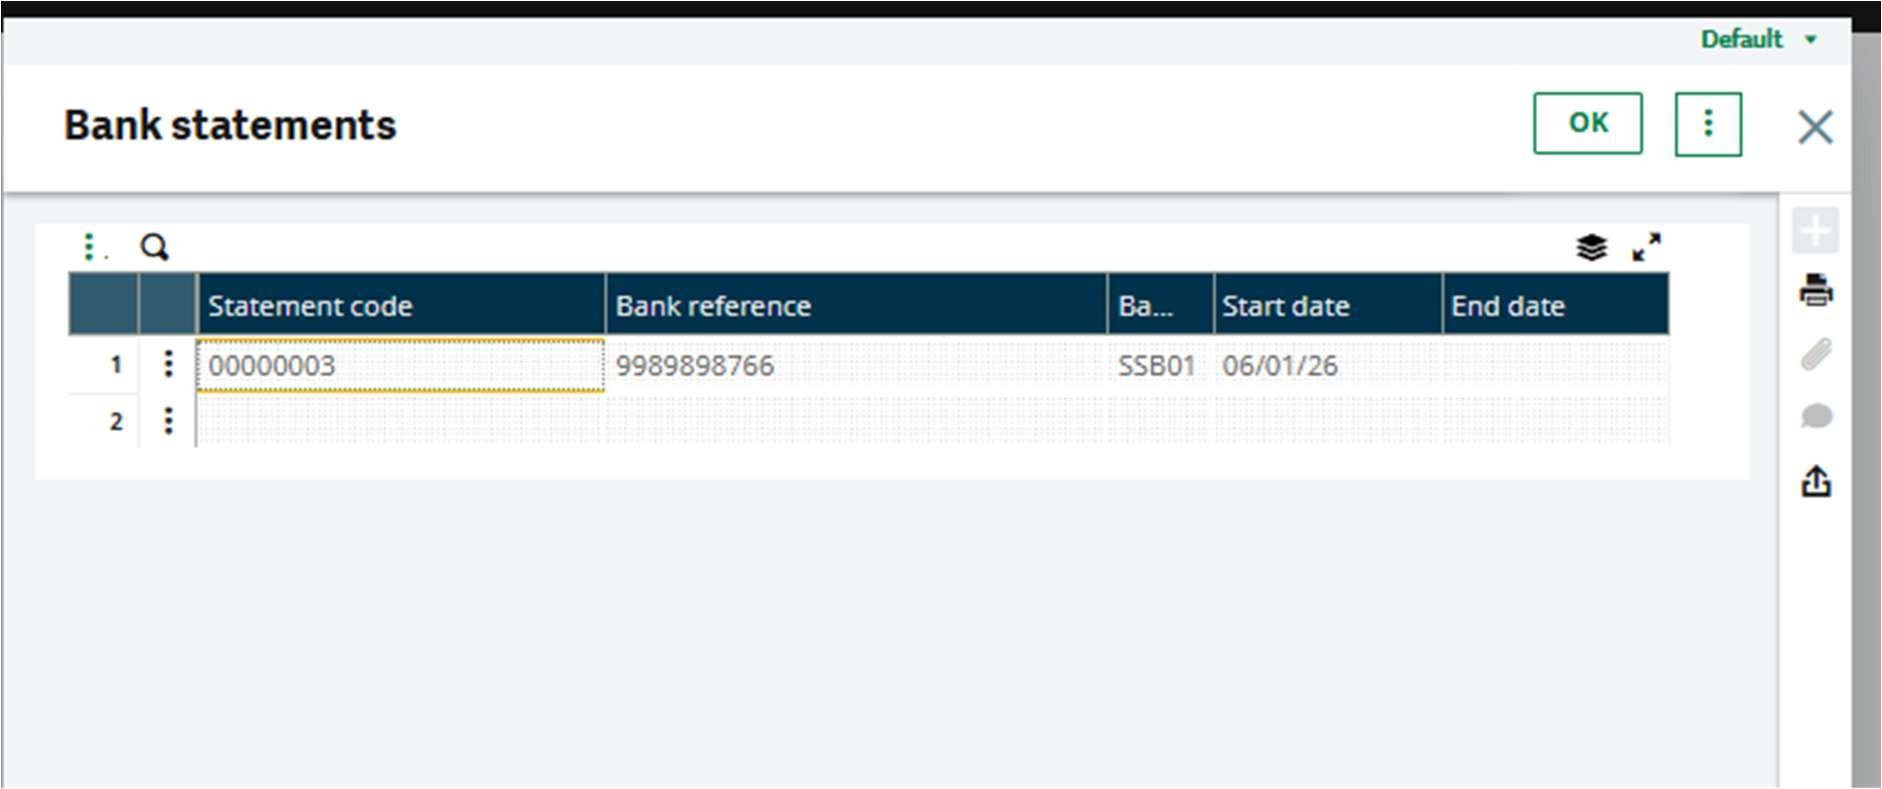
Then go to the Bank Statement Management function to perform the matching.
![]()
The recent imported statement and all previous statements will be shown here.
![]()
Click on the Action button and click on Start matching to perform matching.
Click on OK.
You will get a log saying that the statement is matched.
You can see the information about individual statements by clicking on Display
![]()
In this, you can get 3 different match statuses: A, B, and C
![]()
A: Matched
B: Some open items found, but not an exact match
C: No open items found
Click on Process bank transactions to go to the Process bank transactions function. This is the main screen to work with the Bank statement
![]()
Here, you can click on Refresh, and then the entries in the statement will appear on the left side.
![]()
Here you can see that the entries are automatically matched.
![]()
After verifying the statement, click Validate statement.
![]()

Wrap Up
An advanced bank reconciliation statement helps spot discrepancies in the books of accounts and keeps your accounting records clean, accurate & transparent. Automating the reconciliation process eliminates traditional labor-intensive operations, freeing your staff to focus on more strategic and value-adding activities.