A Change Request in Sage X3 is a formal and controlled process used to request, review, approve, and implement any modification in the system. It ensures that no important master data or process is changed without proper approval.
A Change Request (CR) in ERP software is a formal request to make a change in the system, especially for important data that affects production, costing, inventory, or quality. It works like a permission or approval system before any important data is changed. If someone changes these without approval, it can create wrong production, wrong costing, or inventory errors. To avoid this, companies use Change Requests.
Creating a Change Request in Sage X3
Here are the steps to creating a change request in Sage X3:
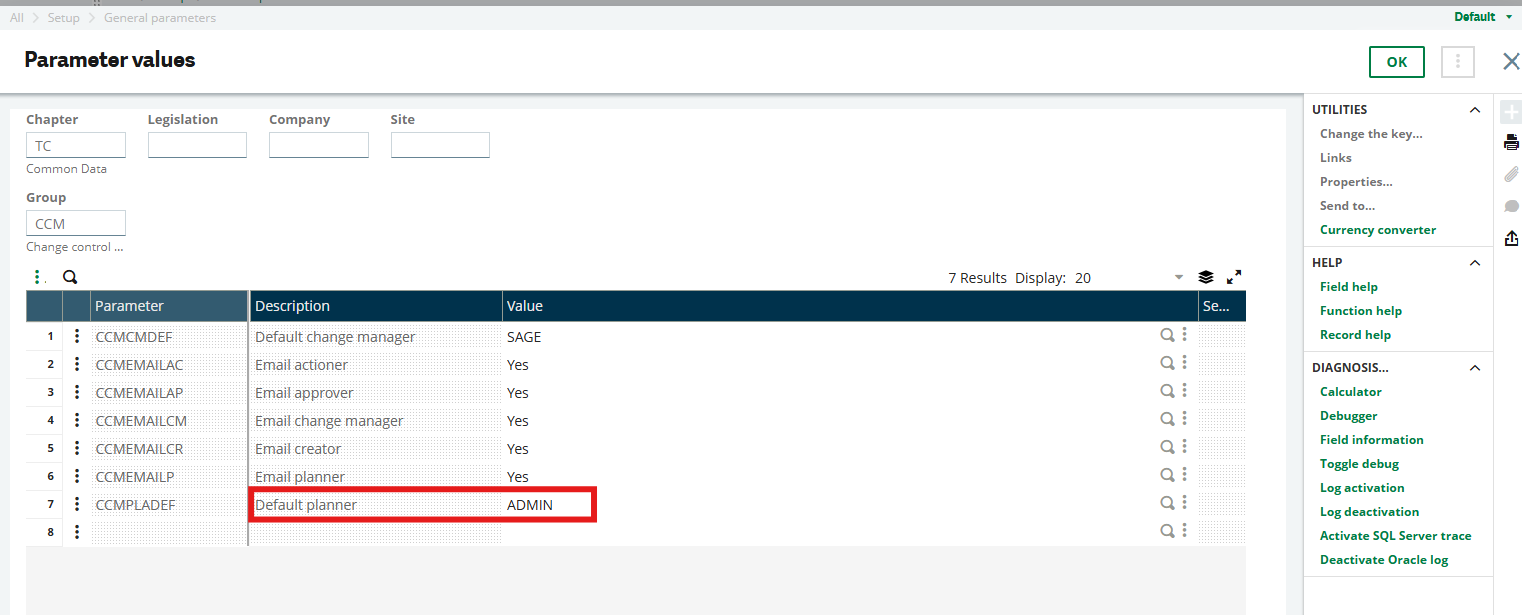
- Go to Parameters Values, then select TC Common Data, and open Change Control Management (CCM). Set this option to Yes.
For CCMCMDEF, enter the username in the Value field of the user who will access the screen (for example, “SAGE”).
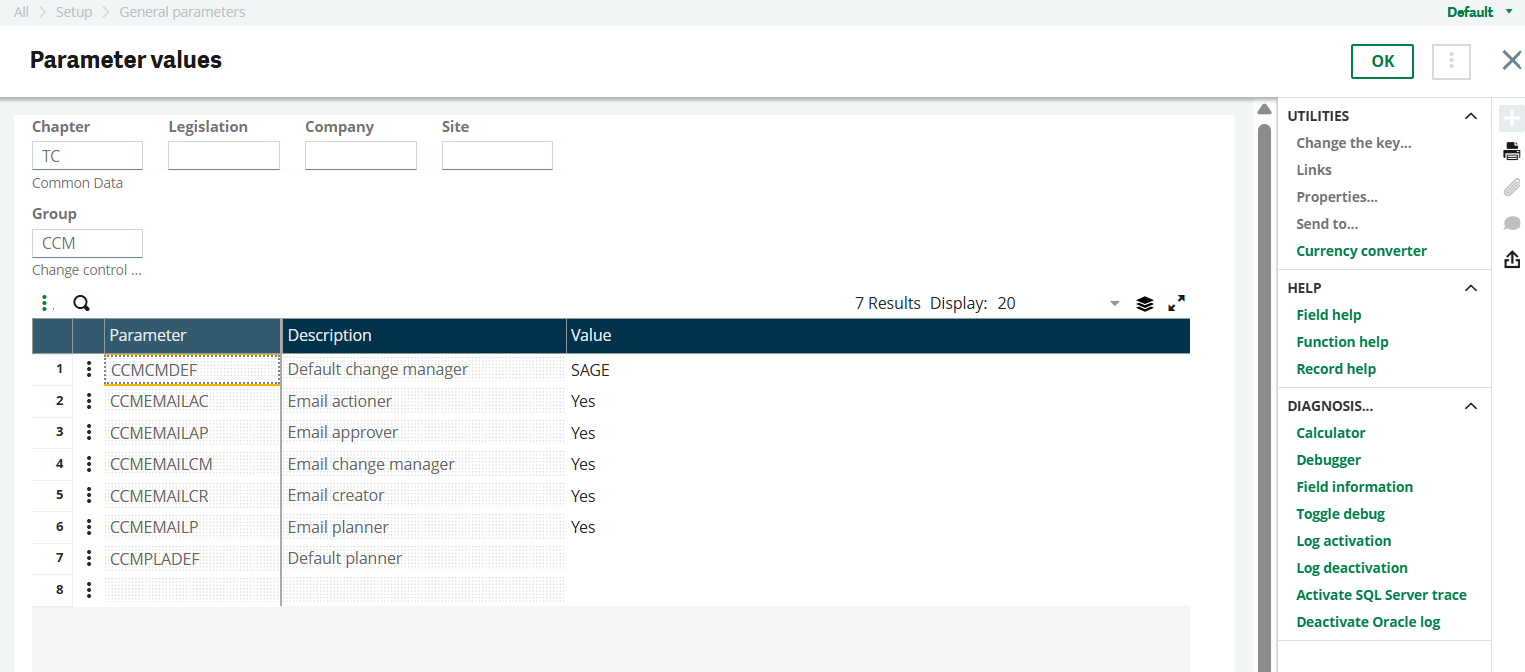
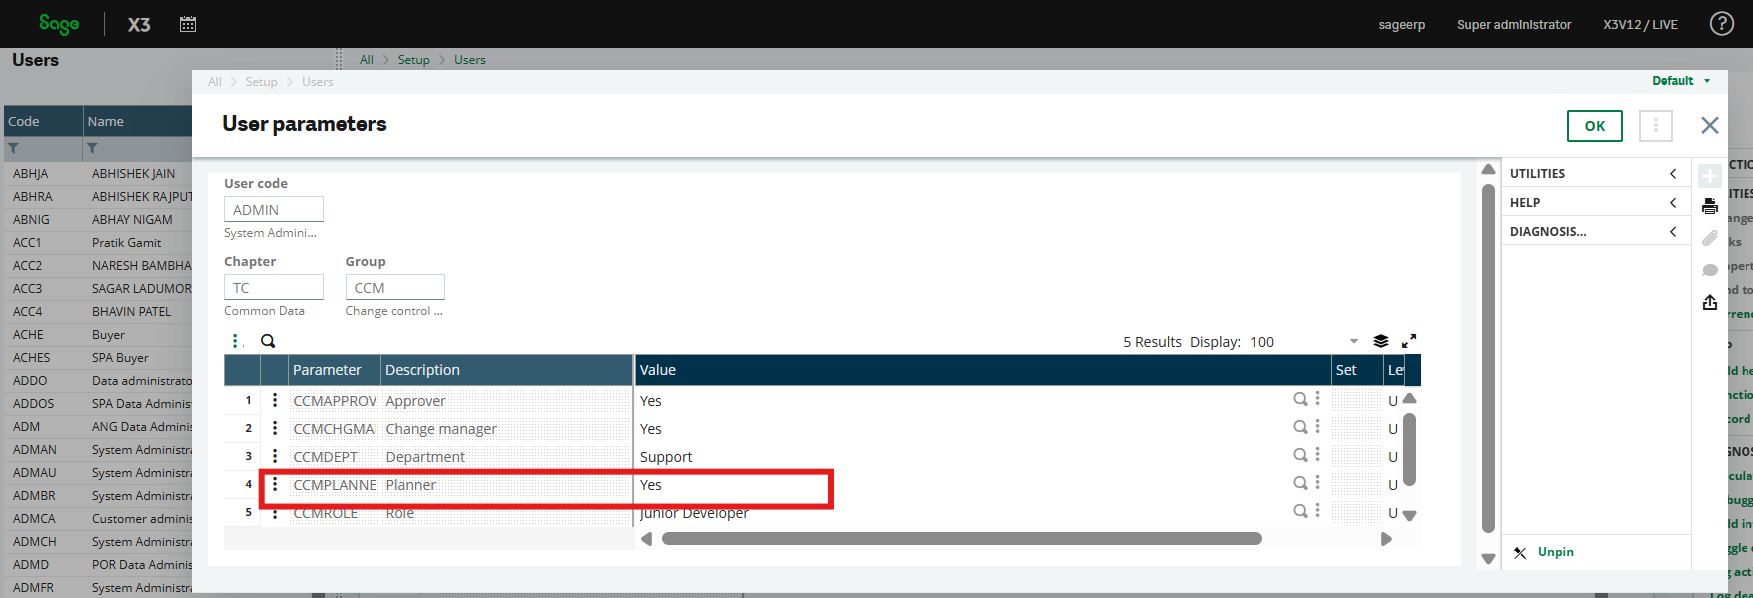
2. Navigate to Setup → User.
For the user who will create the change request, set the Change Control Management access to Yes.


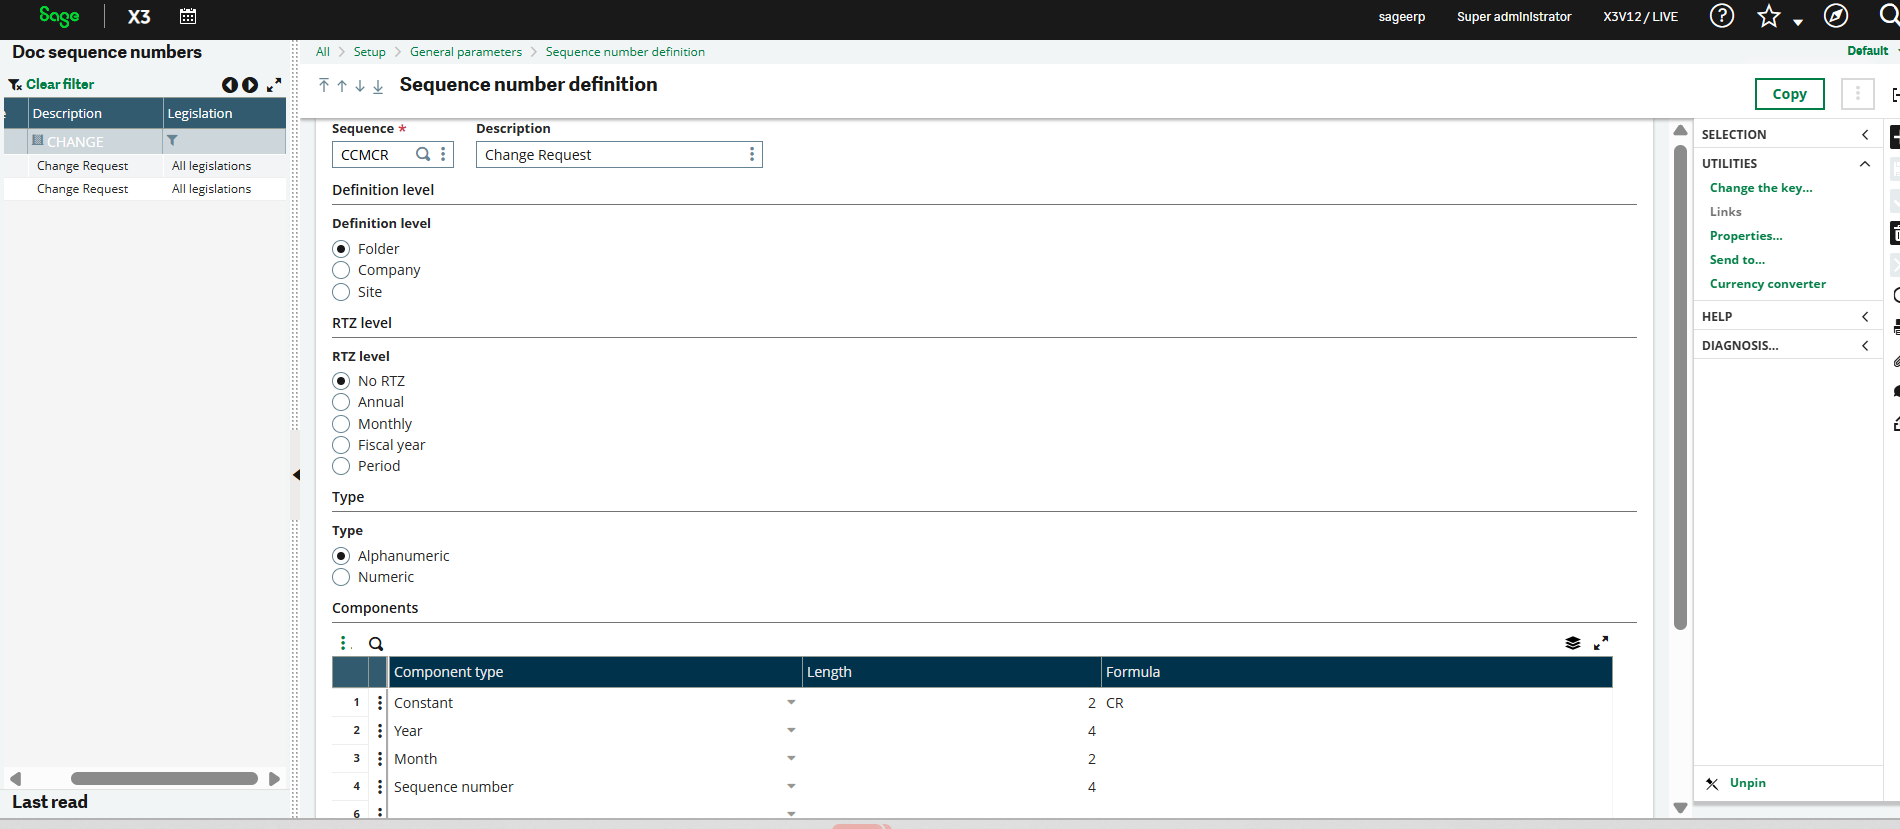
3. Create a new sequence number in the structure CCMCR (Change Request).
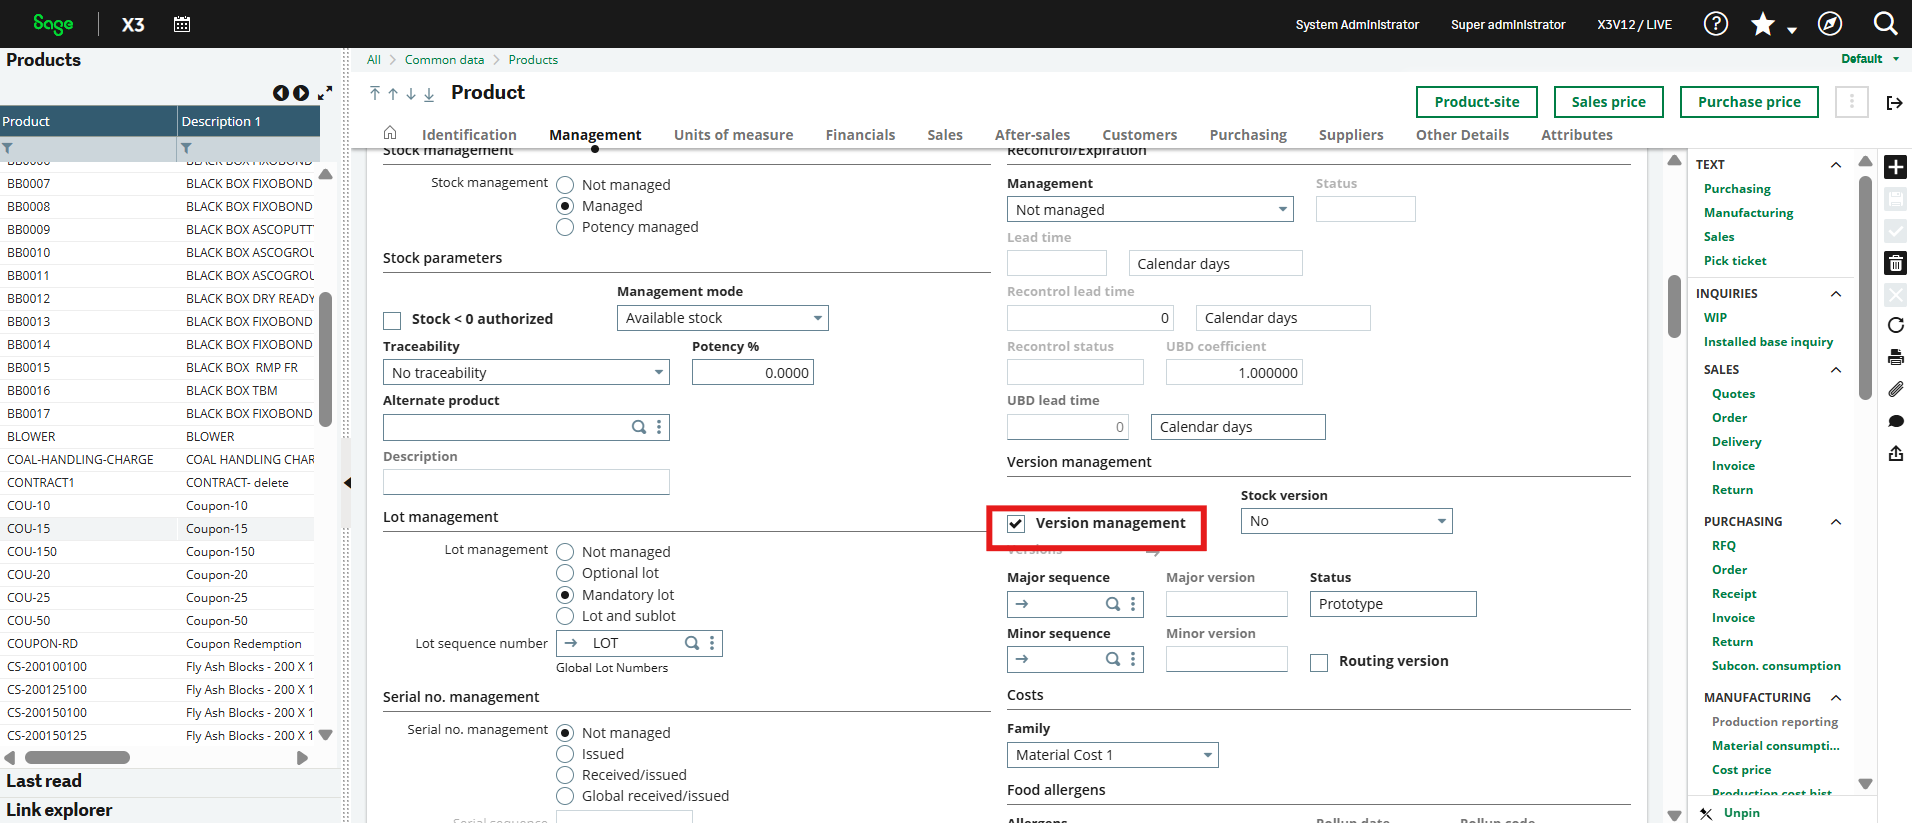
4. Kindly ensure that, for any product you select, Version Management is enabled in the Product Master.
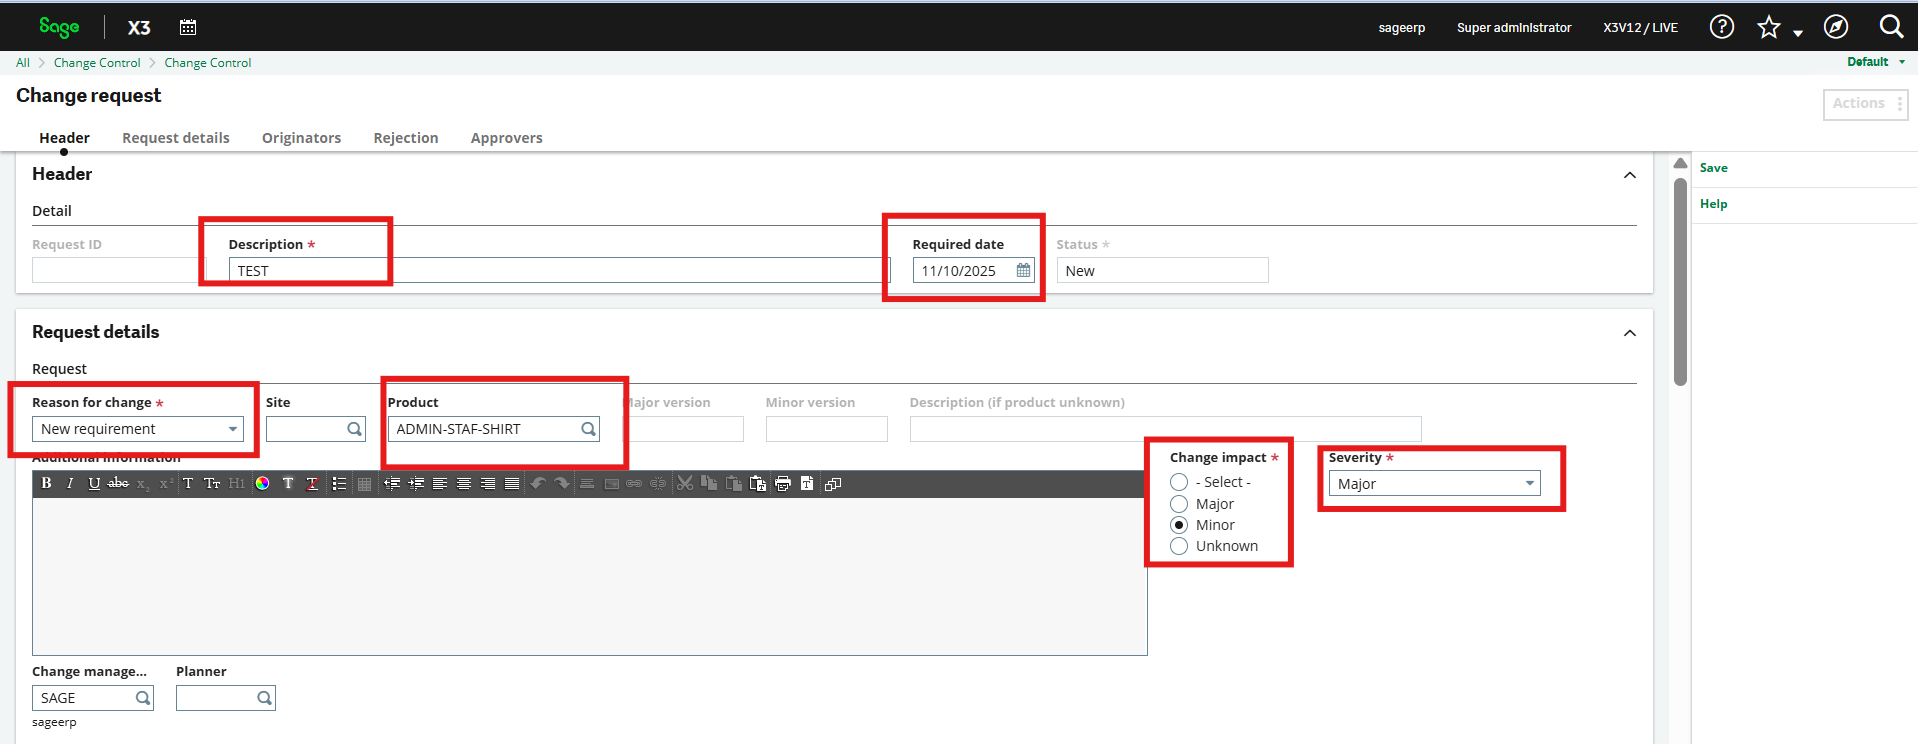
5. After that, you can create a Change Request, where you can enter details such as:
- Description
- Required Date
- Reason for Change
- Product
- Change Impact
- Severity
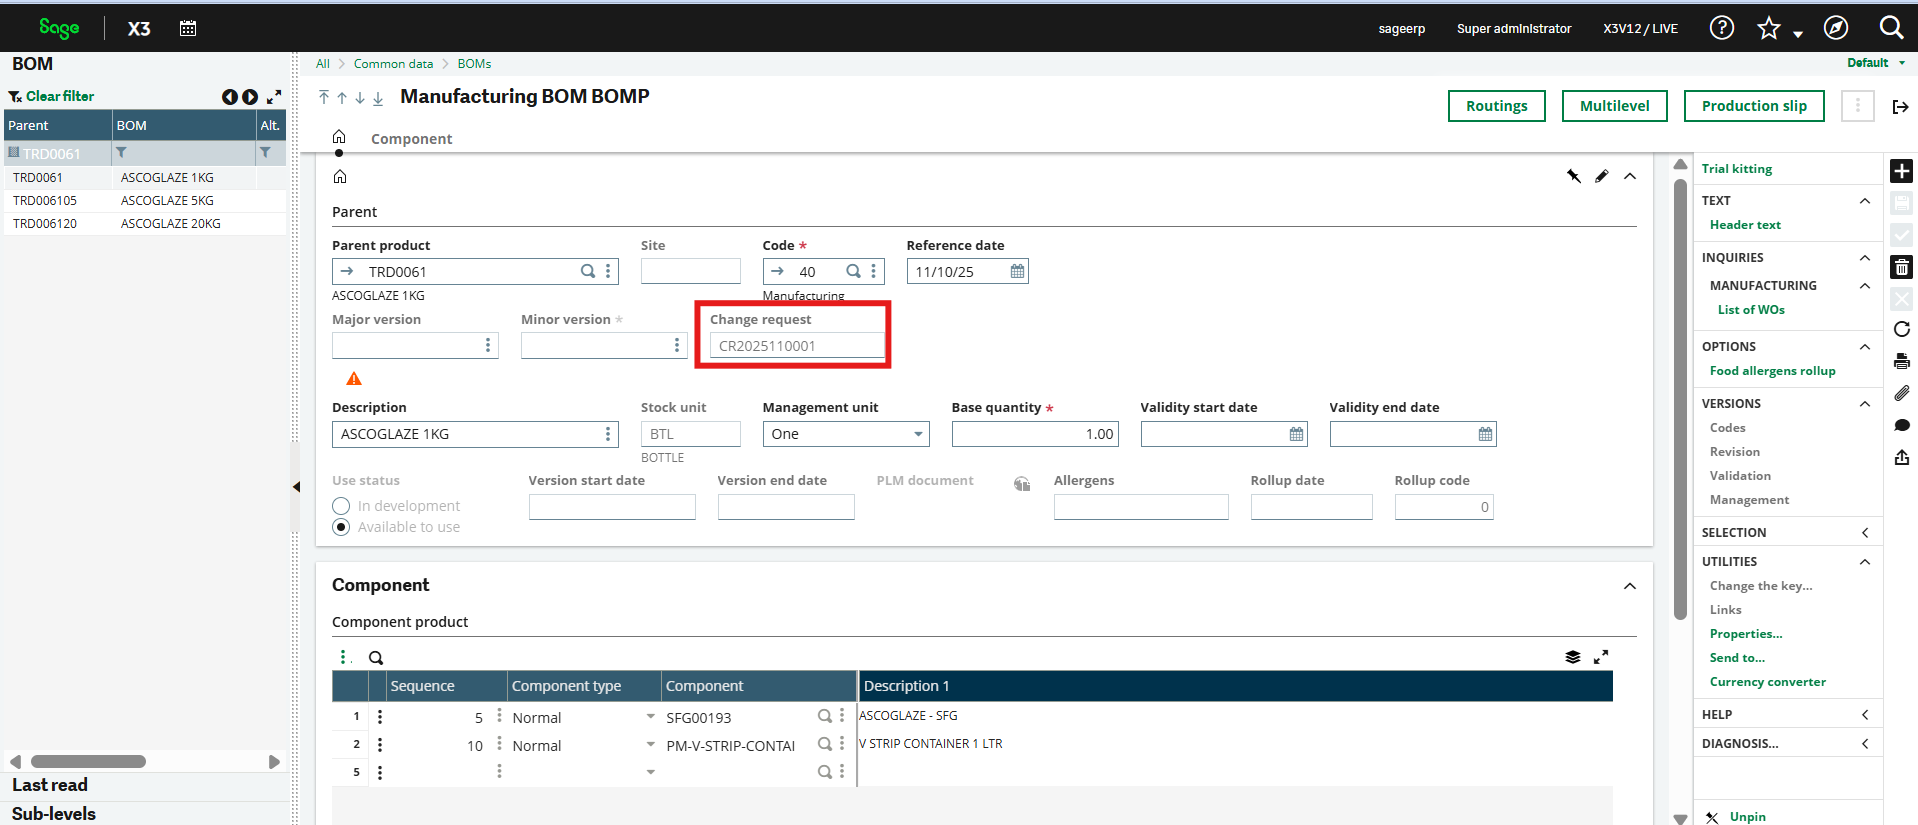
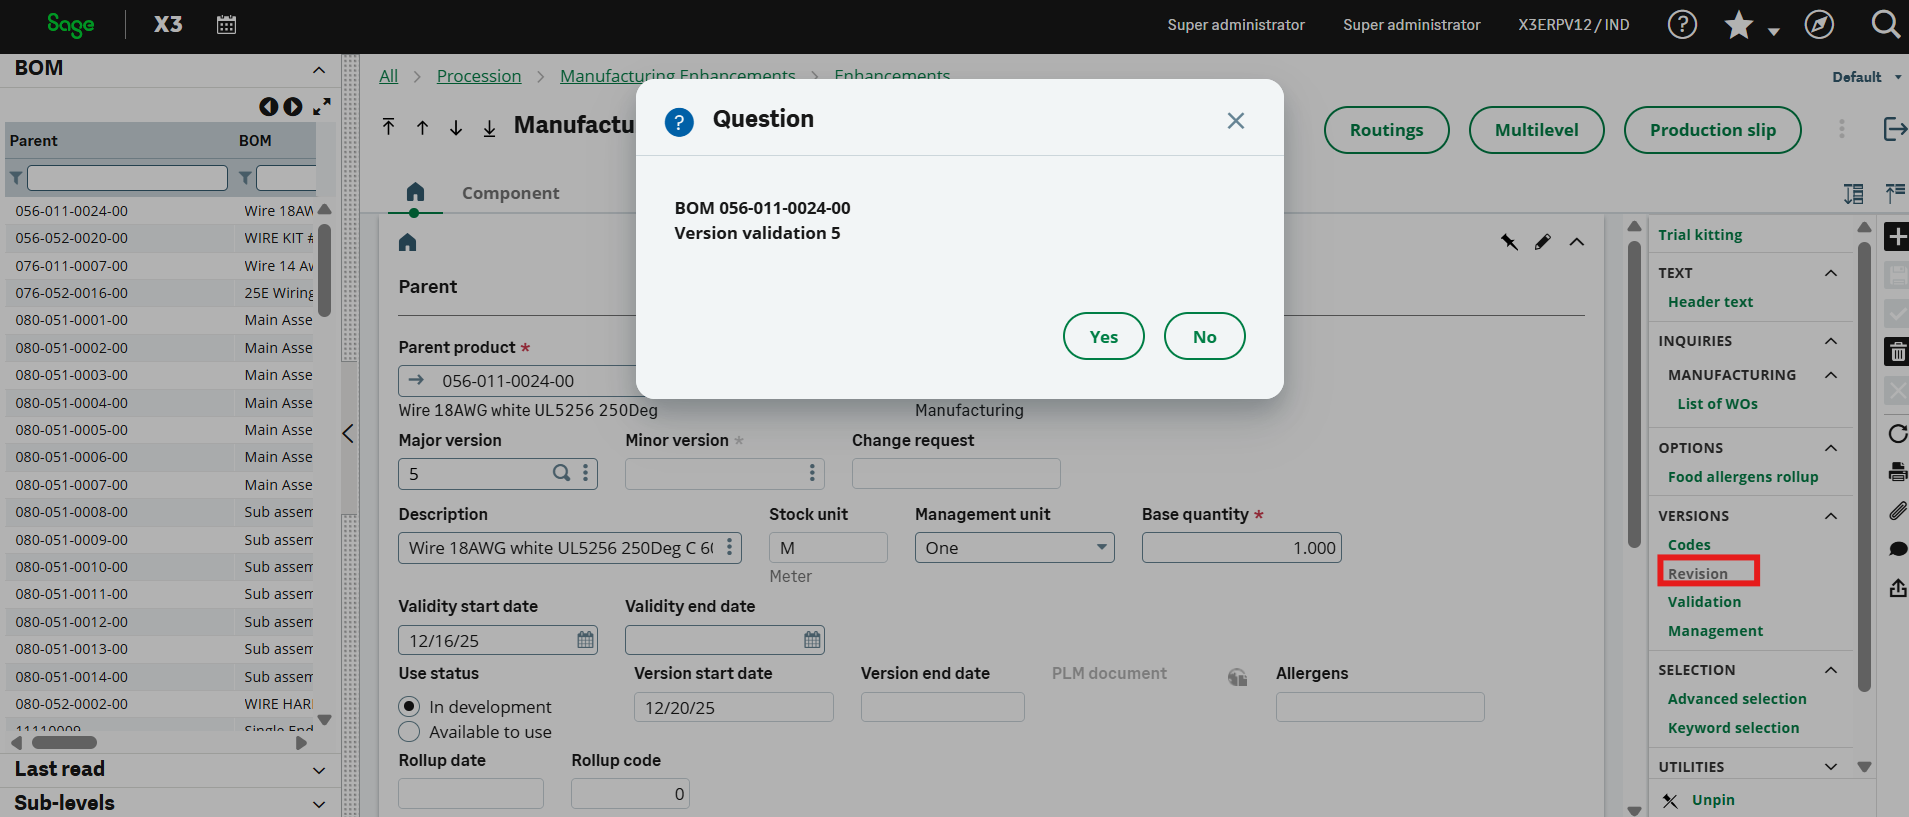
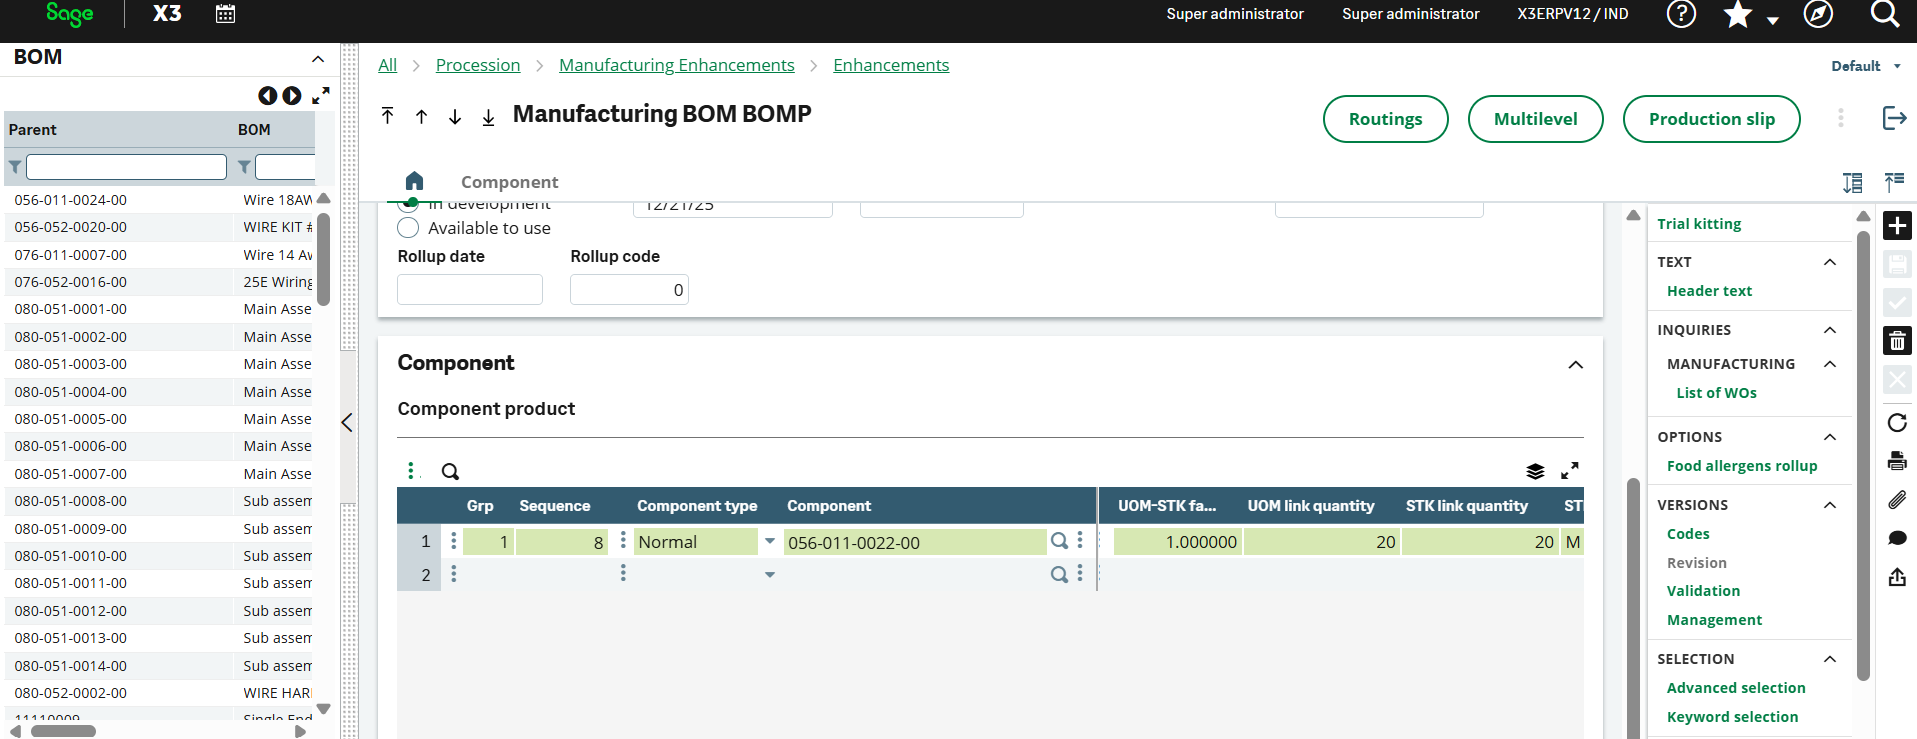
6. Once the Change Request is created, open the BOM (Bill of Materials) for the same product. Initially, keep the Change Request status as “New Requirement.” After creating the Change Request, update the status to “Review.” Once this is done, the Change Request Number will be displayed in the BOM.
Here, you can view the Change Request Number in the BOM.
7. Next step is to change the status to “Planning” and go in user and allow the user of planner and allow to “YES”
8. Go to parameter value and enter the name for the default planner
- When a change request has been reviewed and is ready for planning or is currently in planning, and a project manager has been assigned to it.
- You need to assign a planner or a project manager when you select this status.
- You can revert the status of the change request from in planning to in review. If you do this, the action plan is deleted automatically.
- The planning status and the status of the action plan are directly linked. Manually clearing all Planning complete checkboxes in the action plan automatically sets the status of the change request to in planning.
9. If you need to update the planning status, click on ‘Planning Complete’
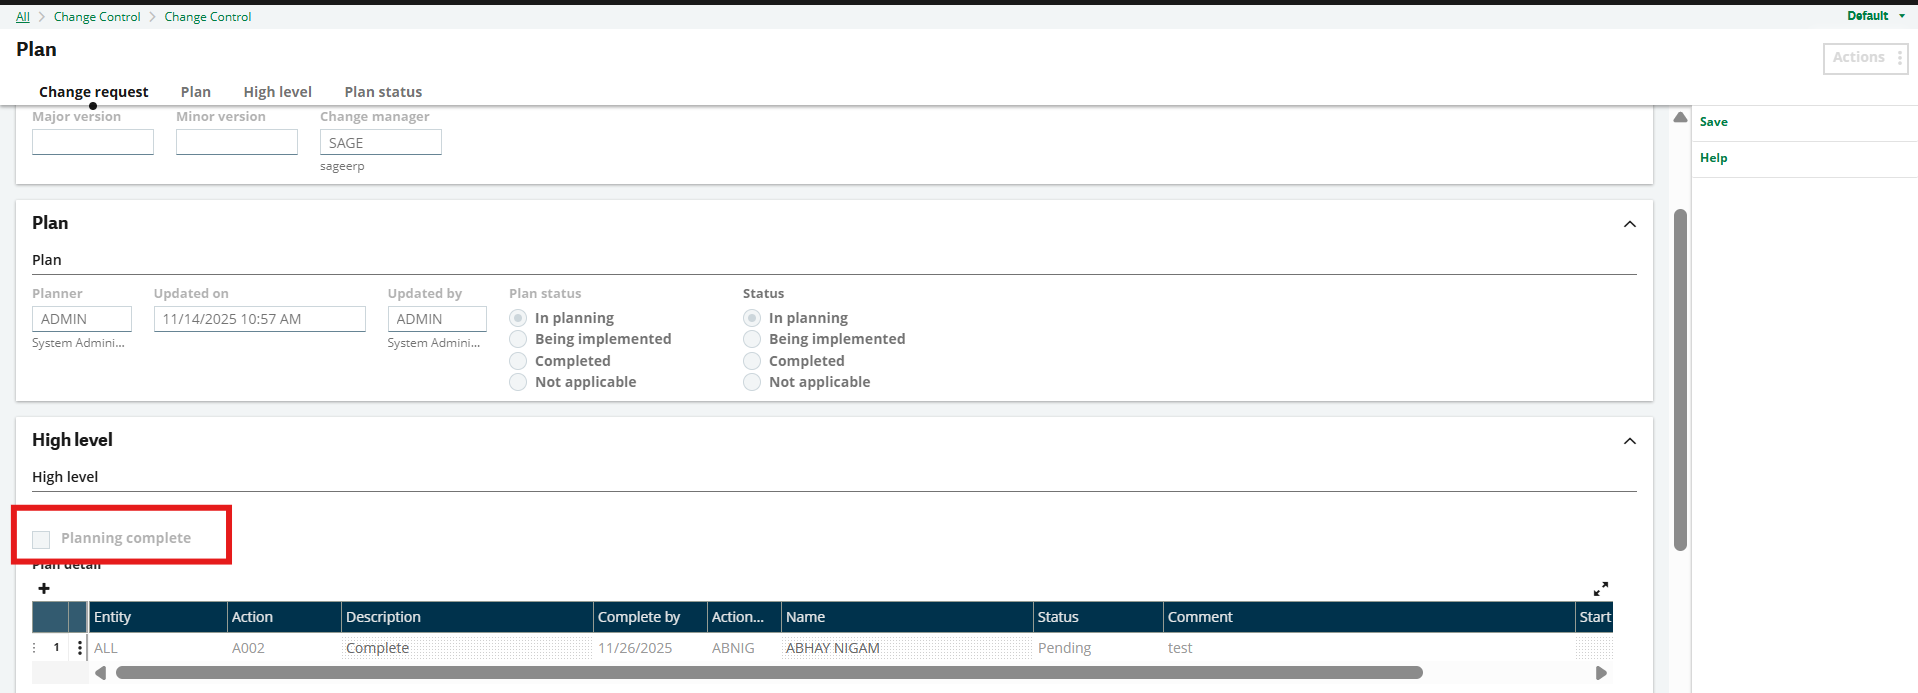
10. Once the planning status is completed, you may update the status to ‘Completed’

11. Then, we will create the BOM and generate a change request number.

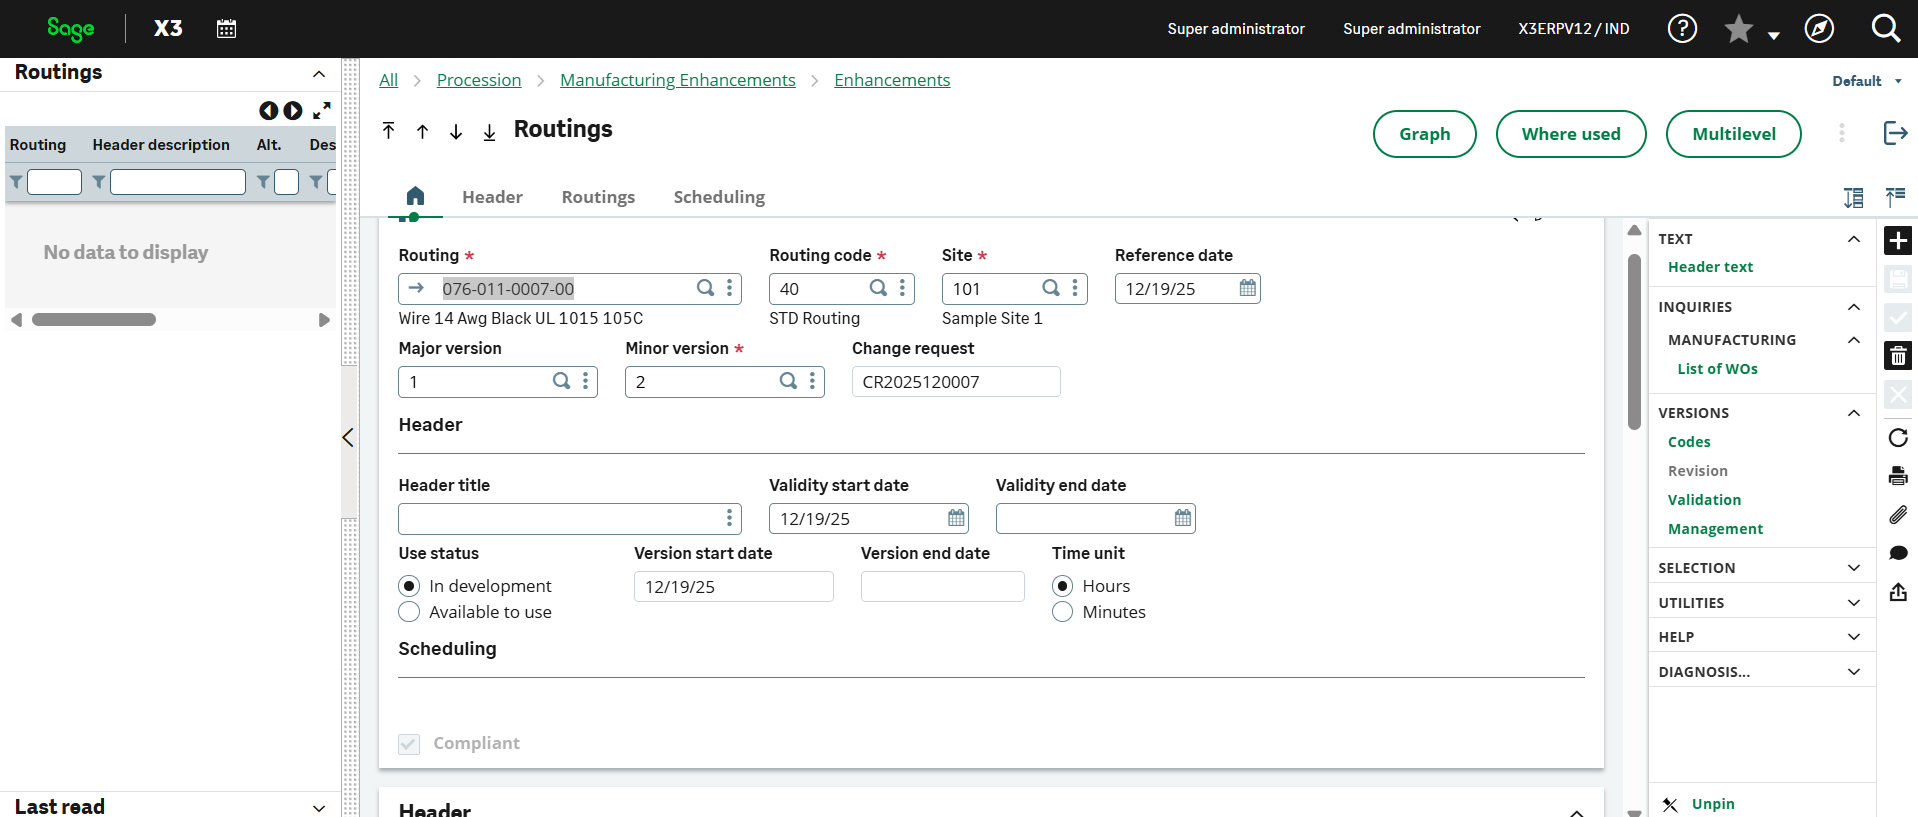
12. Create a “Routing”
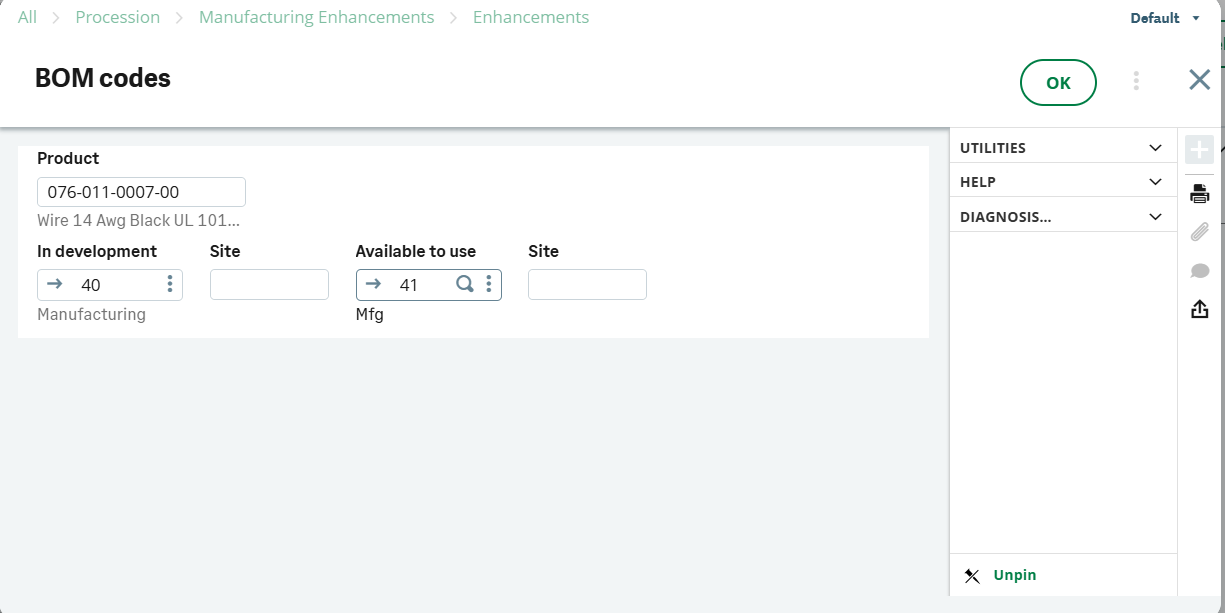
13. Click on the Codes option on the right-hand side and apply another available code. For the example below, we have used “41”
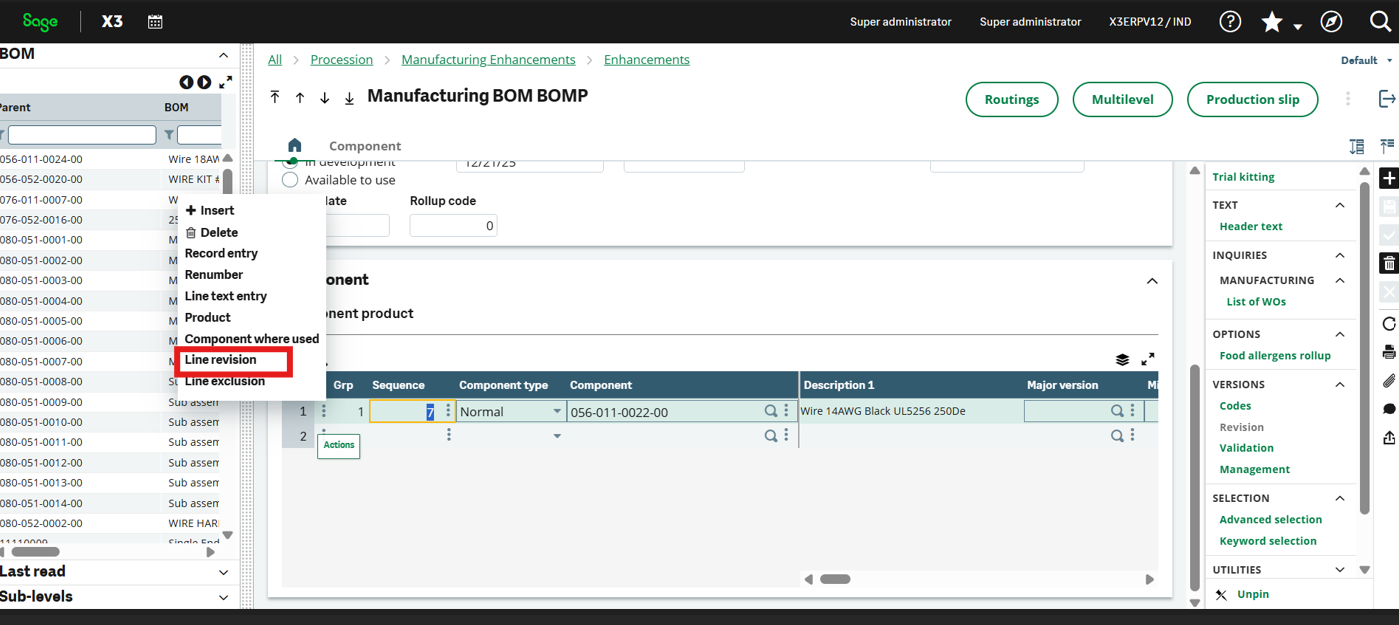
14. If you want to change the quantity, go to the Component, click on Line Revision, enter the revised quantity, and it will be updated accordingly.
15. In the screenshot below, we are modifying the quantity highlighted in green.
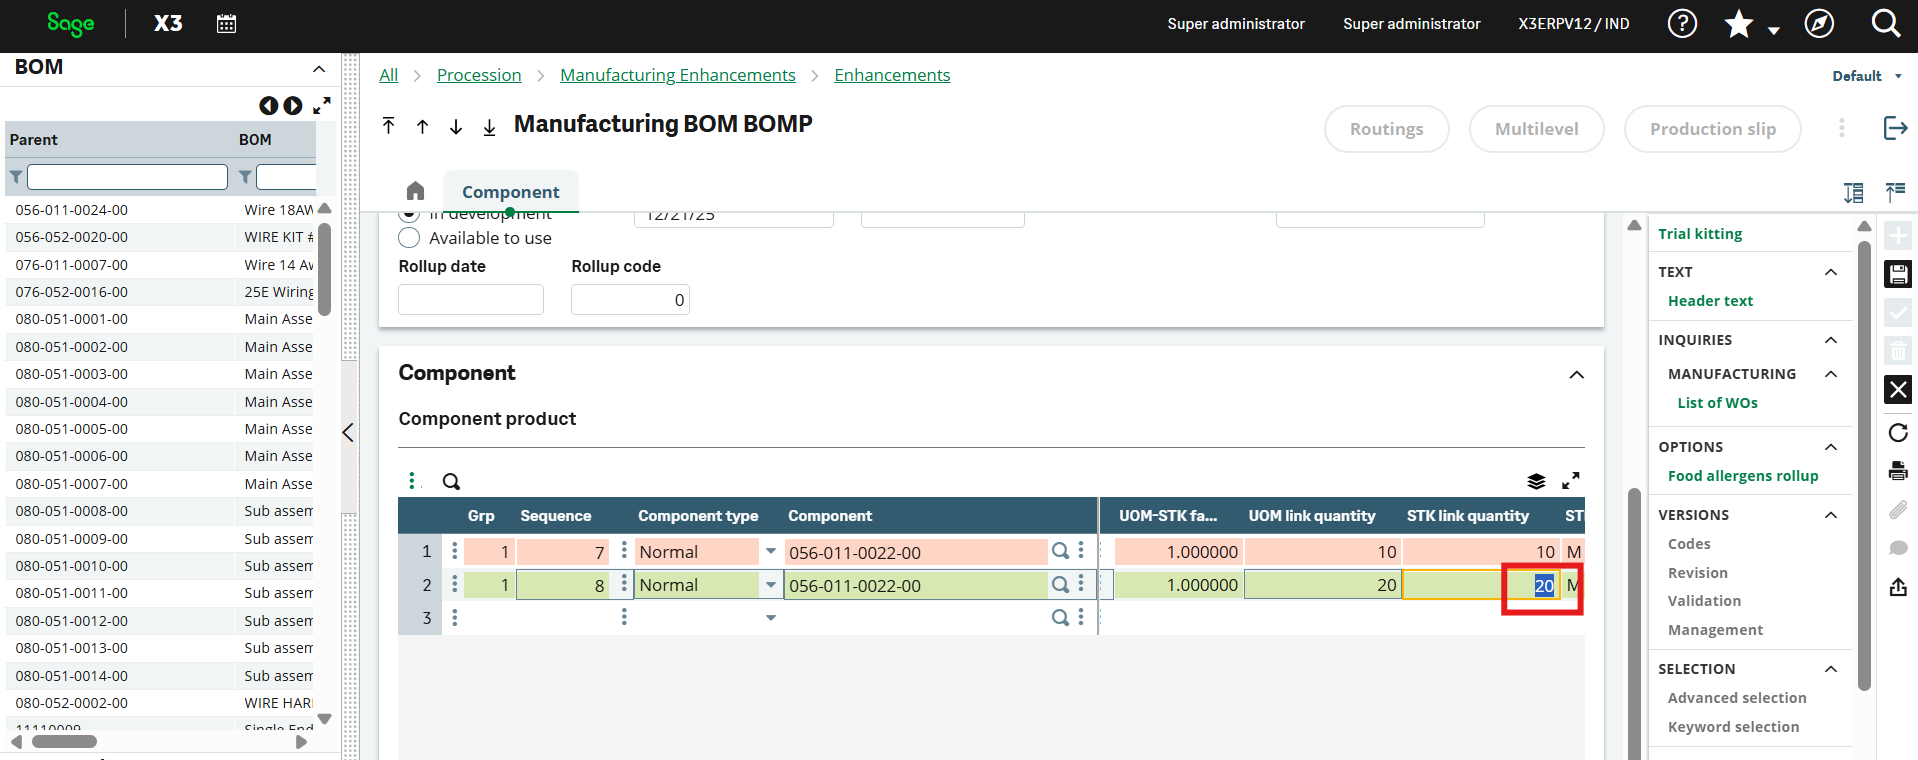
16. Here, the quantity has been updated, and the revised value is displayed accordingly.
Wrap Up
Creating a change request in Sage X3 is broadly divided into three processes. First, you will need to create a new request. Second, you will need to provide the required header information. Last but not least, you will need to provide the change details.