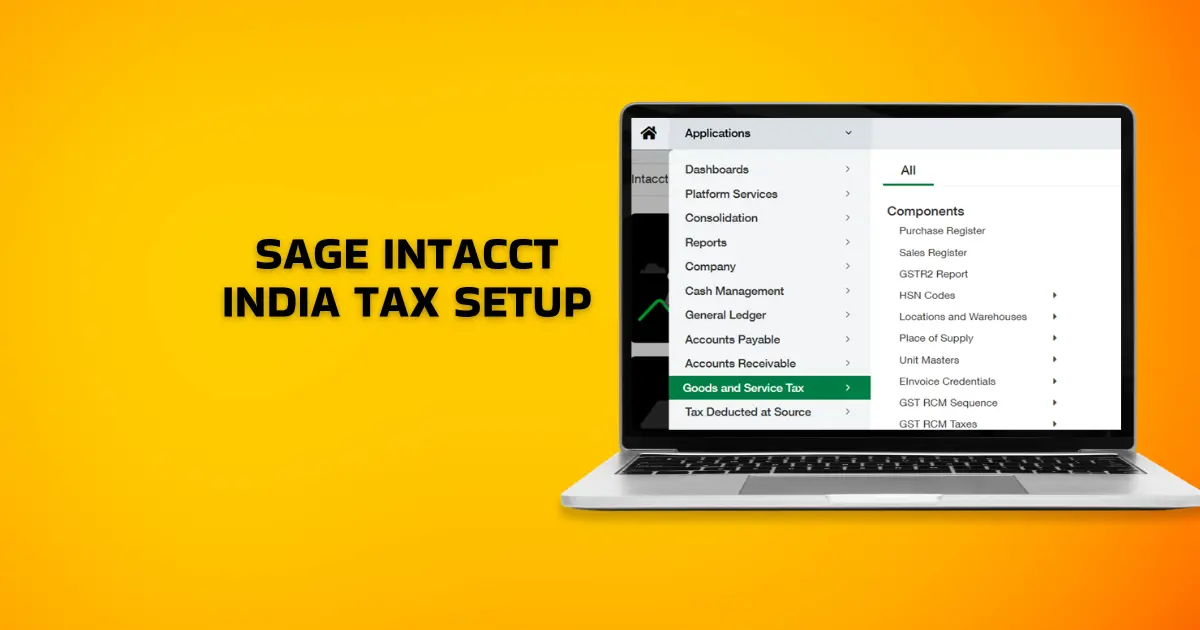
The core modules in Sage Intacct India Localization Suite enable Indian businesses to configure local GST (Goods and Services Tax) and TDS (Tax Deducted at Source). It automates complex taxation processes and simplifies TDS through its advanced taxation features to meet Indian tax compliance requirements. Sage Intacct India tax setup automates GST rates computation, TDS deductions, and regional reporting, in addition to supporting the e-invoicing integration.
Sage Intacct India tax setup process can be broadly classified into two parts. First, you will need to set up the tax configurations. Second, you will need to set up the GST Masters using the GST module in Sage Intacct. To use the GST module in Sage Intacct, a few master setups need to be completed. These setups play a major role in understanding how GST will be applied to transactions. The configurations depend on standard modules and some additional information that will be further required.
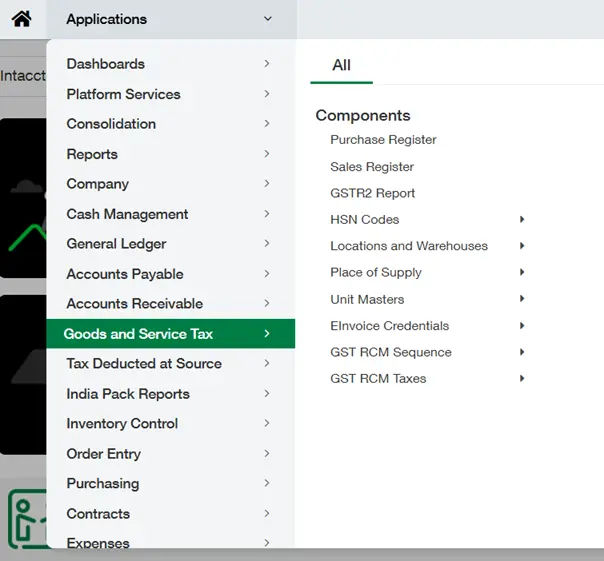
Here’s the snapshot of the GST module on deployment:
1.1 How to Set Up Tax Configuration in Sage Intacct?
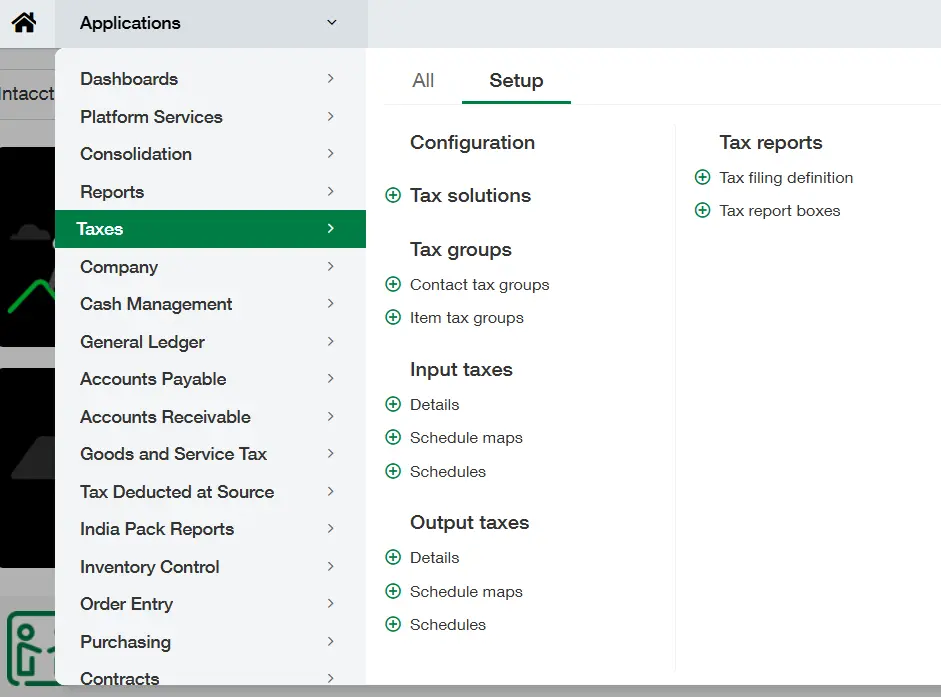
Firstly, the user will have to configure Taxes as per the Indian taxation system. Let us first configure Taxes to make use of it in the Sales and Purchasing modules. From the screenshot, we can see all the Tax configuration screens required. Here, we can also notice that the Taxes for the Sales and Purchasing modules are differentiated based on Output and Input Taxes, respectively.
If you need any help with the Sage Intacct India tax setup, feel free to contact our Sage Intacct support services team.
1.1.1 Tax Solution
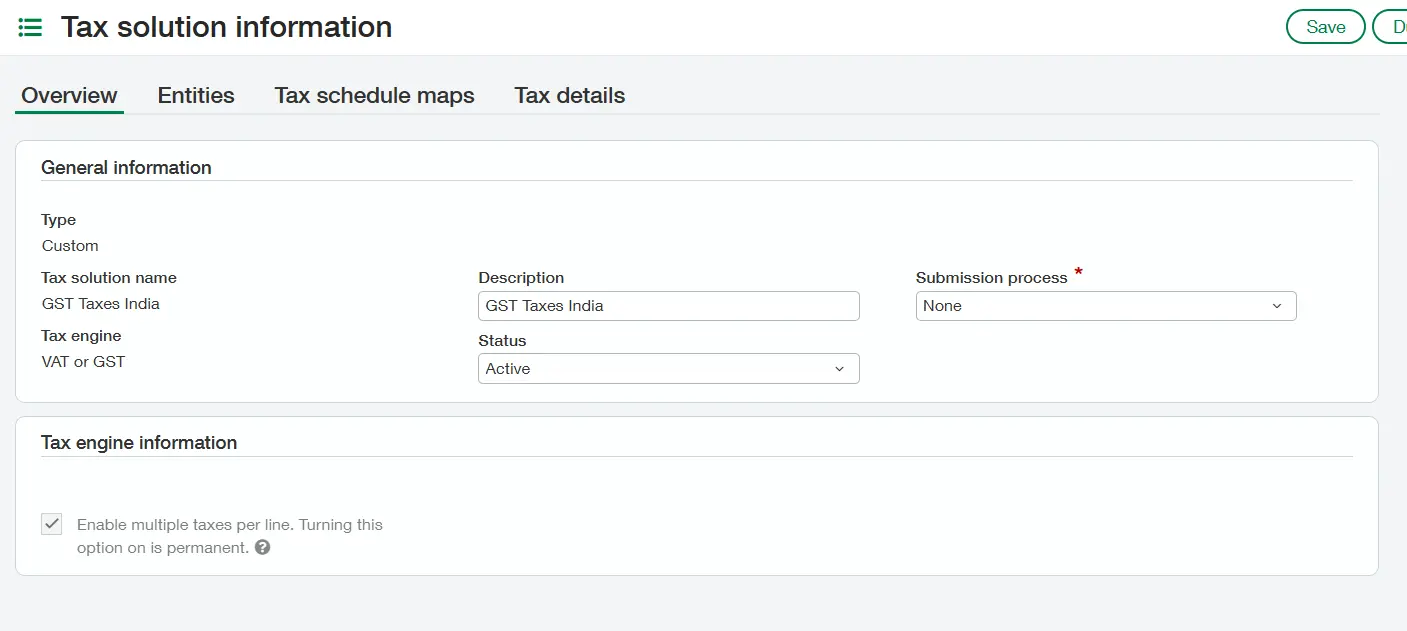
The Tax Solution screen is the main screen to define which type of Tax system the entities will follow. Here, we create the Tax Solution and assign it to the entities accordingly.
1.1.2 Contact Tax Group
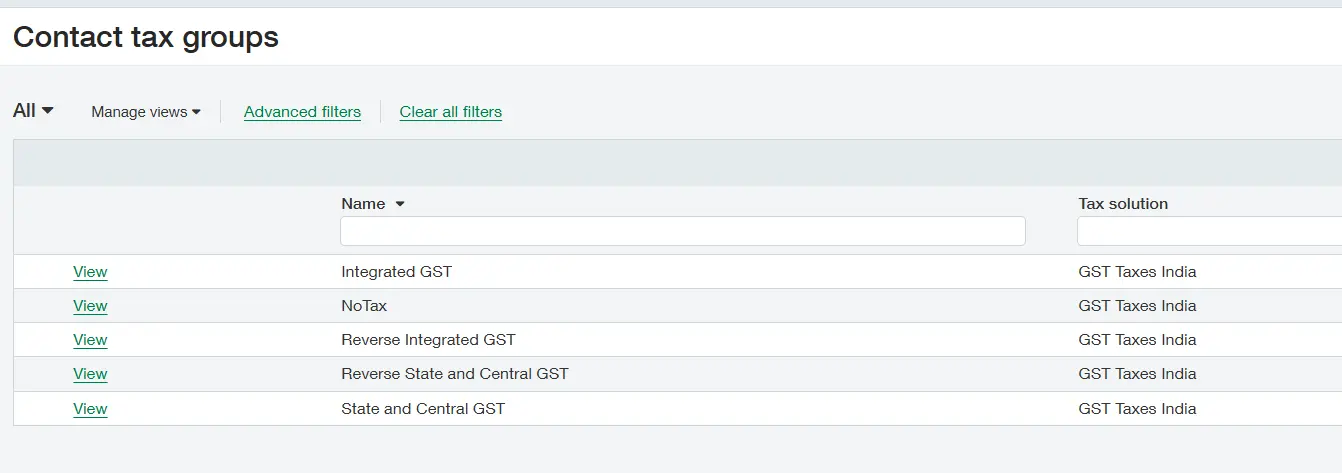
Contact Tax Group information needs to be added to the screen, which is then fetched in the Vendor and Customer Master Screen. Contact Tax Groups such as IGST, SCGST, and NOTAX can be created as per requirement, while assigning them to the Tax Solution created in the first step.
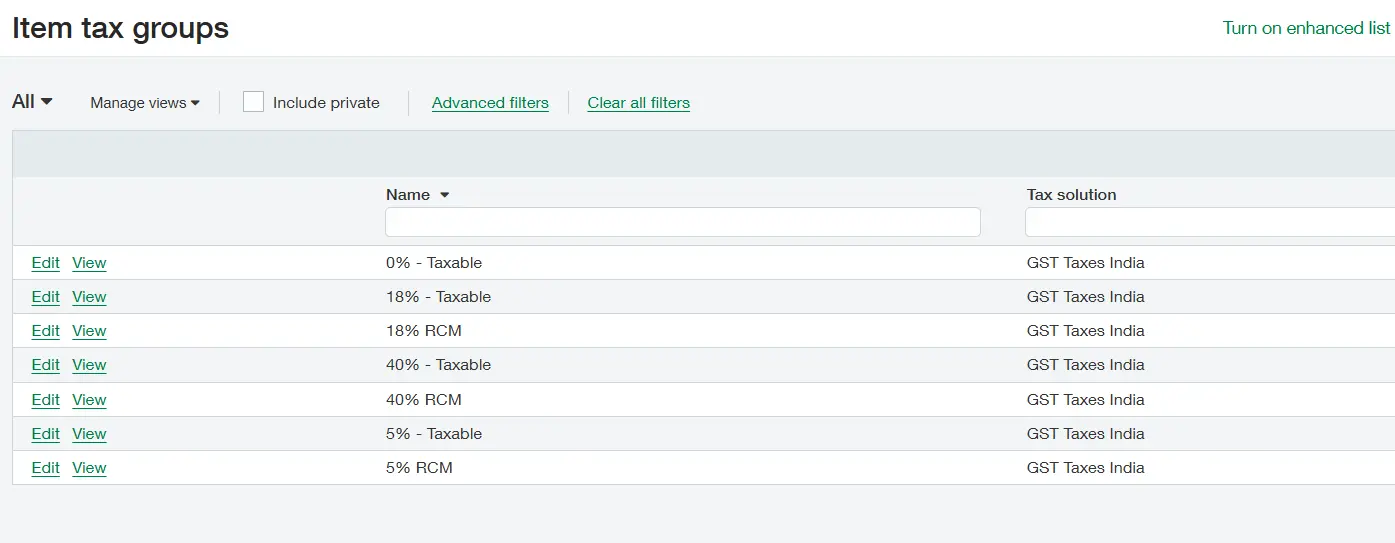
1.1.3 Item Tax Group
Item Tax Group information is added in this screen, which is then fetched in the Item Master screen. Here we can create Item Tax Groups such as IGST, SCGST and NOTAX as per the GST rates while assigning them to the Tax Solution created in the first step.
1.1.4 Tax Detail
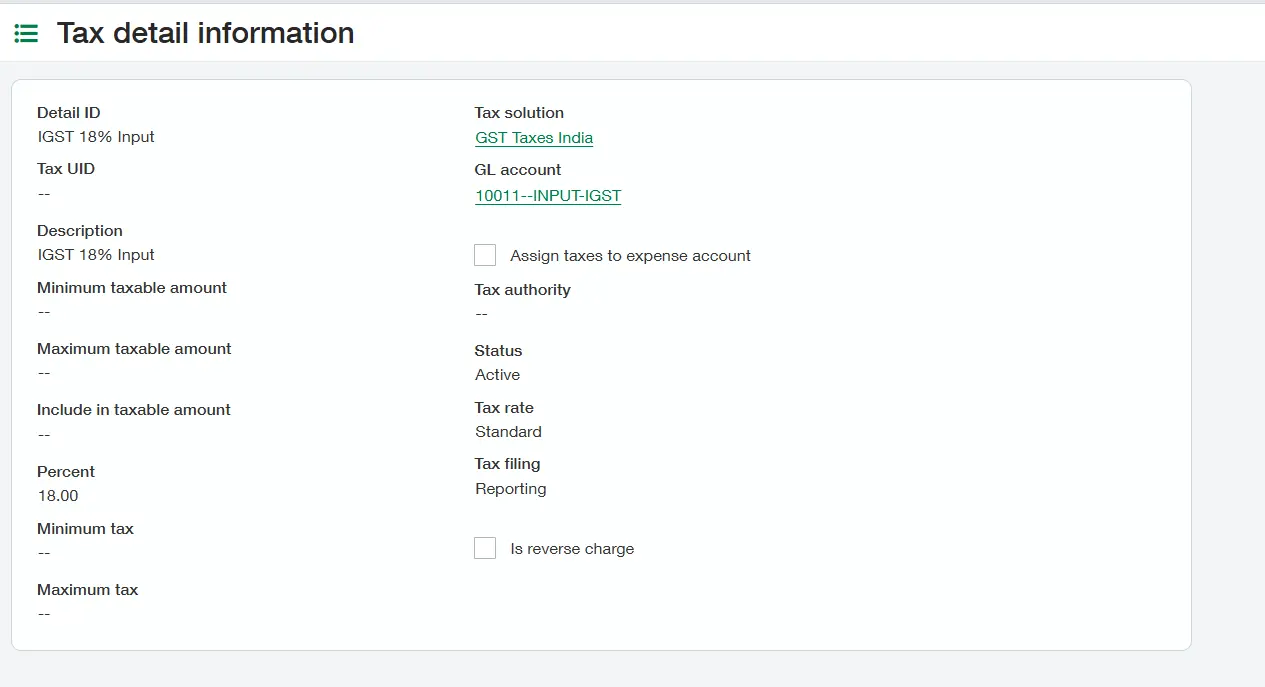
After the creation of the Contact Tax Group and Item Tax Group, the user can now configure the Tax Details screen for both the Sales and Purchasing modules. Configuring Taxes in the Input Taxes section helps users to apply them in purchasing transactions, whereas taxes in the Output Taxes section are applied in Sales Transactions.
Here in Tax Details, the user needs to enter the details mentioning the percentage of tax to be deducted when used in transactions. Also, we need to assign this detail to a particular Tax solution and GL Account, which are mandatory fields.
1.1.5 Tax Schedule
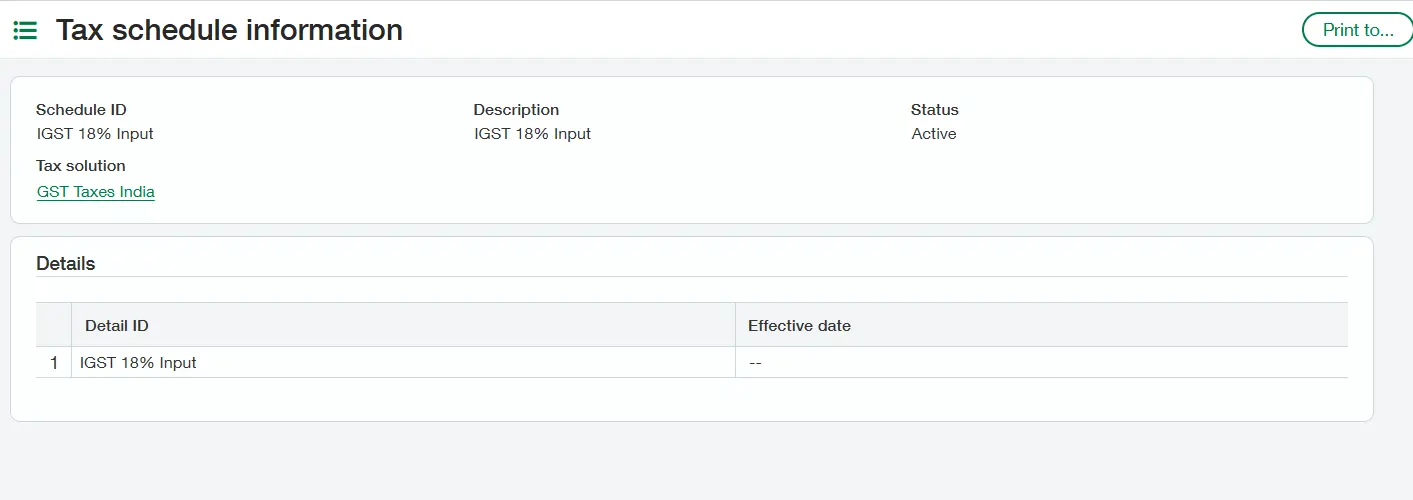
In Tax Schedule information, we can insert multiple Tax Details lines, thereby grouping them and assigning them a Schedule ID to use it in case of multiple detail Line Taxes in Transactions. We also assign Tax Solution to this Schedule ID information, which is mandatory.
There is a column of Effective Date beside Detail ID to ensure the date from when it starts affecting when in used in Transactions.
1.1.6 Tax Schedule Map
This is the last step for Tax configuration in the Sage Intacct India tax setup. Here, as the name suggests, we map the Taxes created in the above steps to a particular Transaction screen. Mapping of a Tax Solution to Contact Tax Group, Item Tax Group, and Tax Schedule is done here, whose combination is then assigned to a particular Transaction screen. This step is very important, as the user cannot use any Taxes created if they are not mapped with the proper combination here.
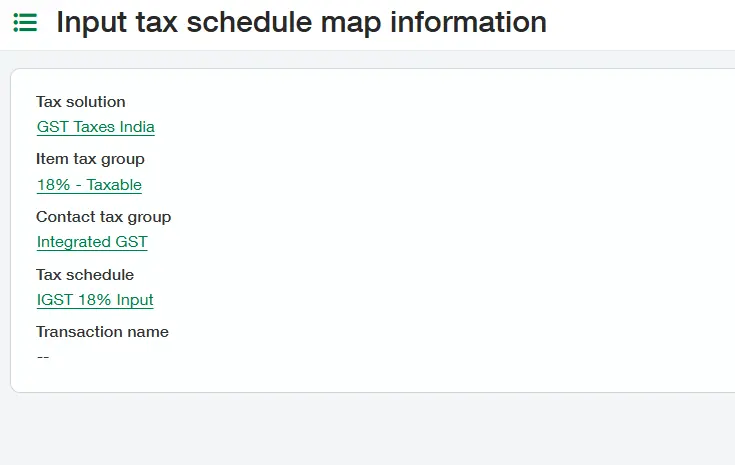
Also, note that Taxes created in the Input Section (Purchasing) cannot be used in the Sales Transaction modules
Similarly, Taxes created in the Output Section (Sales) cannot be used in Purchase Transaction modules.
1.2 Other GST Masters Setup
Below Masters are configured under the GST module so as to meet various GST requirements like Sales Purchase details, E-Invoicing, etc. These fields need to be properly configured for GST-related transactions and reporting as part of our Sage Intacct India tax setup.
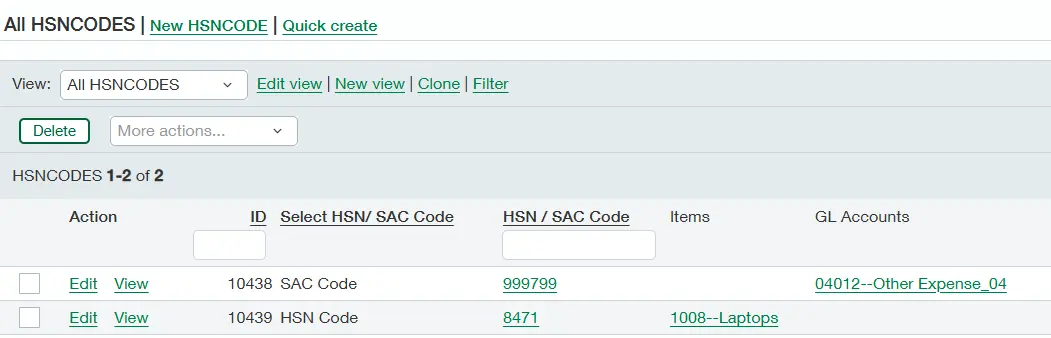
1.2.1 HSN Master
We can see from the image the HSN Master Screen, which is used to set HSN and SAC codes for Items and Services, respectively. These saved HSN/SAC Code values can then be used in the detail lines of Sales and Purchasing Transactions where Items/Services are fetched. HSN codes for the respective Items need to be configured for smooth E-invoicing functioning.
1.2.2 Location and Warehouse
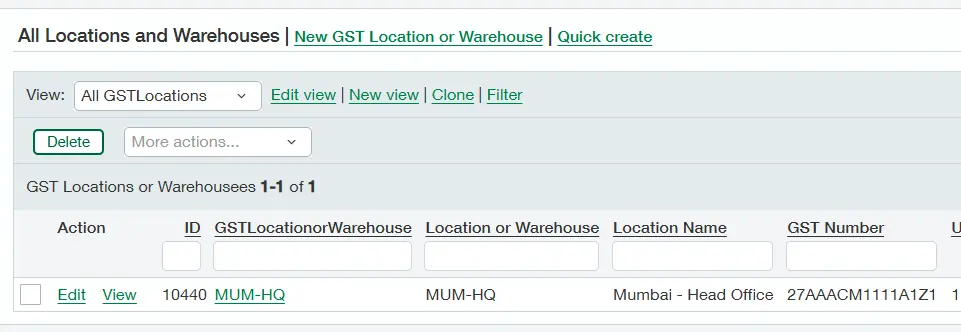
The Official GST Law and Procedures Handbook (Commercial Taxes Department, India) outlines threshold limits and registration rules (Section 22) for Indian businesses. While setting up multi-entity businesses in Sage Intacct, you are required to set up a unique GSTIN per entity branch.
Image Location and Warehouse Master Screen, which is used to set GSTIN details for different branches in India for GST reports and the printable format of Tax Invoices and Vouchers.
1.2.3 Place of Supply
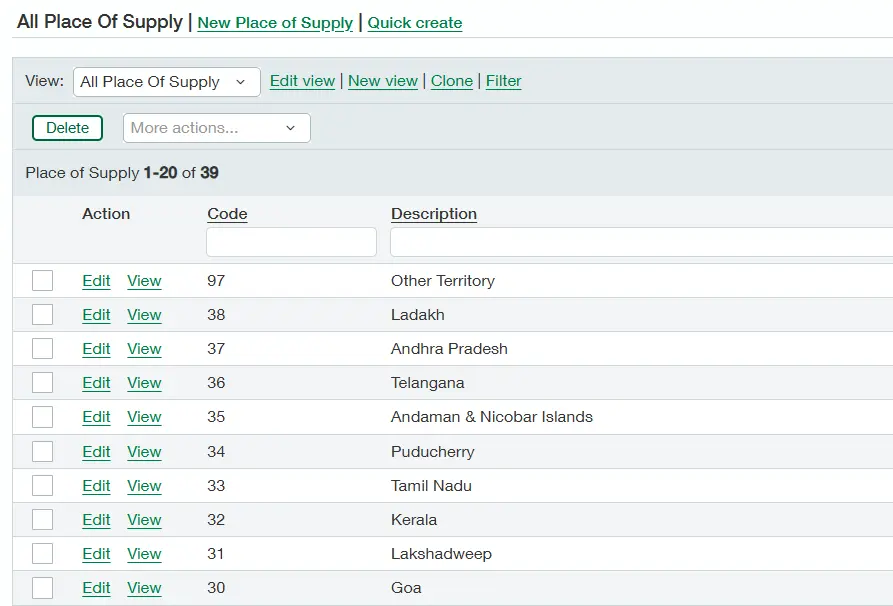
The Place of Supply is used to determine whether to apply IGST or CGST+SGST on a transaction and ensures accurate data formatting for E-Invoicing and GSTR filing.
1.2.4 Unit Master
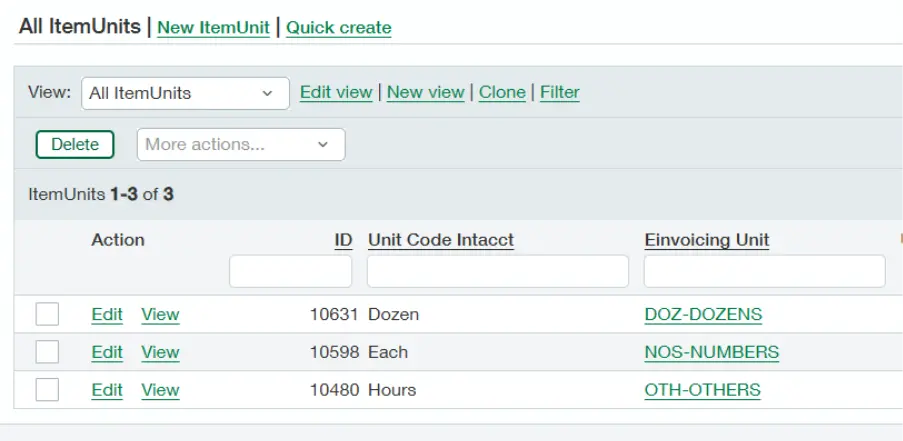
Unit Master is used to save data that is later used for E-Invoicing functionality in AR and OE screens. AR Screen does not require a Unit value; hence, the default ‘OTH’ is considered. The field is mapped for OE transactions in the Item Detail line as ‘Unit ’, where the user needs to map the respective Sage Intacct Unit with the Unit value as specified in the Government portal.
For example, if the transaction detail has ‘Each’ as per Sage Intacct, then while E-invoicing, ‘UNT’ will be considered (which is a valid Unit as per Government rules) as per the mapping done in the ‘ItemUnit’ masters of GST.
1.2.5 E-Invoice credentials
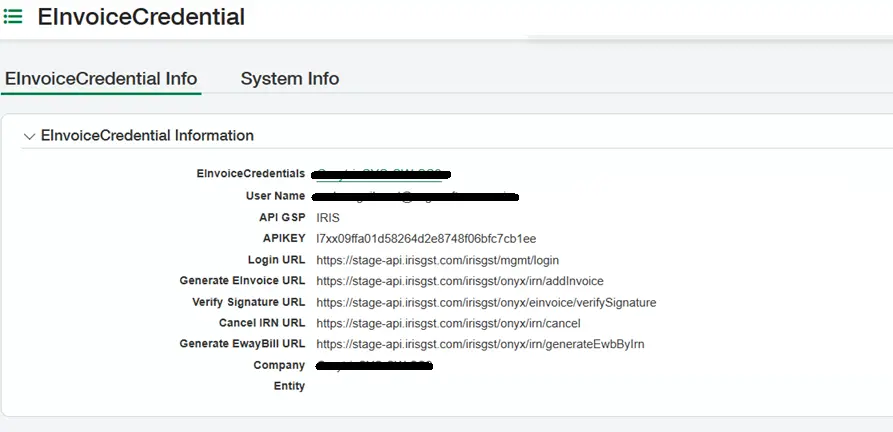
The E-invoice Credentials screen is used to store credentials that are received from IRIS (SOVOS), i.e., GSP, in order to generate the E-invoice within the system, along with support URLs that are required to function.
1.2.6 GST RCM Sequence
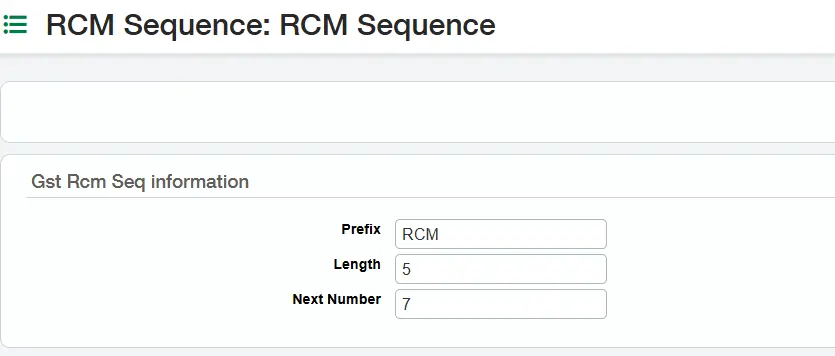
Through this screen, you can define the prefix, length, and next number generation for the RCM-related transaction in order to keep a record of the RCM Transaction in the system.
1.2.7 GST RCM Taxes
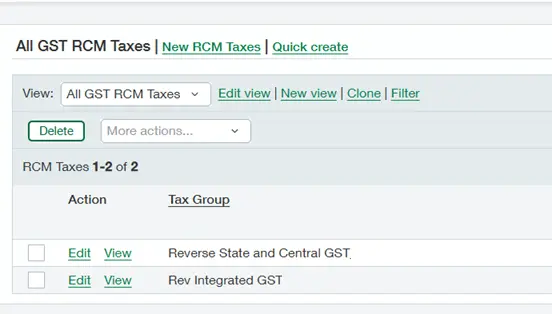
This screen maps the RCM Contact Tax Groups from the Taxes module to the GST module, enabling the system to correctly identify and apply reverse charge taxes during transactions.

Summary
Sage Intacct is a robust financial solution that empowers your business with rich financial insights for better decision-making, and streamlines GST and TDS compliance process. In this blog, we discusses the steps for Sage Intacct India tax setup (with screenshots). Overall, the process involves configuring basic tax parameters, mapping solutions, and defining your tax objects. By following this procedure, your business can stay compliant with the Indian tax regulations, including GST and TDS. Moreover, Sage Intacct will simplify your returns filing and claiming input tax credit. You will be able to streamline everyday financial tasks such as AR and AP automation, and tax invoice generation (through integrated e-invoicing), leading to reduced financial & compliance risks.