What is Positive Pay?
A positive pay system detects fraudulent checks at the point of presentment and prevents them from being paid. This means that checks that have had their payment amounts altered or which are derived from stolen check stock will be flagged by the bank. This is an effective way to stop check fraud. The basic positive pay steps are noted below.
Step 1. Send Information to Bank
The issuing company periodically sends a file to its bank, in which are listed the check numbers, dates, and amounts of all checks issued in the most recent check run. Some banks also accept files from submitting companies that contain the name of the payee for each check, which should prevent someone from illegally altering the name of the payee and having the payee issue payment to the altered entity.
Step 2. Compare Presented Checks to Payment Information
When a check is presented to the bank for payment, the bank teller compares the information on the check to the information submitted by the company. If there is a discrepancy, the bank holds the check and notifies the company
Reverse Positive Pay
A variation on the positive pay concept is reverse positive pay, where the bank sends information about its check acceptances to the company on a daily basis, and pays those checks that are approved by the company. Realistically, if the company does not approve the checks within a relatively short time frame, the bank will be compelled to pay the checks. Thus, reverse positive pay is not as effective a control as positive pay.
RBI had issued guidelines for banks to implement this system from January 1, 2021, to safeguard against cheque frauds. Here is all you need to know
Banks have been informing customers about making mandatory, the positive pay system, a process of reconfirming the key details of high-value cheques.
The Reserve Bank of India (RBI) had issued guidelines for banks to implement this system from January 1, 2021, to safeguard against cheque frauds. Here is all you need to know:
What is the Positive Pay System?
The Positive Pay System, developed by the National Payments Corporation of India, is a process of reconfirming the key details of large value cheques. Under this system, a person issuing the high-value cheque submits certain essential details of that cheque like date, name of the beneficiary/payee amount etc. to the drawee bank. The details can be submitted through electronic means such sas SMS, mobile app, internet banking, ATM etc. The details are cross-checked while issuing the cheque and any discrepancy is flagged.
What is the limit on the amount for the system?
RBI has told banks to enable the facility for all account holders issuing cheques for amounts of ₹50,000 and above. It has also said that while availing of the facility is at the discretion of the account holder, banks may consider making it mandatory in case of cheque values of ₹5 lakh and above.
Why is this system important for customers?
Some banks have been telling customers that if the details of large-value cheques are not pre-registered, the cheque will be returned, unpaid. On issuance of a high-value cheque, customers should ensure that details are provided within the timeframe prescribed by the banks for hassle-free clearance. RBI has said only cheques that are registered in the Positive Pay System will be accepted under the dispute resolution mechanism. Customers would get an SMS on whether the cheque is accepted or rejected for any reason.
What are the details of the cheque that must be submitted?
Account number, cheque number, date of cheque, amount, transaction code, beneficiary name, MICR CODE.
How can these details be submitted?
These details can be submitted through the respective bank’s website, internet banking or mobile banking. In case a customer does not use electronic banking services, they can submit the details by visiting bank branches.
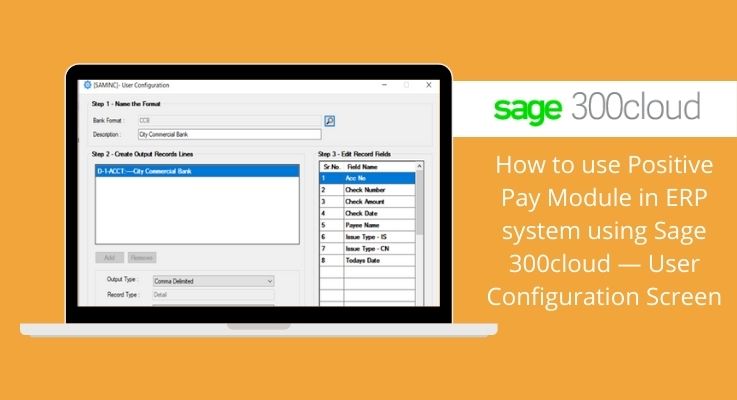
How can we configure Positive Pay Module in Sage 300 Cloud
There are three Menu Types in Positive Pay i.e. User Configuration, Transaction Upload Screen and Transaction Upload History. In this blog we will explain how to configure User Configuration Screen in Positive Pay Module
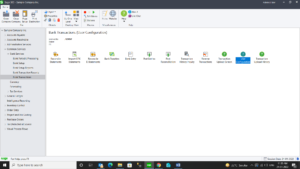
We need to add Menu Type i.e. User Configuration in From Bank Services à Bank Transactions Menu
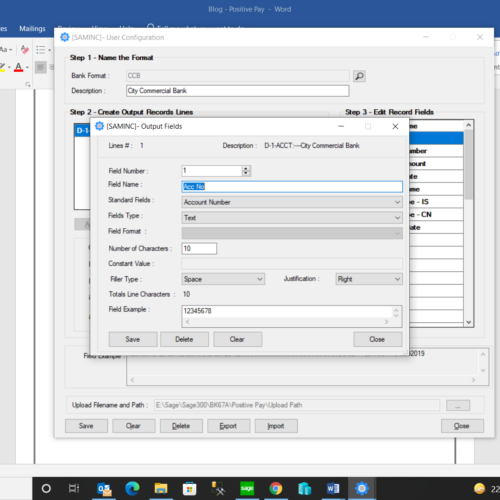
After adding the Menu, we need to Configure Bank details in User Configuration Screen. We need to select Bank Name from the finder button. After selection of Bank name, we need to select Output File format as per the requirement. Then we need to configure Bank Details for e.g. Account Number, Check Number, Check Amount, Check Date, etc. (these all details we can define as per client’s requirement). Once we entered all bank details then we need to define Upload Path where our Output File will be export.
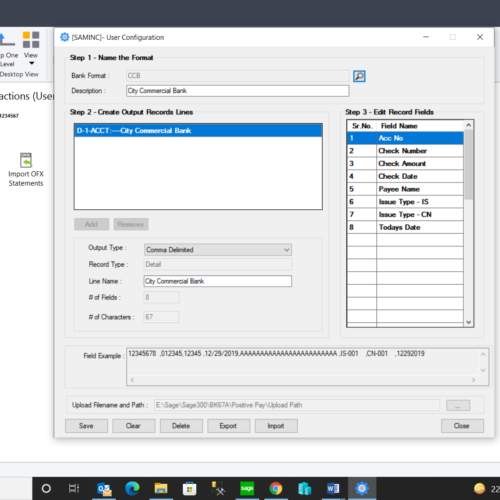
One of Bank details i.e. Account Number where we can add details of Bank Account Number as per the requirement. Like this we can add multiple fields in User Configuration Menu.
Once we update all require bank details then we can pass an entry and can check record in Transaction Upload Screen.
We will upload next Blog of Sage 300Cloud on Transaction Upload Feature in Positive Pay.