Import Feature in Sage 300
In today’s blog, we will see the import feature in Sage 300 which allows users to import entries\master through an excel file. We are going to discuss one of Sage 300 standard features i.e. Import feature and common import errors.
Sage 300 allows you to Import the data according to the screen level fields.
To Import Data:
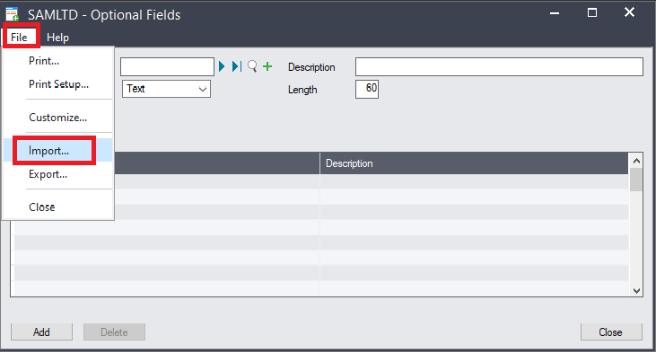
- Open the screen for the data you want to import (for example, Optional Fields).
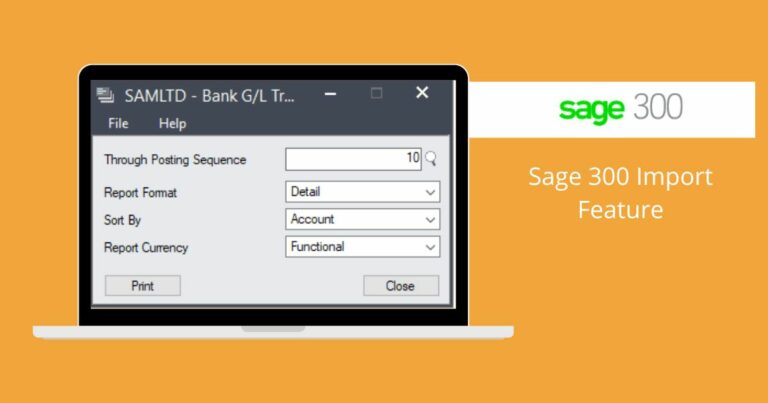
- There is an option “Import” present under the “File” Menu using this you can import the record in sage 300.
Refer below image for your reference.
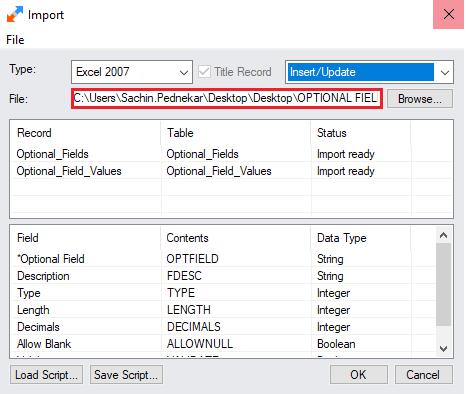
- Once the user clicks on the Import option, the system will open the Pop up which will allow you to check the formats and allow browse and import the file which user wants to import.
- Click the Browse button to specify the name and location of the source file.
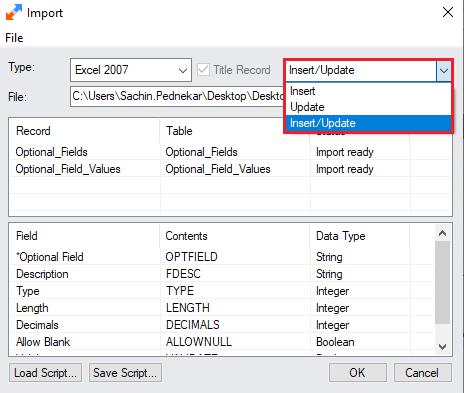
- You can also select what import process should do i.e.
- if you want to only Insert the record then you can select the “Insert” Option,
- If you want to Update the existing values then you can select the “Update” Option.
- if you want to insert and Update the values then you can select the option “Insert/Update”.
The Import screen displays the following information:
- Record. This column shows the records that you can import. (For example, in the Optional Fields screen, you can import both Optional Fields and Optional Field values.)
- Table. This column shows the names of the tables you can import from.
- Field. This column shows the names of the fields in a selected table.
- Content. Once you specify a file to import, this column shows the field names used in the title record.
- Data Type. This column shows the type of data that the field contains (for example, String, Integer, Boolean, Date/Time, or Float).
- Once you specify a file to import, the record status changes from Not Ready to Import Ready.
- Click OK to import the file.
There are a few checkpoints for a successful import process as follows:
- You can import only one batch at a time, and you must specify the format in which the file was created.
- Worksheet name should be proper. The import program reads each worksheet in an excel file as a Table. It expects the table name to be the same as displayed in the table column of the import pop-up screen.
- Even if you change the sheet name you will not be able to import the file.
- If you are on a network, confirm with your system administrator that you have the correct access rights to the file.
- Check that you have specified the correct path (drive and folder) and file name.
- Be sure the import file contains all the fields required by the importing function, and it uses the correct file layout. Make sure the record type is correct.
Sage Software Solutions is a leading IT company with an array of advanced ERP Software solutions. Our proprietary products — Sage X3 and Sage 300, will help you cut operational expenses, improve business productivity, increase operational efficiency, forge robust customer relationships, and strengthen associations with vendors, suppliers, and distributors. So, if you are looking to reinforce your business fundamentals and emerge as an industry leader, then please schedule a call with one of our sales representatives.