
We are transferring assets from one location to another. In Sage, we have 2 scenarios where we have to transfer the Physical element and the main asset while changing the location. Now at first, we will change the location of the Physical asset. The process to which is as follows⏬
Set-up Mass Transfer of Asset in Sage X3
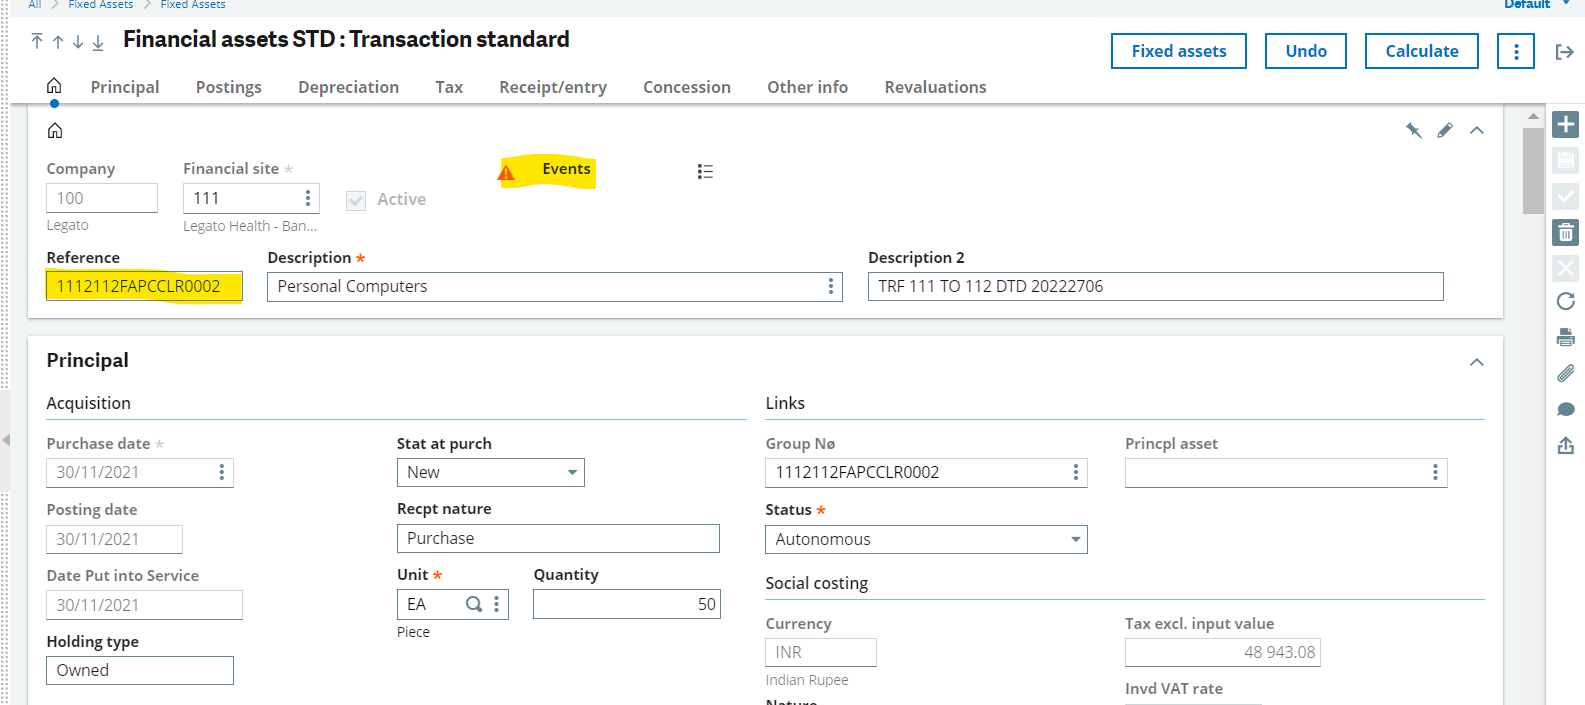
We are taking the below example for transferring the assets from one site to another site.
| Main Asset | Description |
| 1112112FAPCCLR0002 | Personal Computers |
In this main asset, there are 50 physical elements linked. Of these 50 physical elements, we want below 5 physical elements transferred from one location to another.
| Physical Elements |
| 1112112PHY000151 |
| 1112112PHY000152 |
| 1112112PHY000153 |
| 1112112PHY000154 |
| 1112112PHY000155 |
To transfer these 5 physical elements first we need to update their description 2 field as “TRF or any unique value as per your understanding”. We want to do mass transfer so we need to define a specific value that will help us to transfer only these 5 elements.
We will navigate to below path: –
All ⇒ Fixed assets ⇒ Physical management ⇒ Physical Elements.
We will update the description 2 (AASDES2) field manually or we can use the import template for bulk updating.
 After updating the fields, we need to do the mass geographical transfer.
For that, we need to navigate to the below path :
All ⇒ Fixed Assets ⇒ Physical Management ⇒ Mass geographical transfer
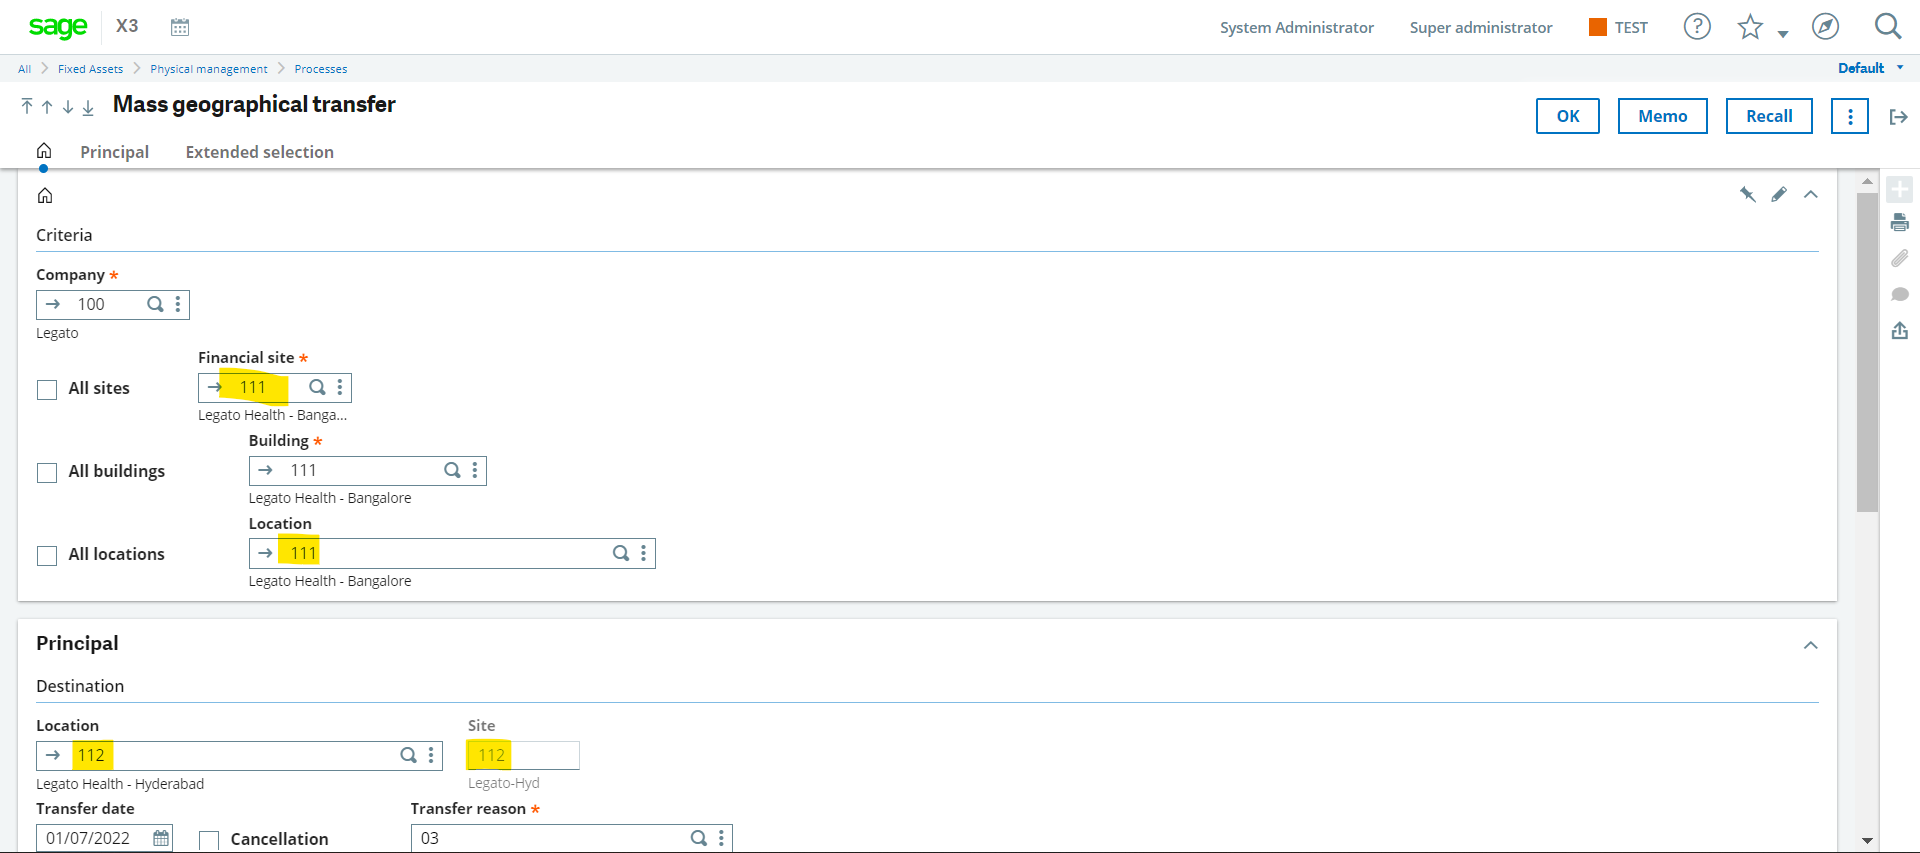
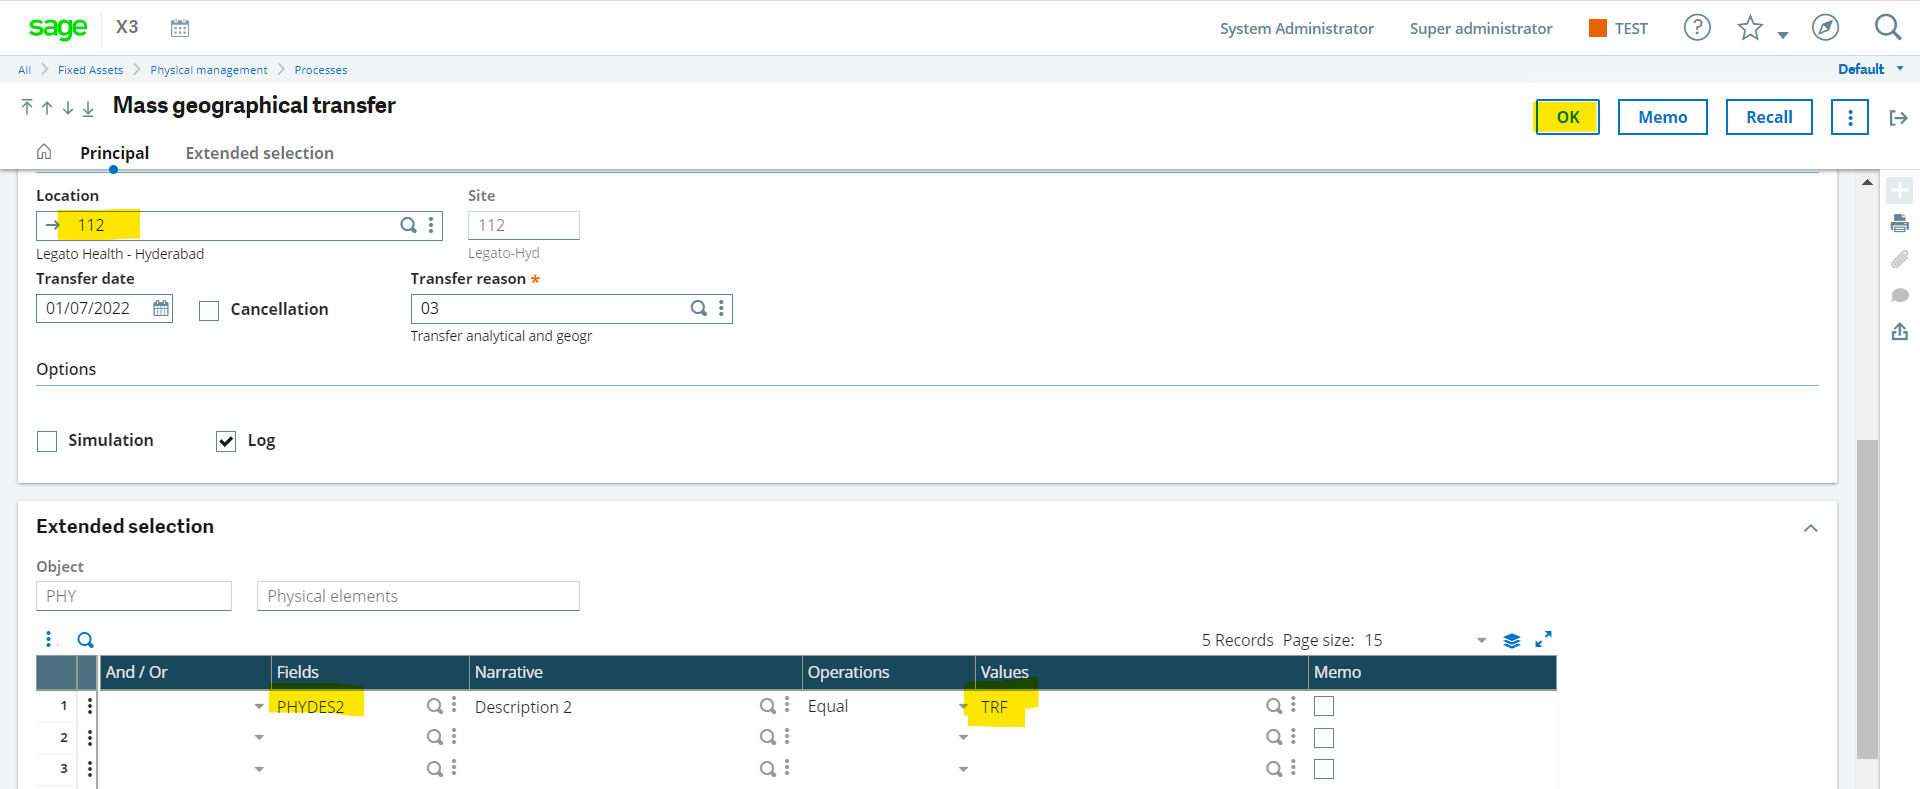
After entering values in the parameters then click on the OK button. This activity will create the movement for the 5 physical elements we want to transfer. The below screenshot shows that movement is created.
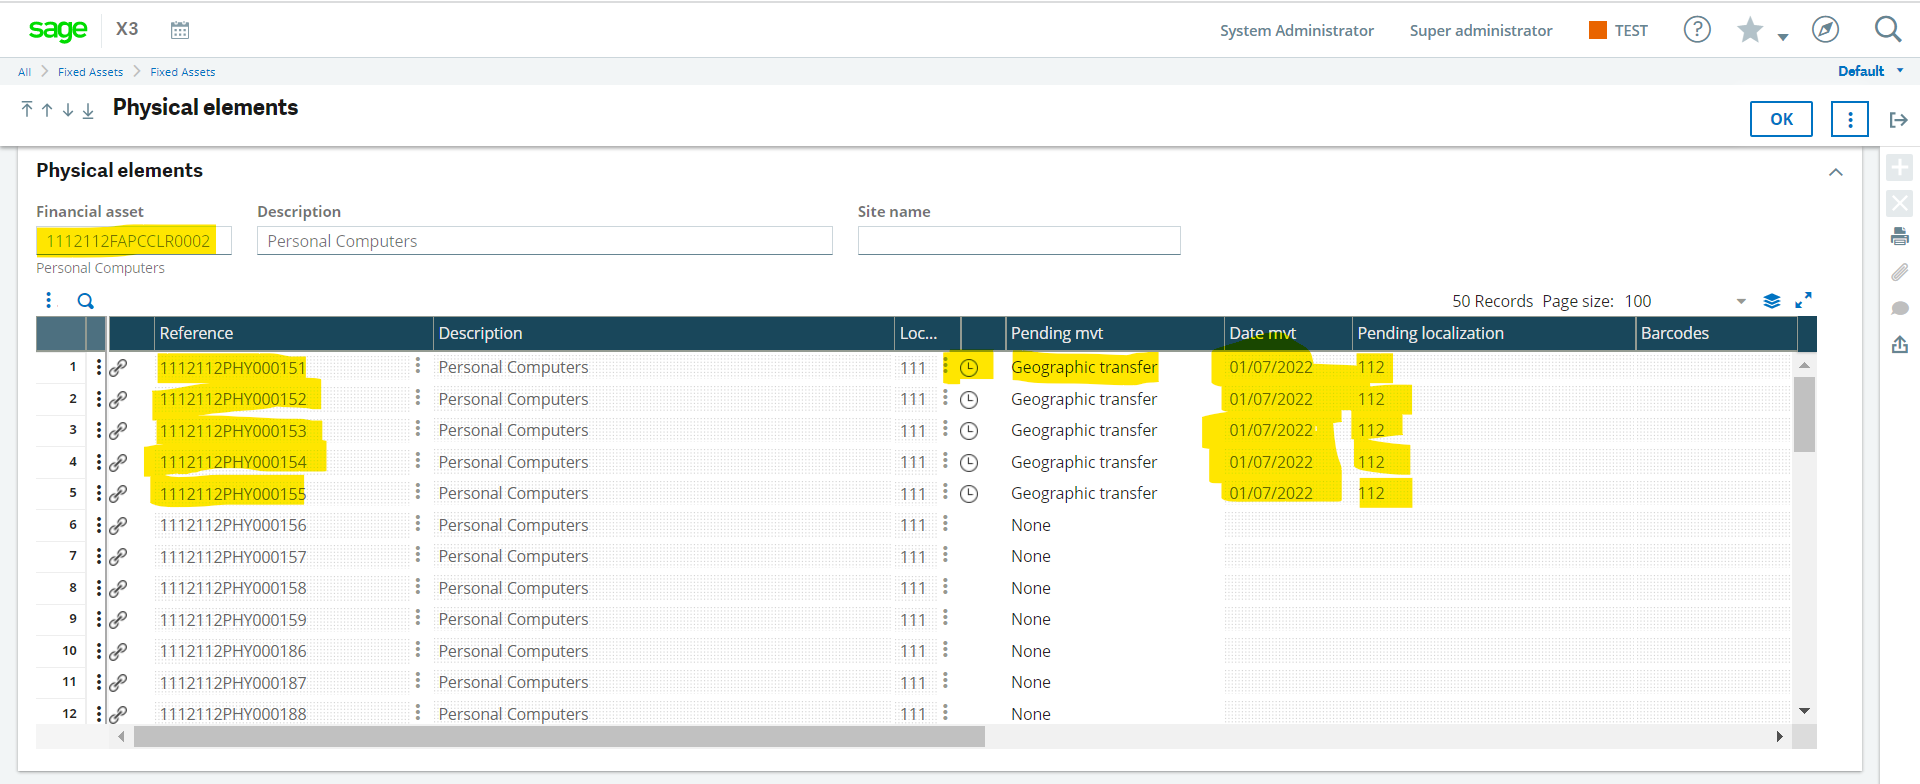
By clicking on the event button, you can see the geographical transfer is created which is showing in pending movement.
Here comes step 2 where we need to split these physical elements from the asset.
To do the splitting we have to navigate on the below path :
All ⇒ Fixed assets ⇒ Fixed assets.
Click on the action button in the upper right corner and select the split option.
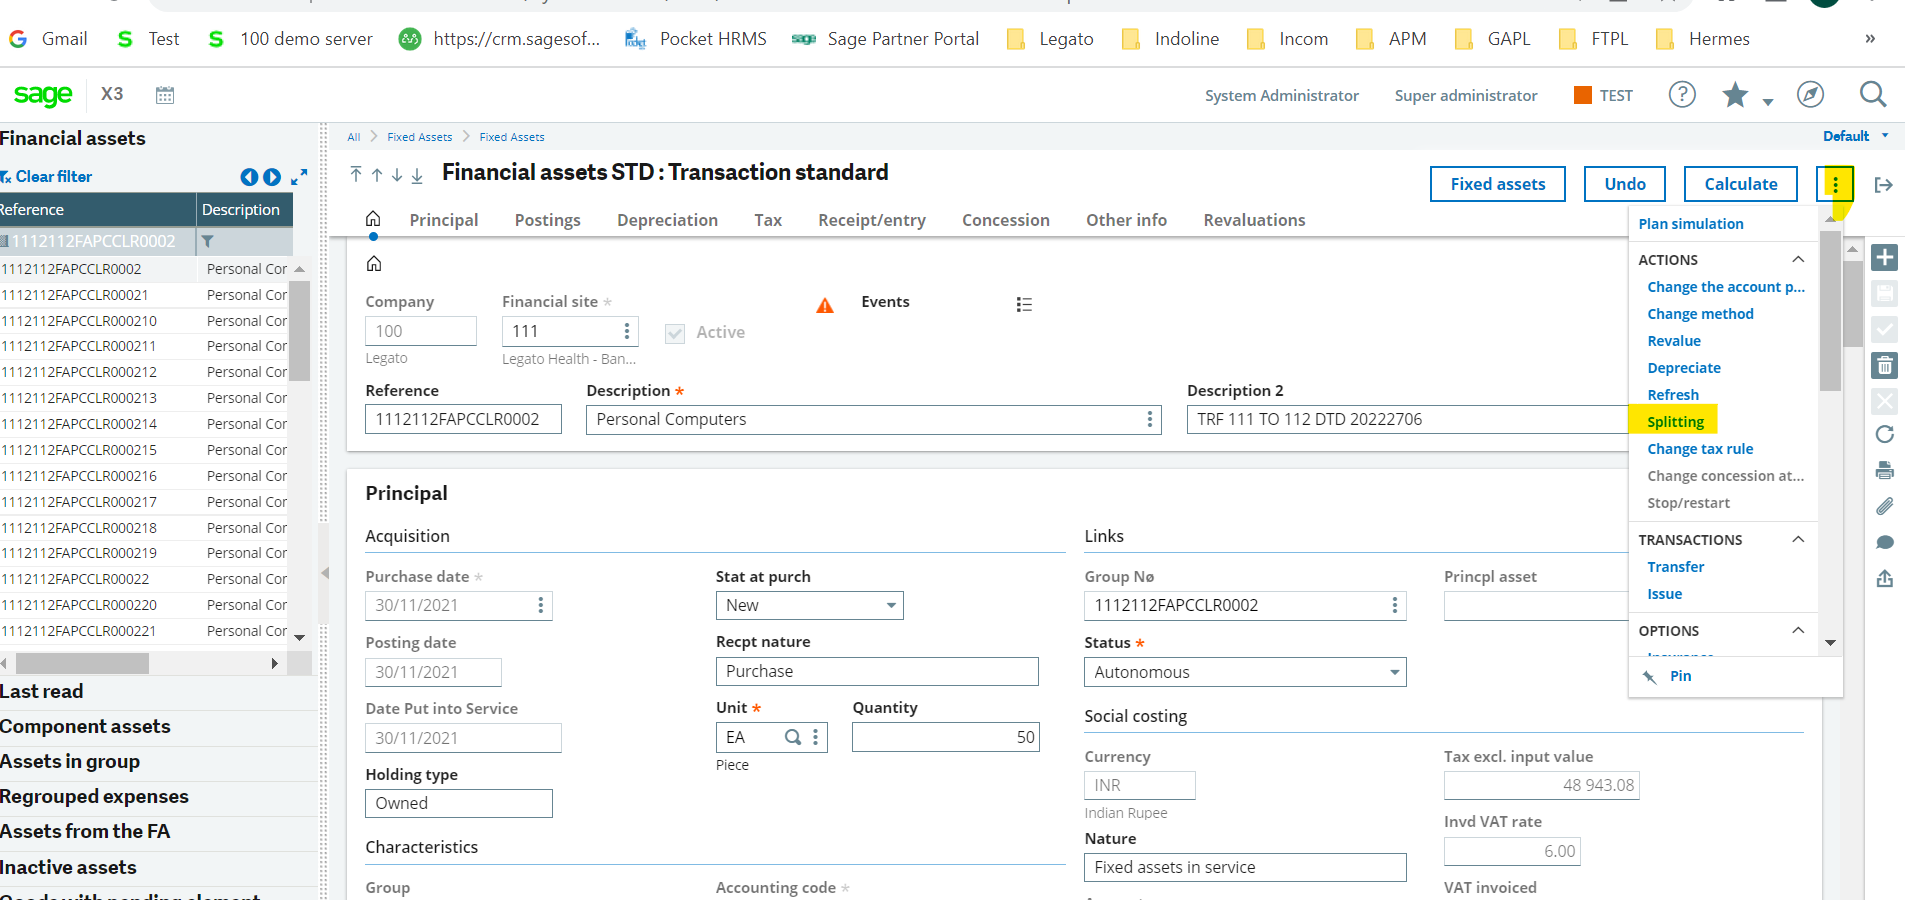
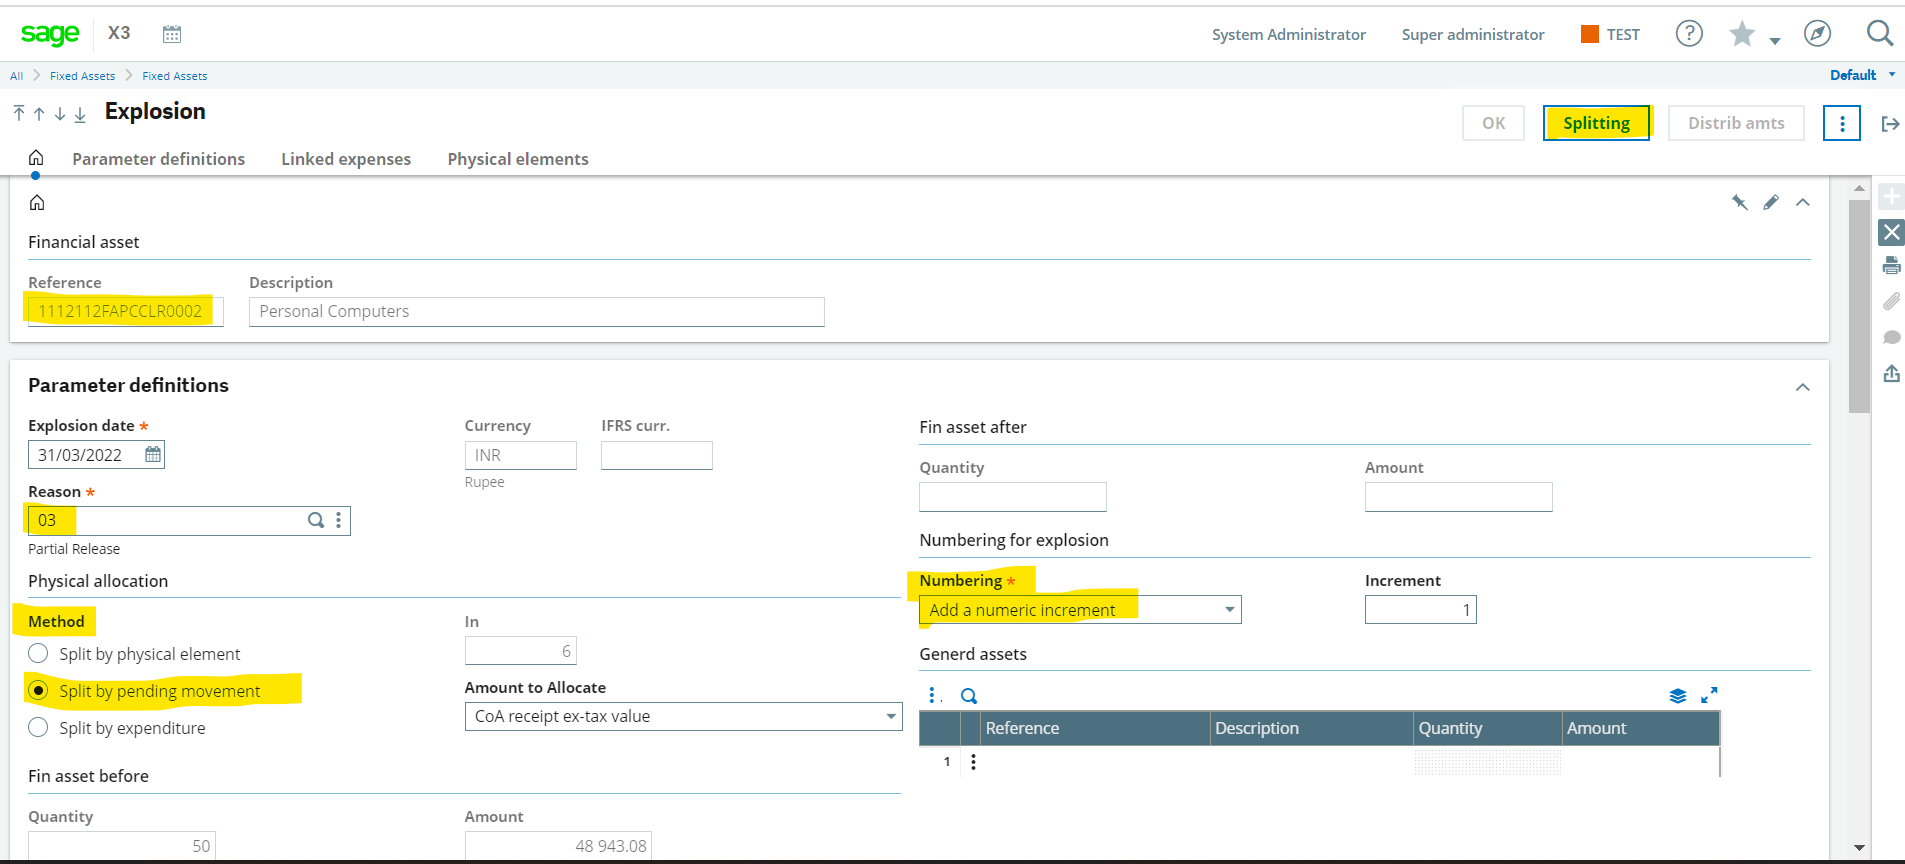
After selecting the split, we need to fill in the below parameters. We need to enter the reason and select the method “split by pending movement” and in numbering, we need to select “Add a numeric increment”.
After entering all the parameters in the splitting screen then click on the splitting option in the right corner and after splitting it shows there will be 5 new main assets with one physical element which we have selected earlier.
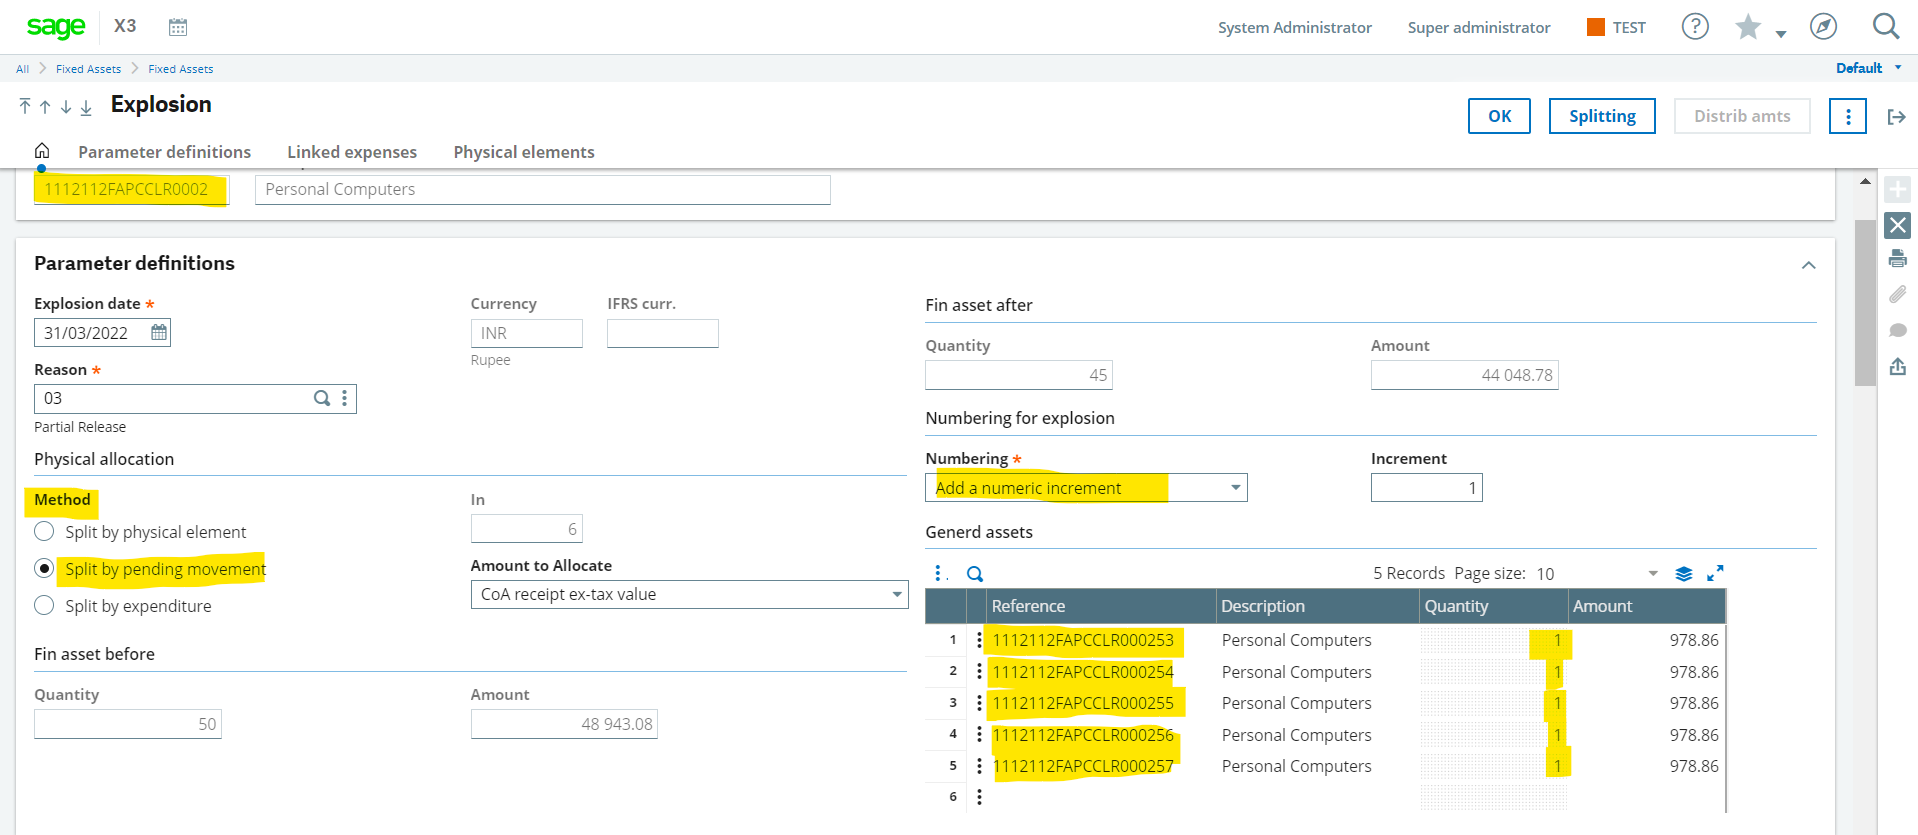
As you can see when we split the physical elements the system generated the main asset for each of the 5 physical elements.
To finalize this, we have to click on the ‘OK’ button and click on Save to split these 5 physical elements from the earlier main asset. After saving you can see the earlier main assets quantity as well value is reduced.
Now the last step is to transfer these newly created main assets with physical elements to the new location. There are 2 methods to transfer these assets :
- We can transfer every single main asset to the new site by selecting the transfer option in the action button tab on the asset screen.
- We can mass transfer the main asset by updating the description 2 field (AADES2) manually as “MAIN TRF” and then navigate to the below path.
All ⇒ Fixed assets ⇒ Transactions ⇒ Dimensional /Geographical transfer.
And do the mass transfer from one location to another.