The Product Design screen in Sage X3 centralizes the definition and maintenance of product data used system-wide. It lets you capture key attributes such as product type, units of measure, categories, pricing, components, and site settings and serves as the single control point for how a product behaves across sales, purchasing, inventory, and manufacturing.
Product Design in Sage X3 – Prototype-to-production workflow
- Create prototype: Launch a prototype work order directly from the Product Design screen.
- Execute: Process the work order to manufacture the prototype item.
- Quality review: Submit the prototype to Quality for inspection and testing.
- Approval: Once the prototype is approved for production, finalize the product design.
- Publish: Approve the final design and release the BOM for production use.
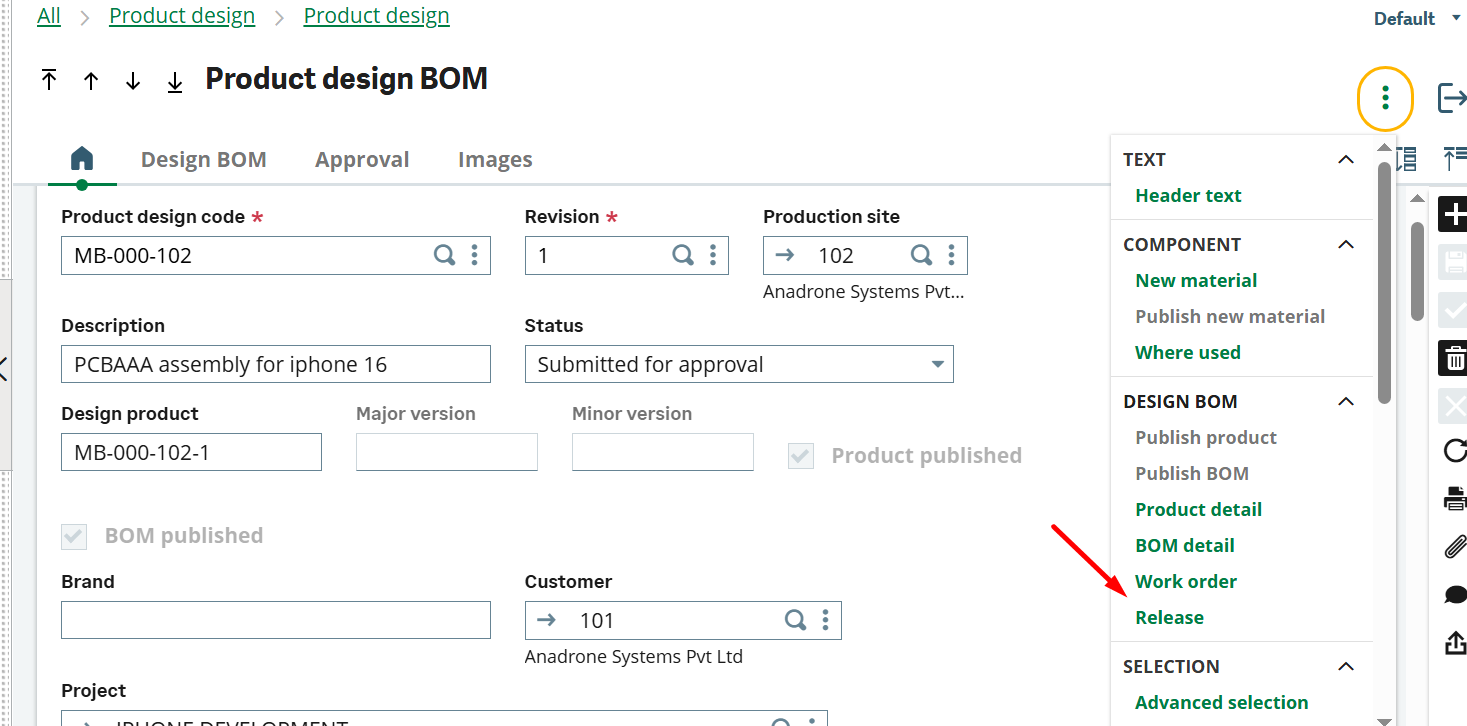
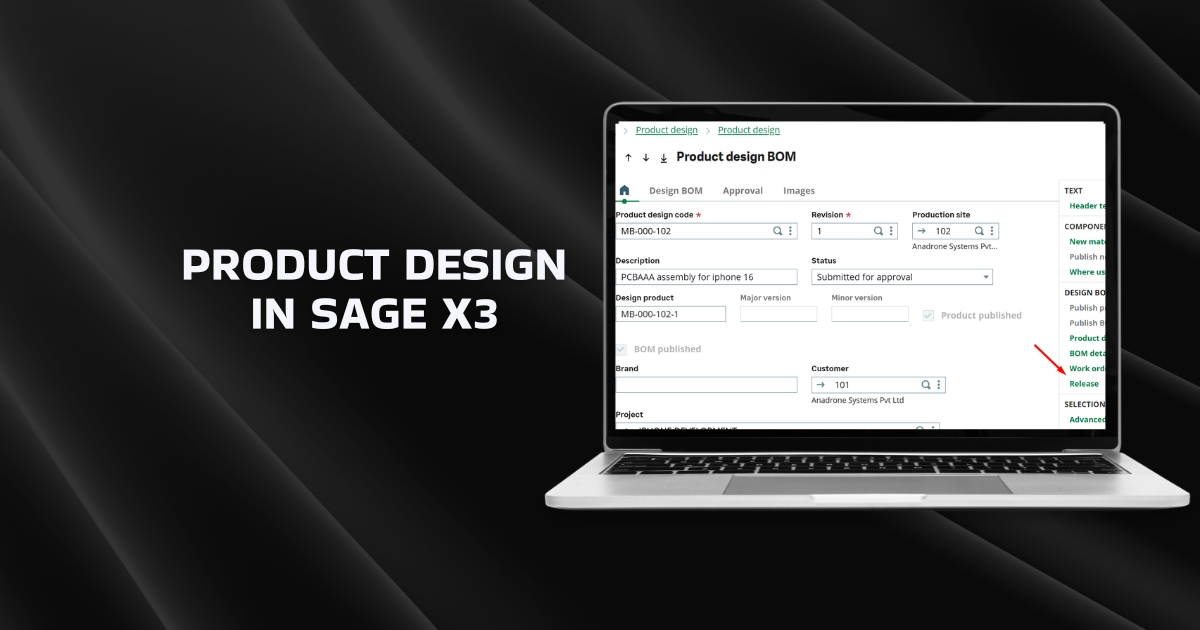
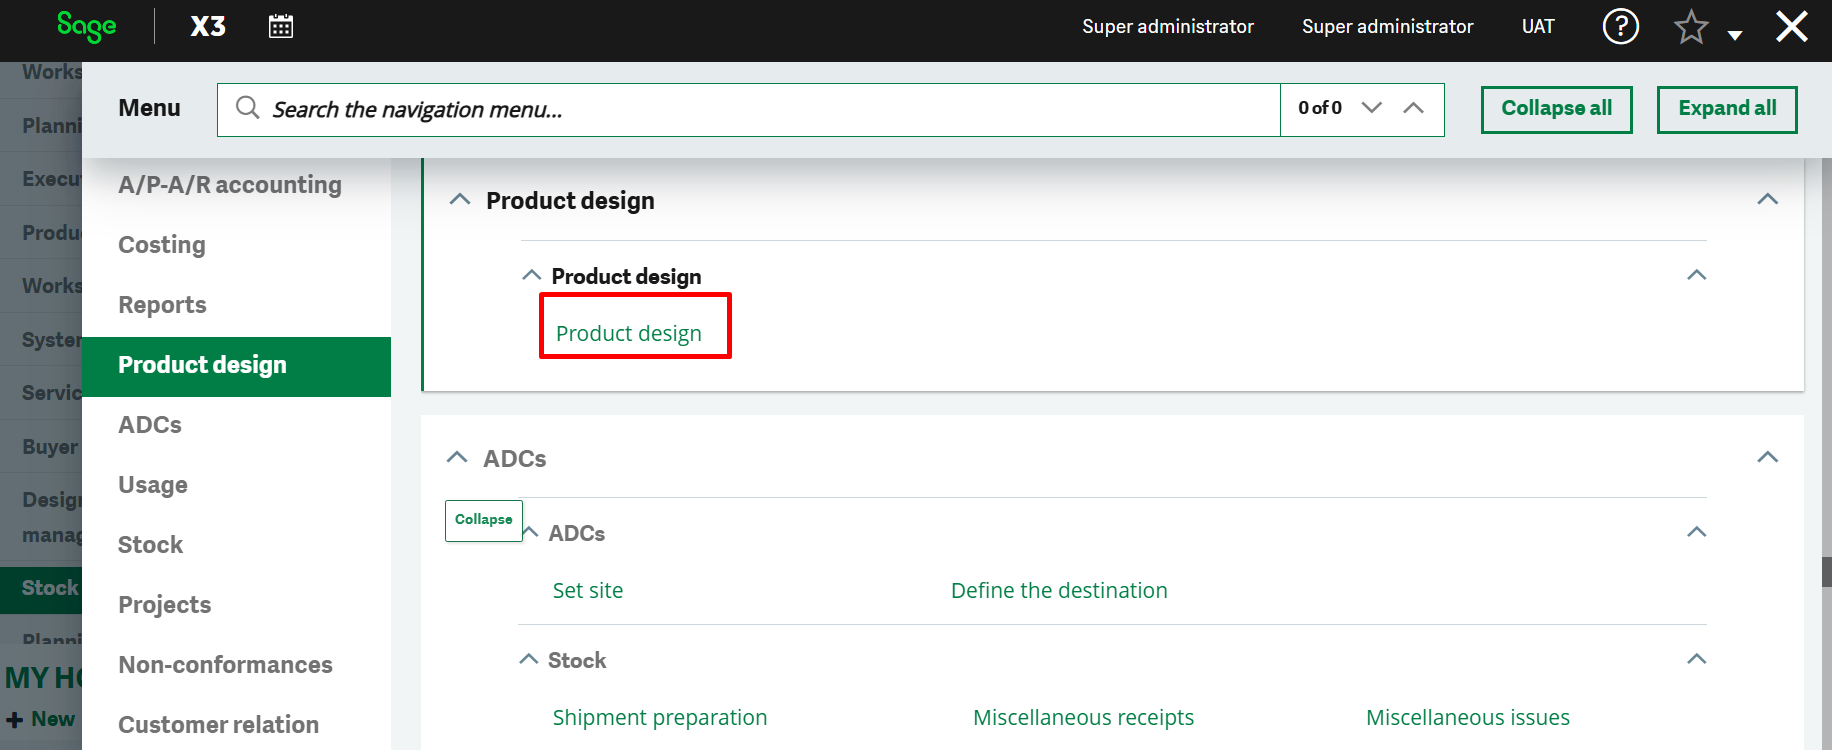
1. Go to Product Design → Product design → Product design.
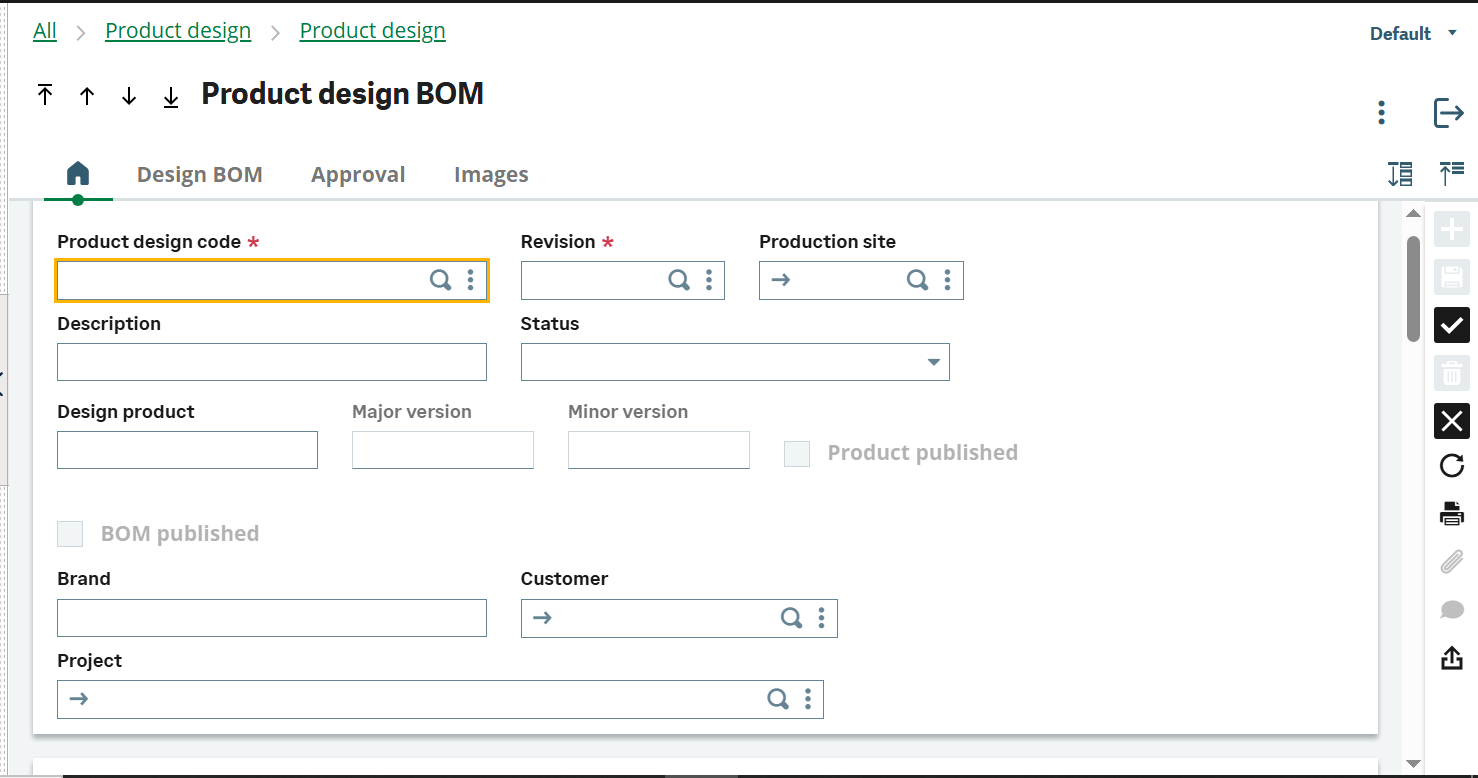
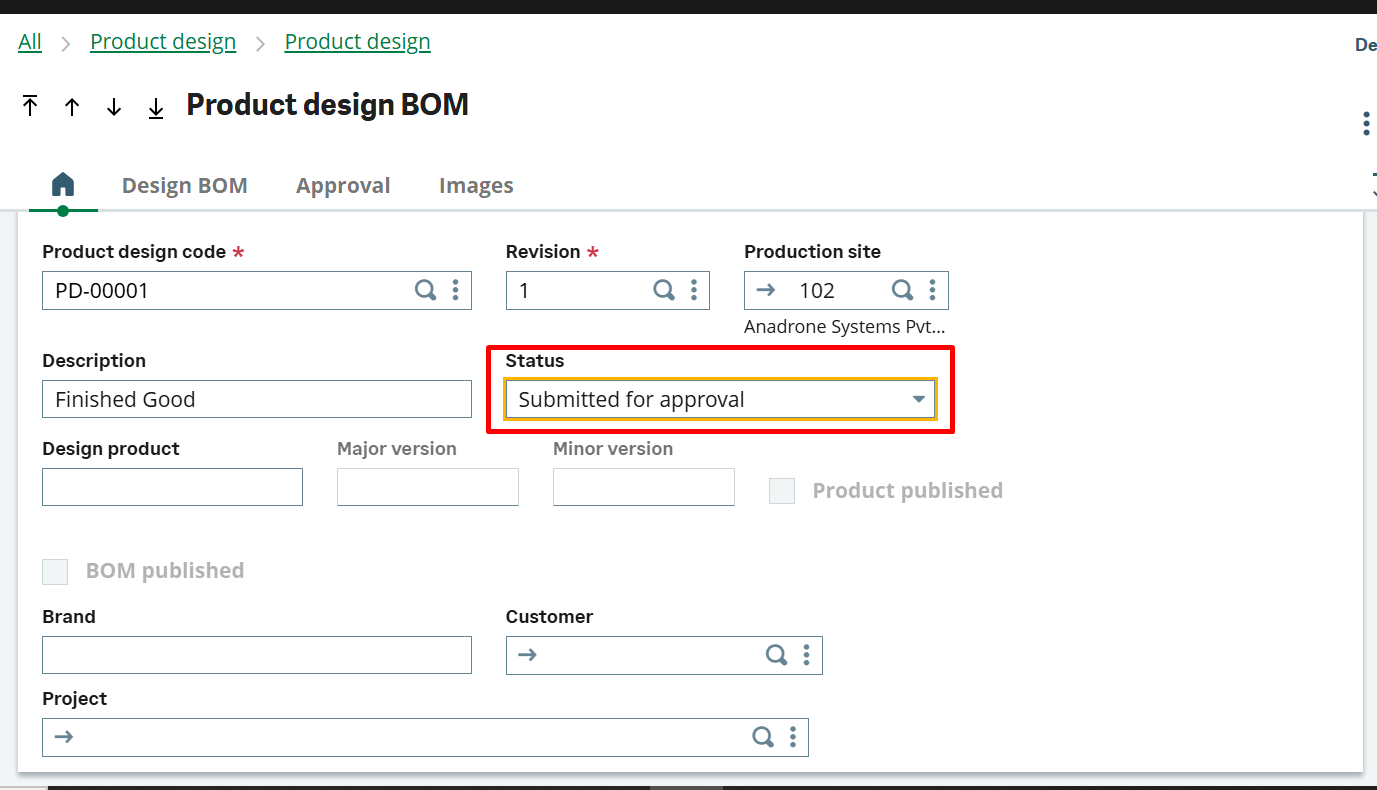
2. Give Product Design code, revision in numbers and Production site for Product.
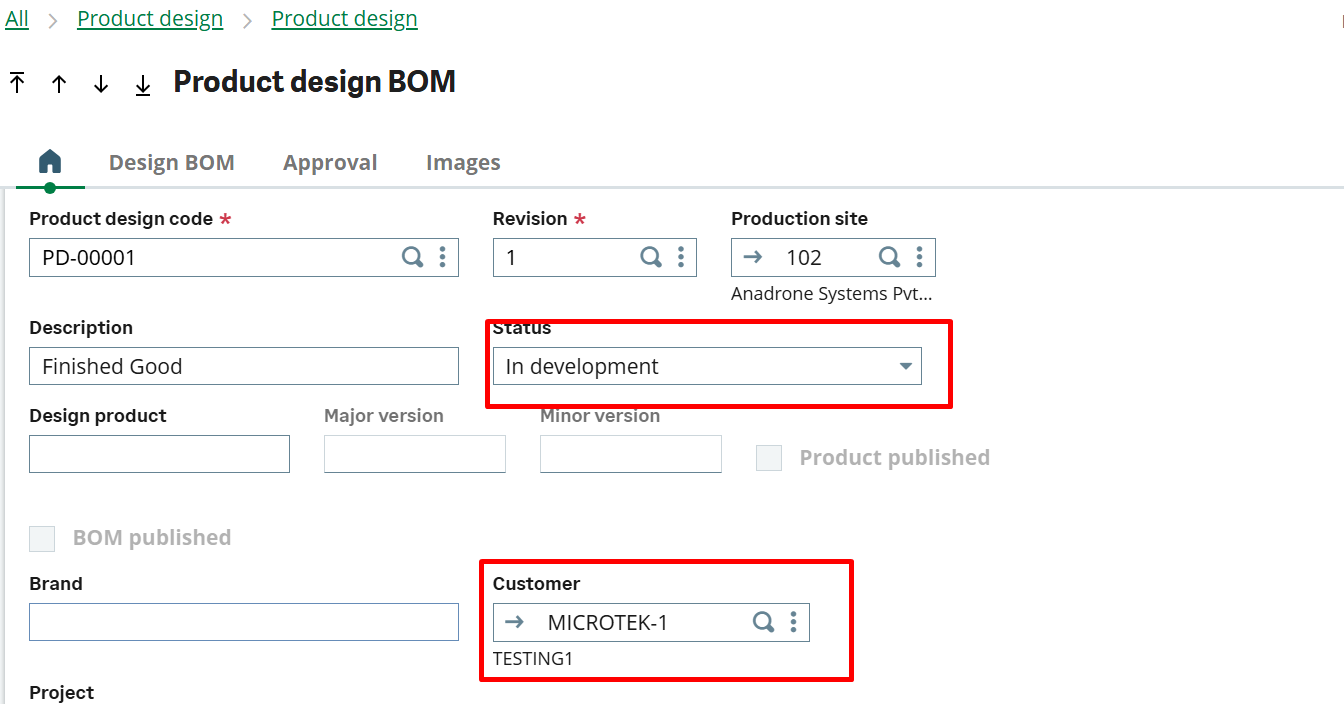
3. The status should be “In Development” and if having customer details need to fill it as well.
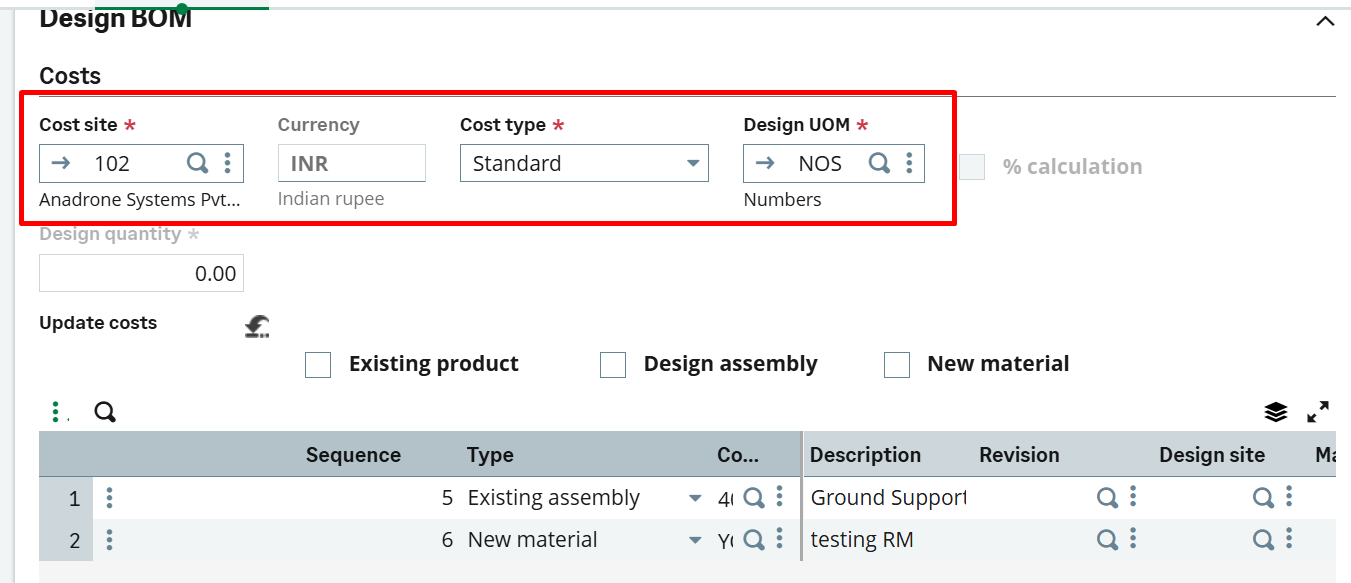
4. Assign the Cost site and type with Unit of measure of the product.
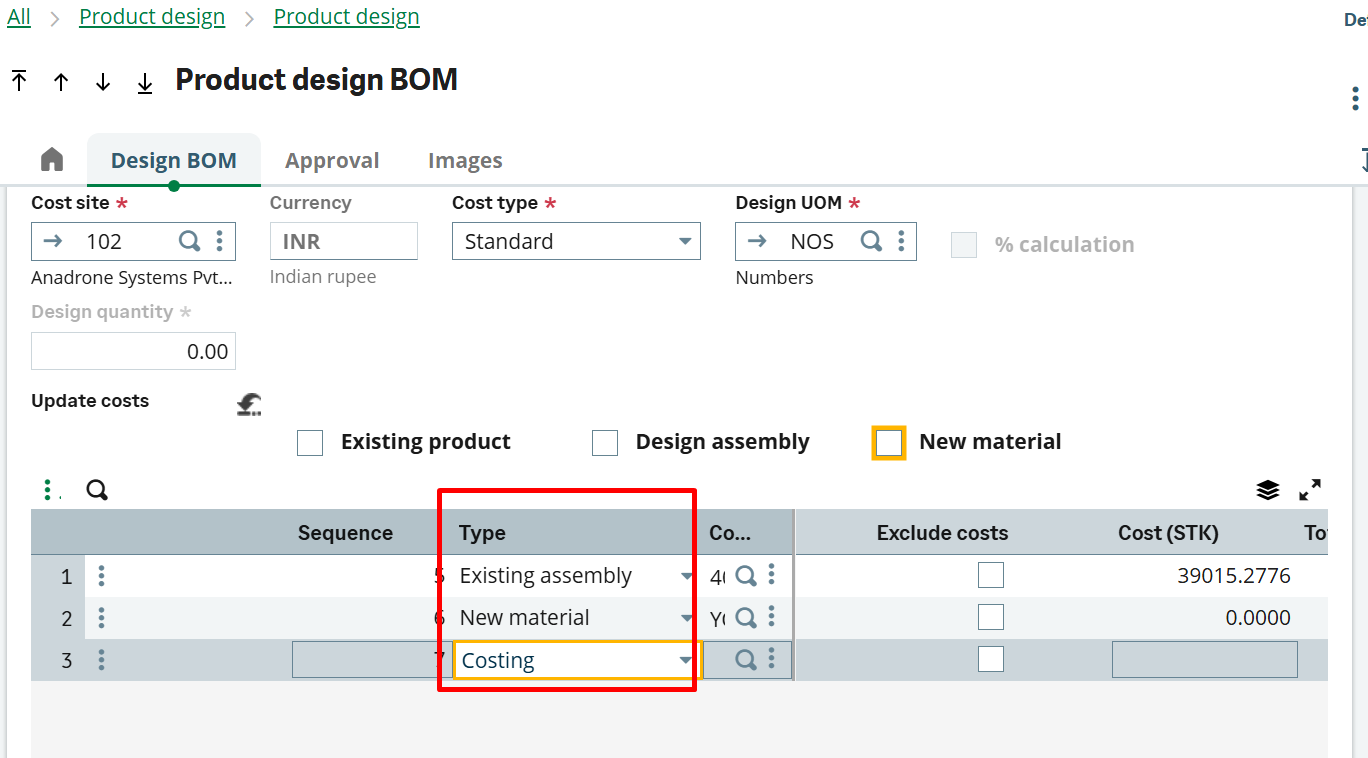
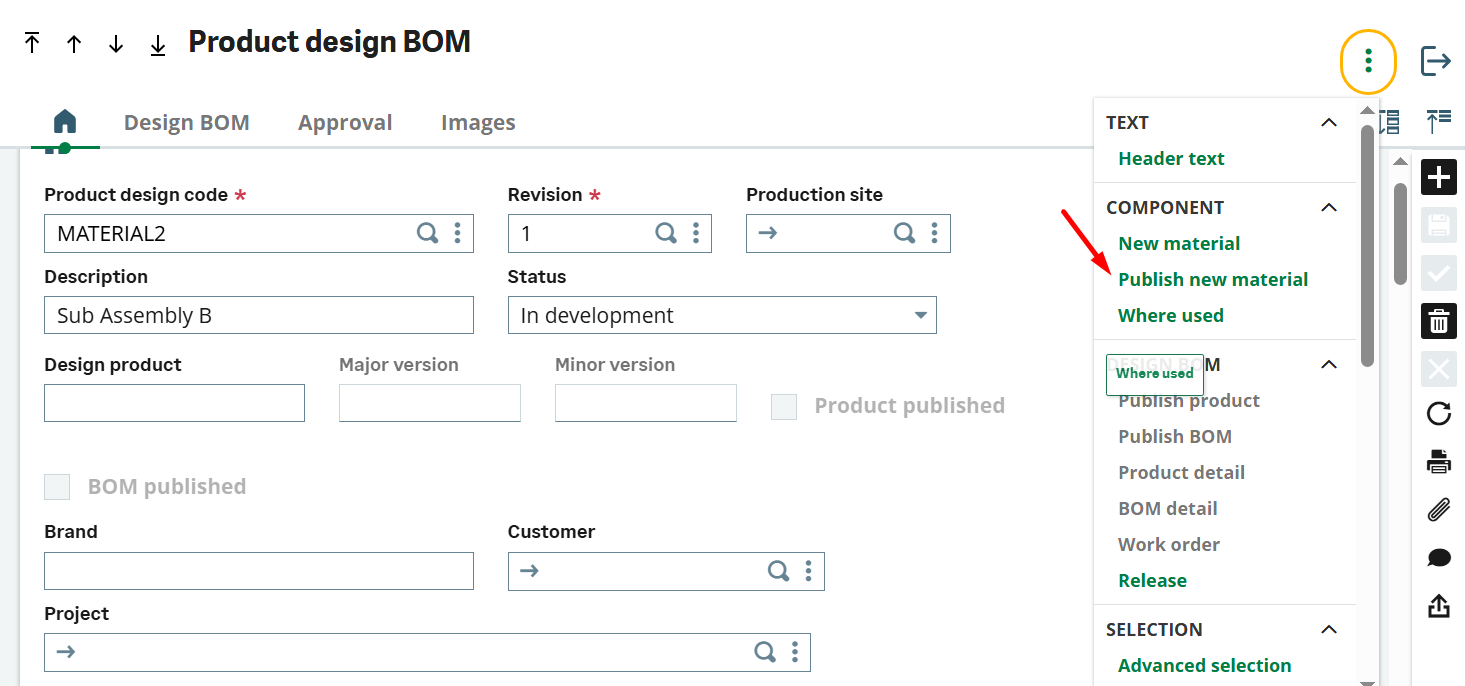
5. Fill the line component here in type we have below options :-
- Existing material. The component currently exists as a stock record in the Products table (ITMMASTER).
If an image is attached to the product in the Products function (GESITM) the image is copied to the component line. - Existing assembly. The component is a subassembly or a semi-finished product that currently exists as a stock record in the Products table, and as a production or subcontracting BOM in the Products – BOMs table (ITMBOM).
If an image is attached to the product in the Products function (GESITM) the image is copied to the component line. - New material. The component does not currently exist as a stock record in the Products table. You can type in a temporary code and description for your new product, and create it as a stock record later.
Once saved to a product design BOM, a component of type New material can be selected and included in other product design BOMs. - Design assembly. The component needs to be a subassembly, but the product currently only exists as a product design BOM that has not yet been published to the Products table, and to the Products – BOMs table.
- Costing. This a costing element. You can use it to manipulate the cost of this product design.
- Text. This a text element. You can use it to record notes for this product design.
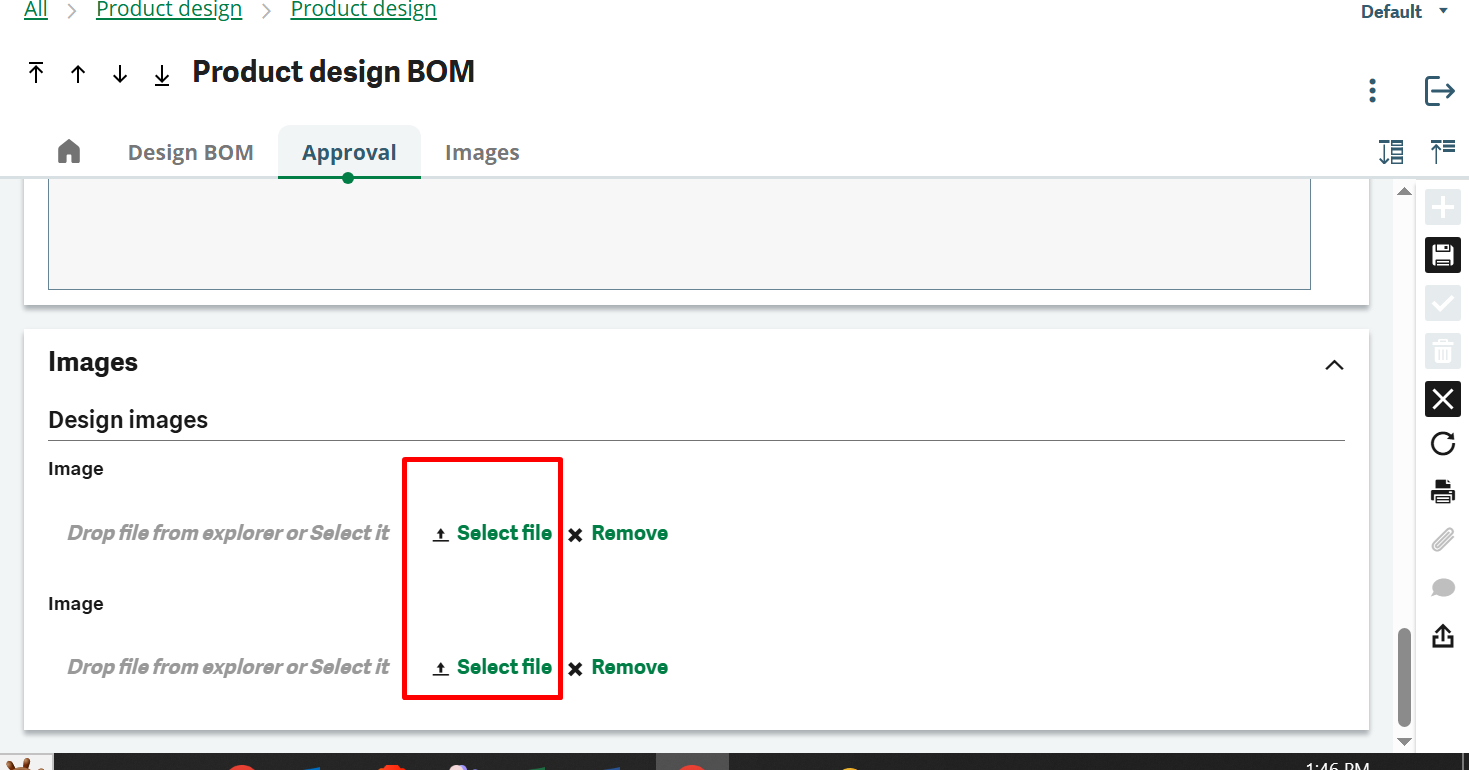
6. Attach the images
7. Once all the component filled up with there quantity and STK unit user and BOM development is completed change the status to “Submitted for Approval”.
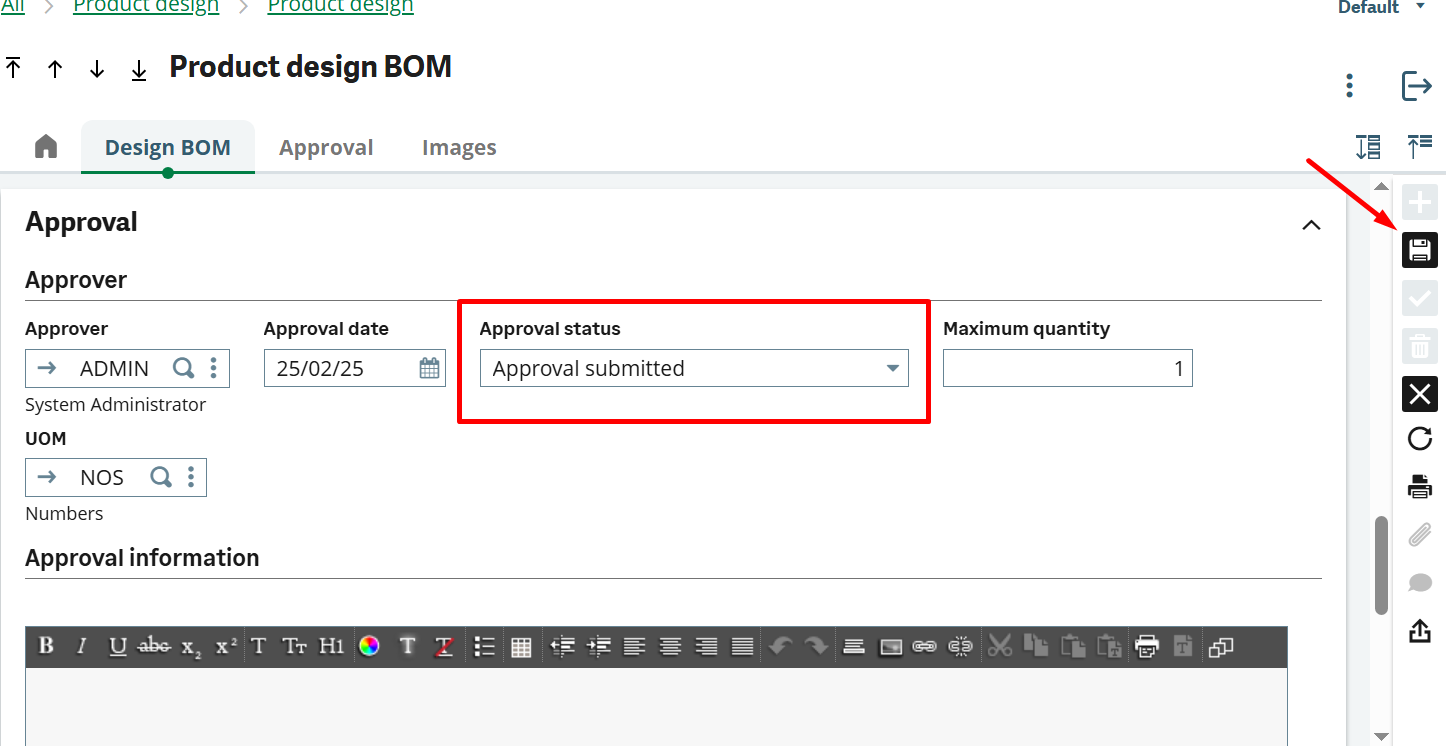
8. Select the approver with approval date and change the approval status to “Approval submitted”. Then Save it.
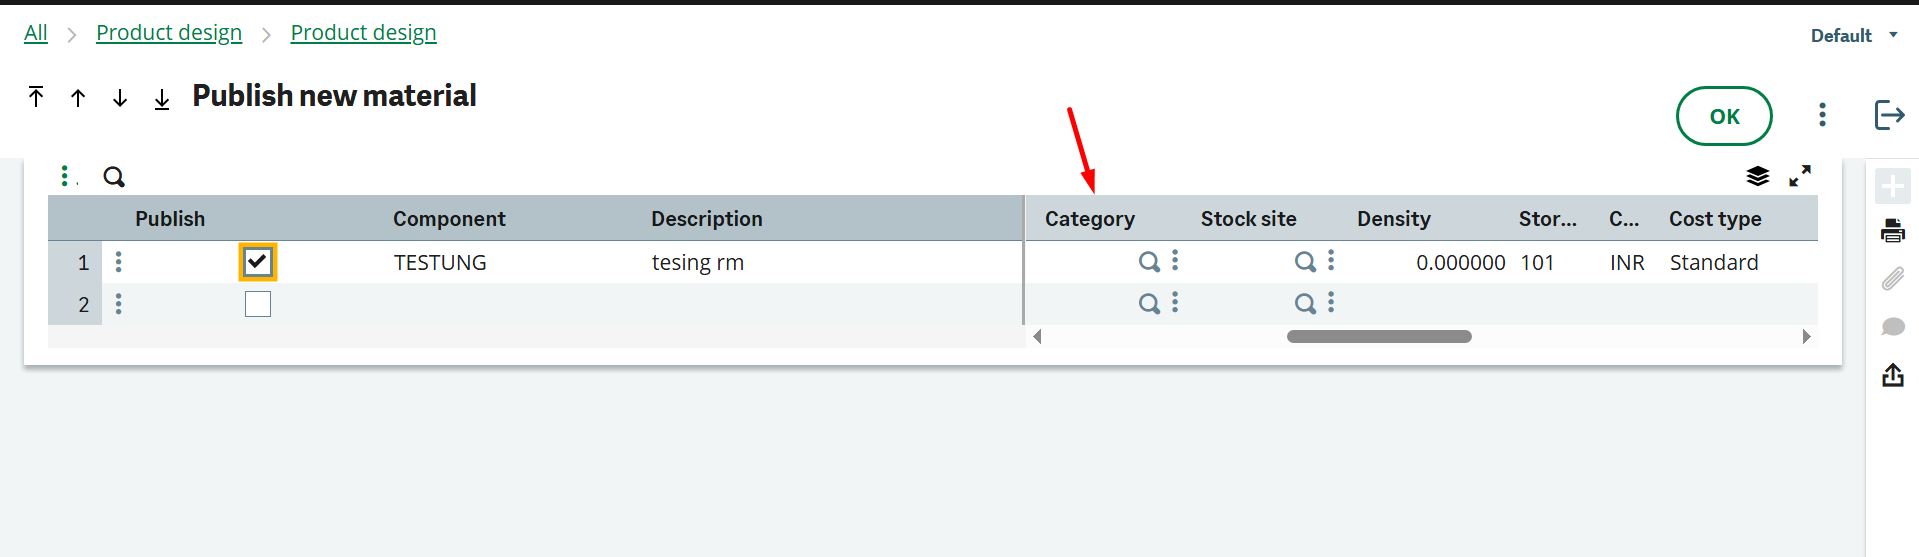
9. If there are new materials in BOM then first publish the all new material. The list will populate all the list of new component where user has to define the category first and then save it.
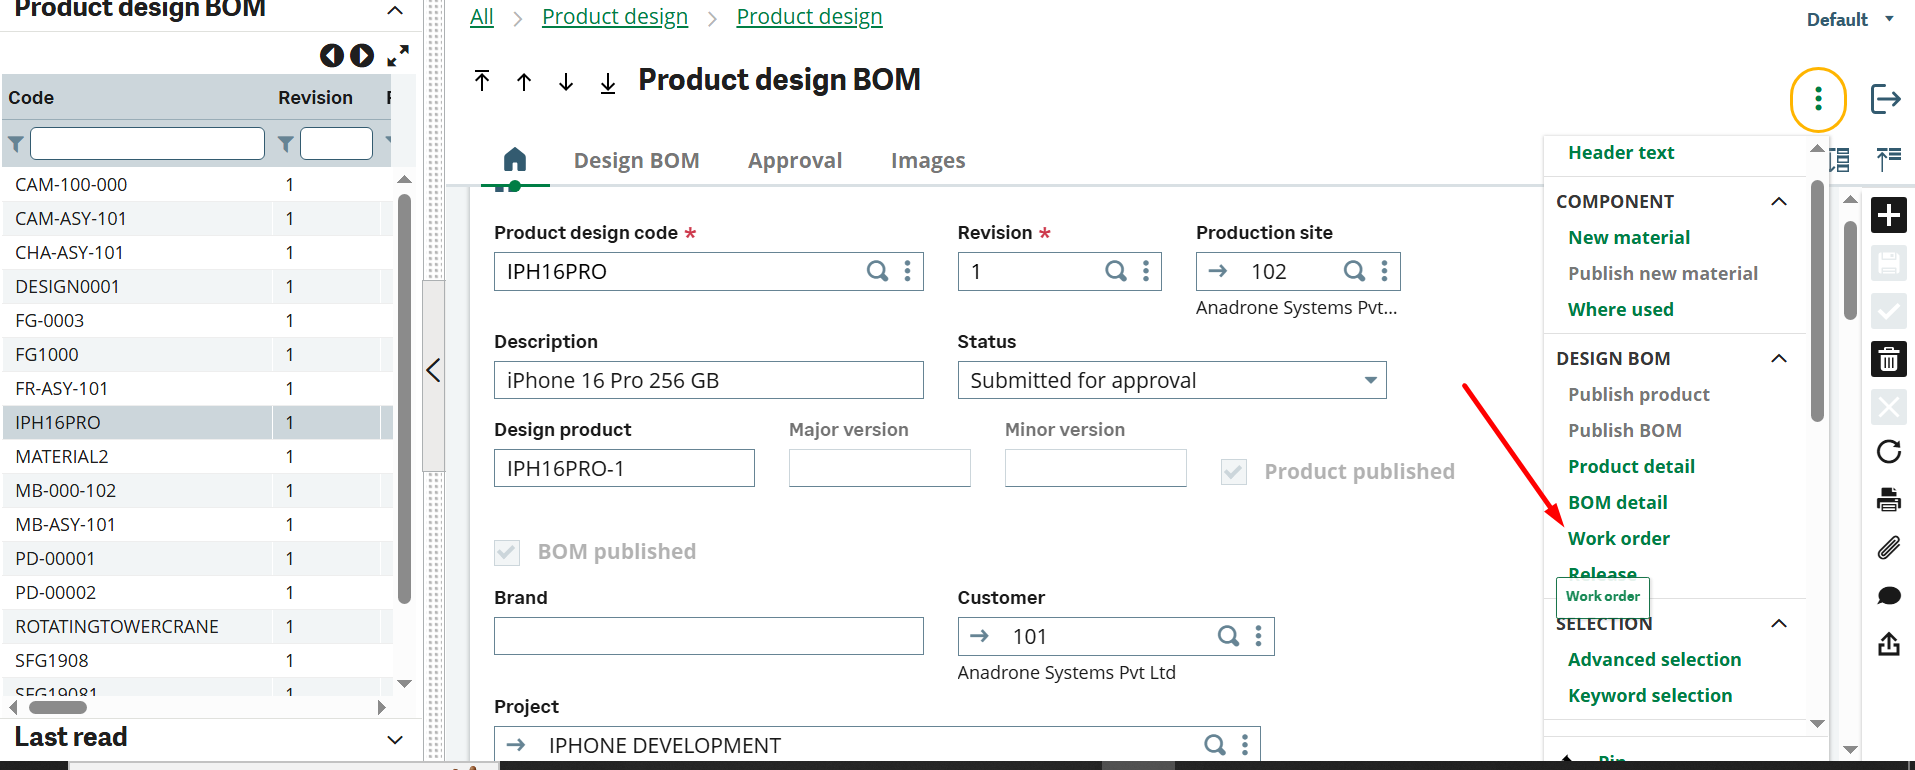
10. Then Publish the product where if user want can publish the BOM as a prototype as well where the approver need to submit this as a “Approved for prototype” status.
11. User can create the work order of this Product as well but has to assigned routing of the product.
12. If a revision is needed for this product, the user can update its revision number and specify the required changes. The Status should automatically change to “In Development”.

13. Then release the Final Product for Production.